This is another of my super easy recipes, and despite being the creamiest dessert on mi list it does not have any cream! As you can see I´m very fond of dessert, and even though I try to eat healthy most of the time, I love to have something sweet several times a week. Sweet treats are the weakness of everyone in Lima, and chocolate mousse is a classic that a lot of people make at home and keep in the fridge. It’s for the days when I need a dose of sweetness in my life that I have these recipes under my sleeve, so easy that making them is almost like magic.
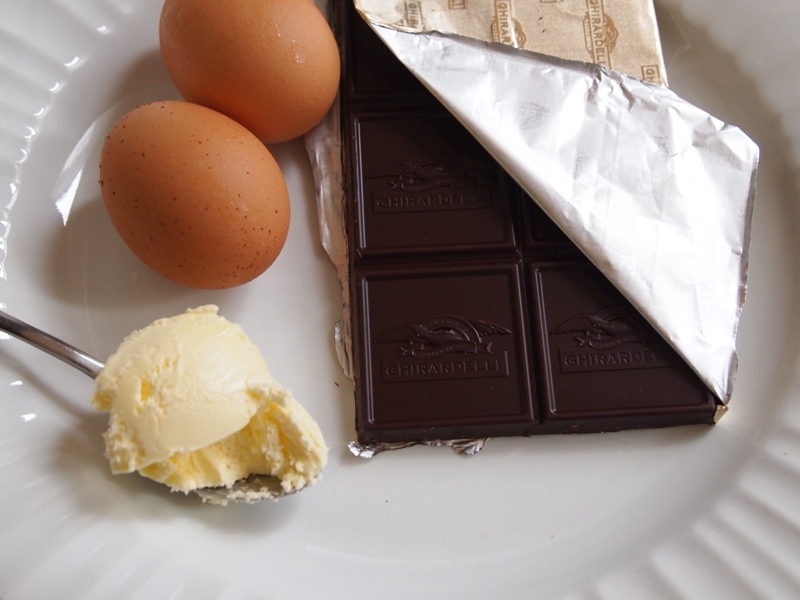
I have tried many chocolate mousse recipes in my life, but a long time ago I came to the conclusion that a good, homey dessert shouldn´t be complicated. Ever since I had that epiphany, I have been making this simple mousse with only five ingredients (or less, if I want to skip the Pisco). I use whipped cream only for decoration, and sometimes I like to add a crispy cookie just for the sake of texture. Marraschino cherries or any other berries in season look great and go incredibly well with chocolate too.
To change the flavor of this mousse, I sometimes use Grand Marnier, Kahlúa, Cognac, Rum, or whatever I have in the house. Dark chocolate is a must for me, -the darker, the better-, but I know that some people prefer milk chocolate or even white chocolate. Please use your favorite chocolate for this recipe. The idea is that you enjoy it!
Don´t wait any longer. If, like me, you’re feeling the urge for a creamy and incredibly rich chocolate mousse, this recipe is for you.
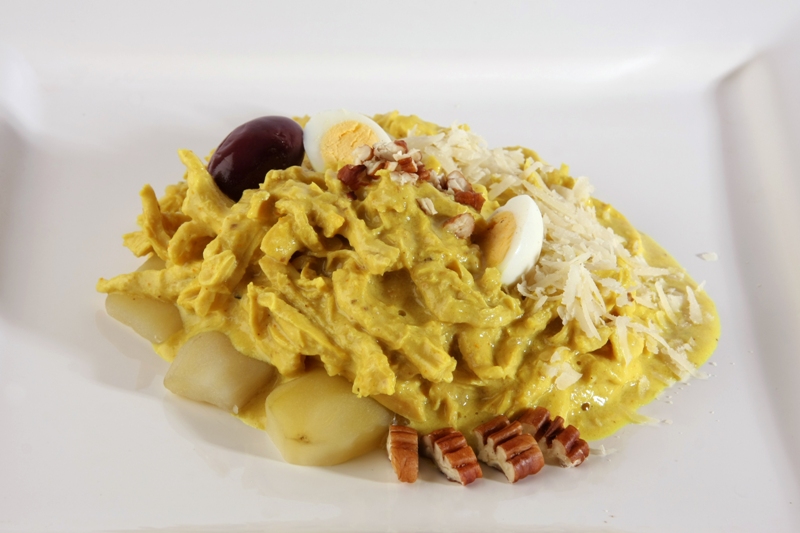
Creamy, spicy, with the pungency of the Parmesan cheese and the delicate texture of the pecans, Aji de Gallina means hen´s chili. Hen used to be the meat of preference in Lima till a few years ago, hence the name, but its tough flesh took so much longer to cook than chicken, that people eventually switched to the easier, younger and less intimidating poultry. So you don´t need to find a hen for the recipe to be faithful to the original… buy a chicken and you´ll be good.
When I first became acquainted with this dish years ago, it looked so difficult to prepare that I decided I would just eat it when someone else was in charge of the cooking. At the time, I struggled with the right use of chili peppers, (Peruvians are masters in this issue), and I didn´t really learn how to make it until I went to culinary school. I have to admit I was wrong once I tried it, everything made sense to me and I understood that it is an easy preparation and not time consuming at all, but of course it is not fast food either.
This dish is neither a stew nor a fricassee, but a flavorful sauce to which cooked chicken is added. There are 3 basic steps in the preparation: cooking the poultry, preparing the sauce, and combining both to blend the flavors. Once this is done, don´t cook it any longer because the chicken will turn stringy. You just want to heat it briefly so everything is piping hot but not boiling. Feel free to use any part of the chicken you want, and always remove the skin before cooking. Versions of the dish are also prepared using shrimps, eggs, or even tuna instead of the chicken.
Some cooks substitute the pecans with sesame seeds or with almonds. This is a matter of personal taste, but I love it with pecans cause that´s how I came to know the recipe and it feels more authentic to me. The shredding of the meat is another point of discussion; some like it finely shredded and some prefer it chunky or with large pieces of meat. In this case I am giving you the traditional preparation, and if you like it -I am sure you will- you can then use the leftovers to stuff empanadas (turnovers), ravioli, sandwiches, etc. Or just reheat it and enjoy with more white rice on the side.
This recipe is very flexible; you can double or triple it if you feel like throwing an impromptu party with friends or family.
In a heavy saucepan, cook the chicken breast in the water with salt and pepper, uncovered and over high heat (about 20 minutes). If you wish to add a parsley sprig or a bay leaf, you can and the resulting stock will be more flavorful.
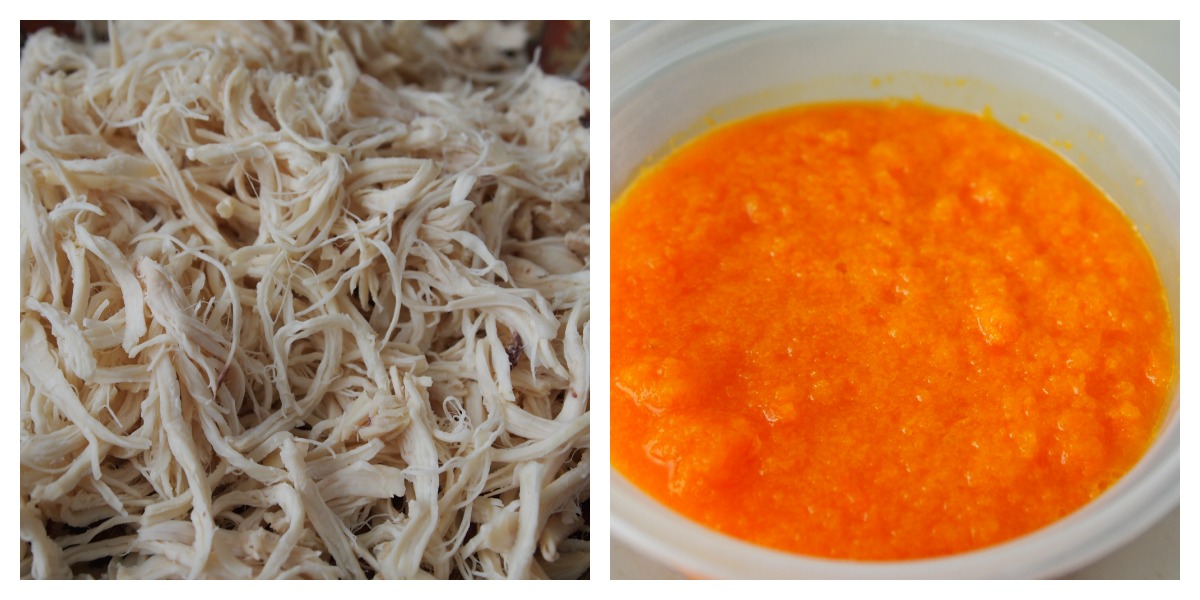
When it is tender, take out the cooked breast, shred the meat with two forks or with your fingers and reserve. Strain the stock.
Put the bread slices in a bowl and add one cup of the stock. When the bread has soaked all the stock, process in a blender to form a loose paste. Reserve.
In the same saucepan you used, heat the oil and cook the onion and garlic over medium heat (about 10 minutes). Stir continuously and don´t let them brown. When they are very soft and almost transparent, add and stir the aji¬ amarillo chili pepper and aji¬ mirasol, then add the dried oregano and keep cooking for 5 minutes.
Add the bread and one more cup of chicken stock to the pan, (always stirring) for 3 more minutes or until the mixture starts to thicken.
Add and stir the shredded chicken, pecans, and cheese. Season with salt and pepper but be careful because the cheese is already salty.
Finally incorporate the evaporated milk or Half & Half, stir and turn off the heat. If it looks too thick, thin it with more chicken stock. The sauce should be creamy, like every piece of chicken is covered with the velvety sauce.
Cut the cooked potatoes in thick slices and put 2 pieces on every plate. Cover with the Aji de Gallina and serve with white rice at the side.
Decorate with hard boiled eggs cut in half or quarters, black olives and a parsley sprig.
I don´t know about you, but having a bowl of pasta with meatballs means comfort food to me. Pasta is a constant dish in Peruvian tables, served with myriad of sauces, vegetables and / or meats. We love this filling ingredient since the first Italians brought it to our country, and this love is always growing. Even in the Andes or in small villages in the Amazon, you can now find pasta as the main dish or as a side for any protein (or for more carbs).
Tomato sauce and meatballs is one of the most popular ways to have pasta at home. Through the years, I have tried every kind of recipe for meatballs: beef, chicken, pork, turkey, tofu, veal, and a mixture of different vegetables. Even though most of them are delicious, I´ve found this turkey recipe to be among my favorites.
A few days ago I was visiting my cousin Carolina, and she decided we should make meatballs for dinner. We had every ingredient we needed in the kitchen: ground turkey in the freezer; big, plump and juicy tomatoes from the garden; onions also from the garden; herbs and spices; and pasta in the pantry. In about an hour we had steaming bowls of pasta with the most delicious tomato sauce with turkey meatballs ready on the table. Everything made from scratch, as we Peruvians like it.
In another bowl, put the bread slice and cover with a little water. Rest until it is very soft. Discard the water and mash the bread. Reserve.
Heat the oil in a saucepan over medium heat and sauté the onion and garlic until transparent. Transfer to the bowl with the turkey.
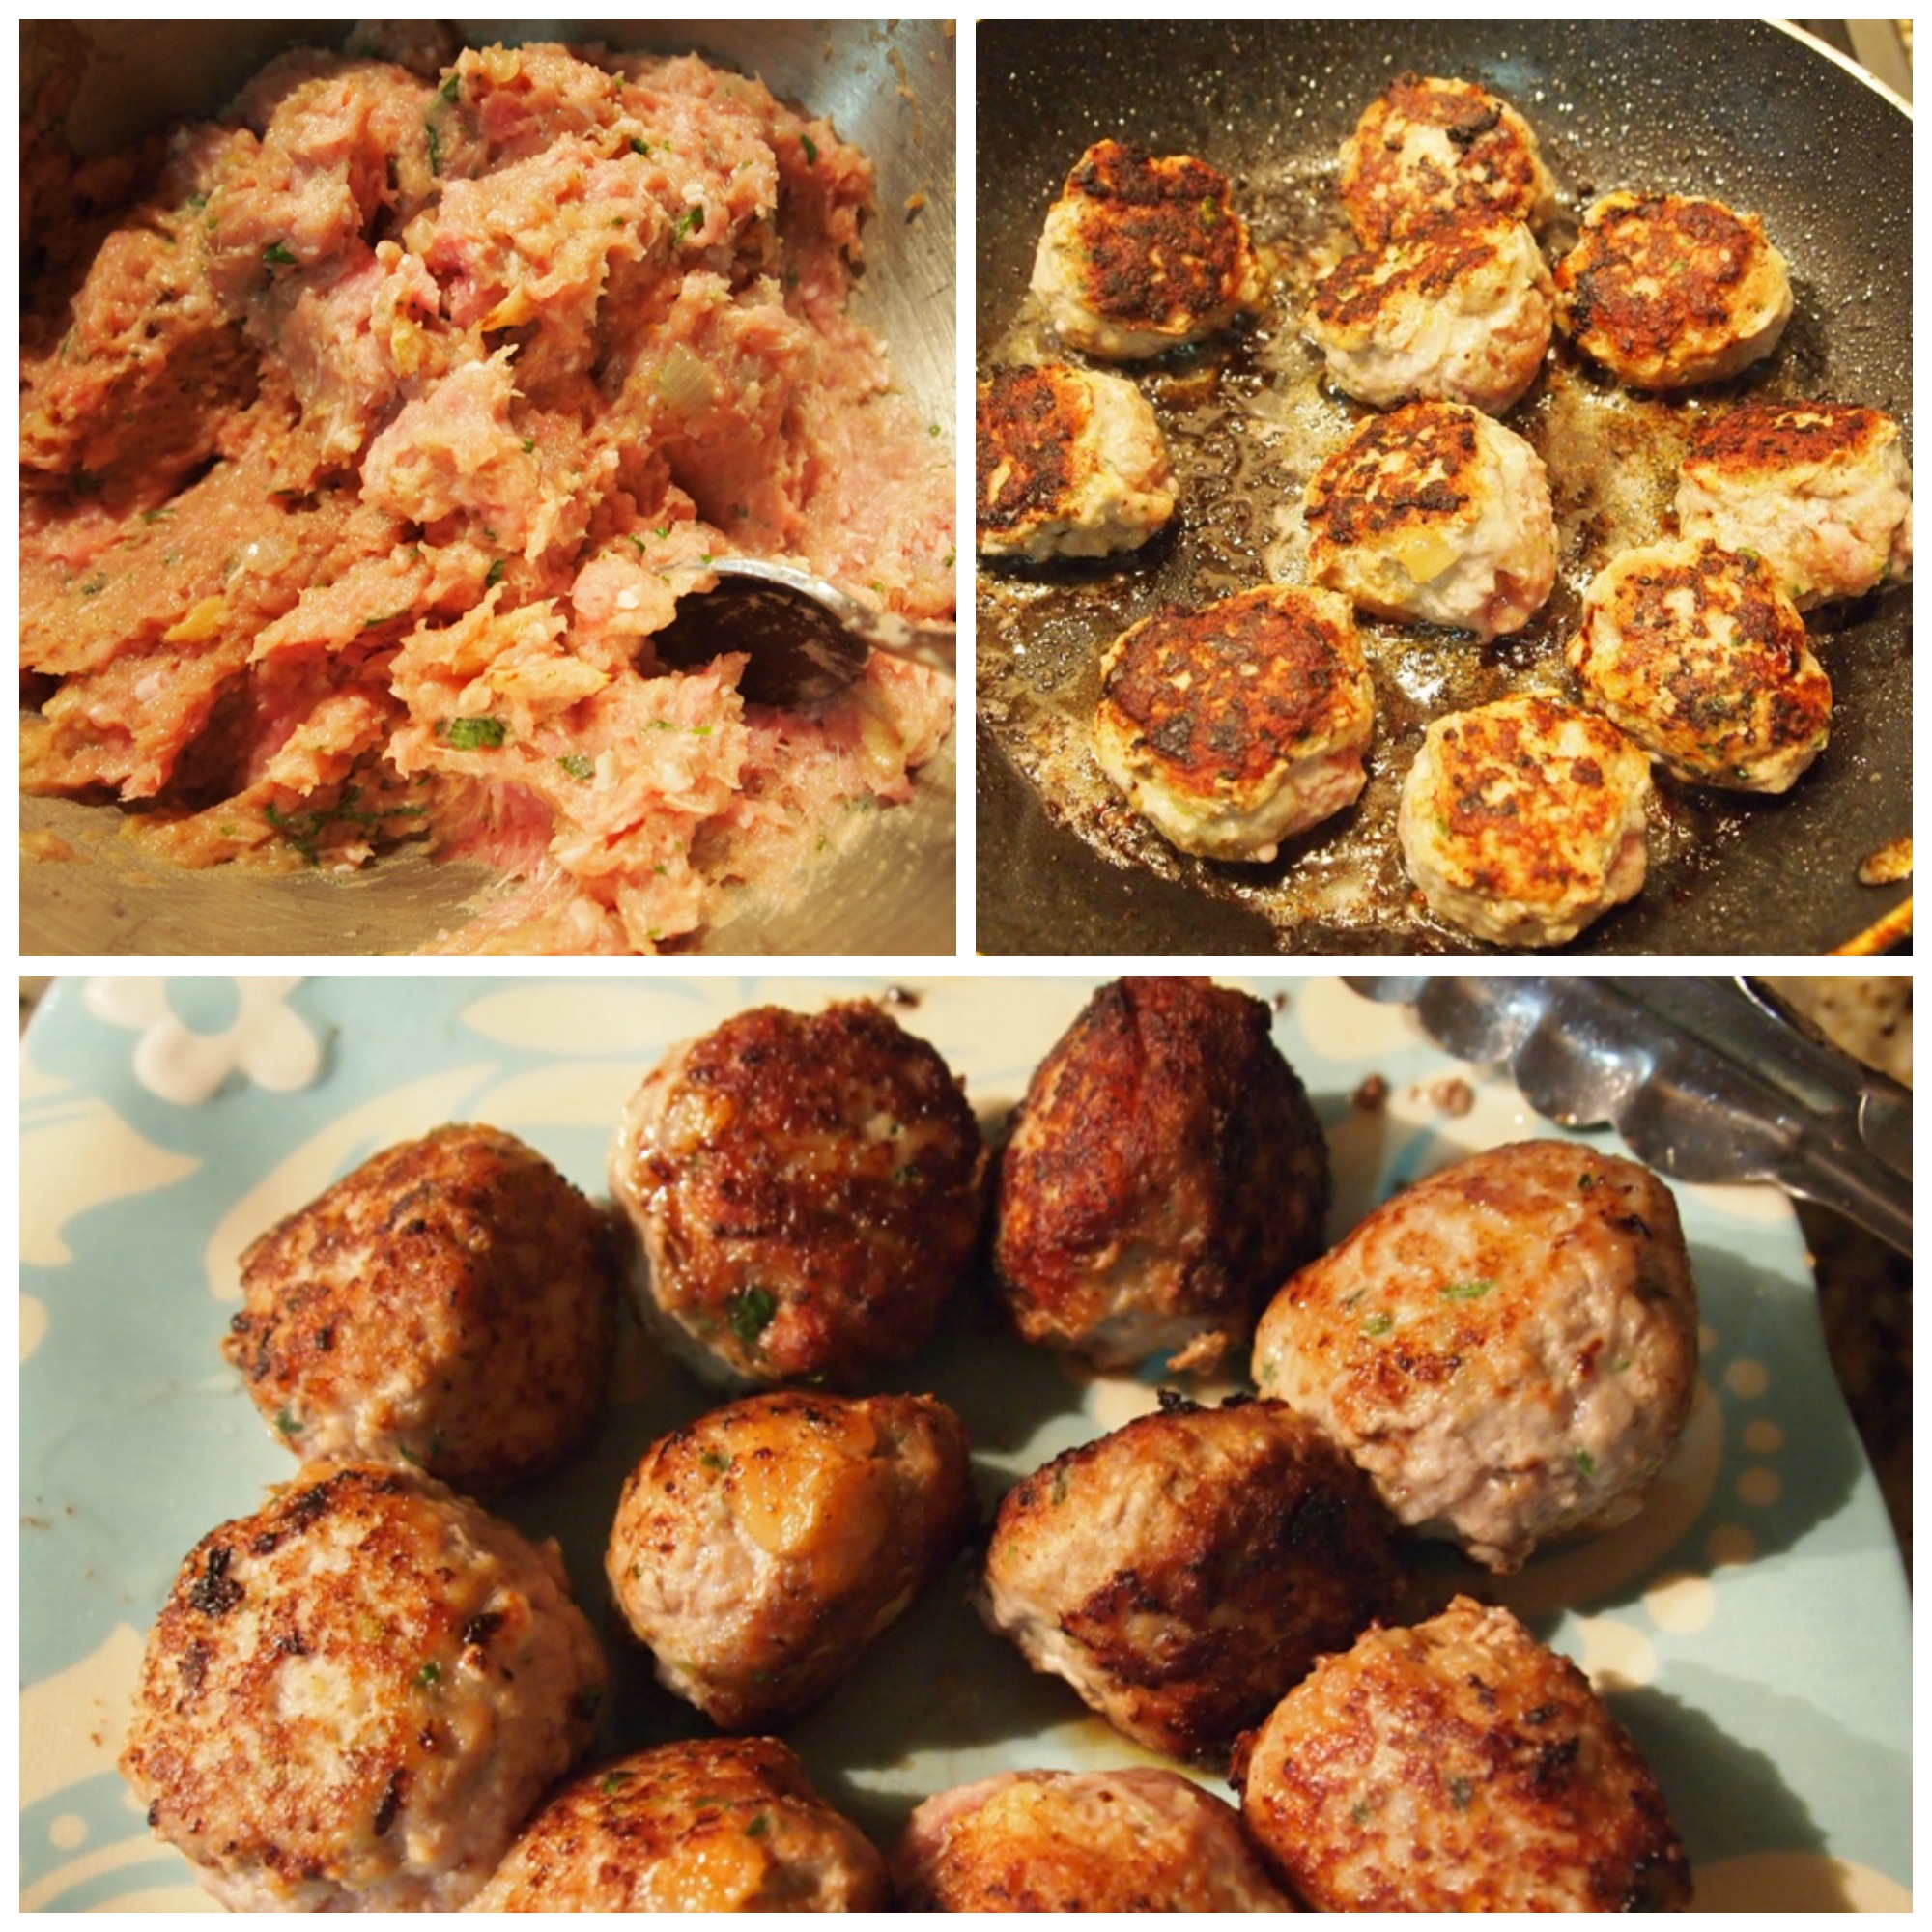
Add the soaked bread, along with the mustard, egg, lemon rind, salt and parsley, and combine well. Form little balls, the size of walnuts.
Heat the oil in a skillet over medium heat. Fry the meatballs, turning every 3- 4 minutes. When they are golden brown transfer to a plate covered with kitchen paper.
Meanwhile, heat the oil in a saucepan over medium heat. Sautée the garlic cloves, add the tomatoes, stir, and add the bay leaf. Put the lid on, lower the heat and simmer until the tomato forms a sauce. Season with salt and pepper. Add the meatballs, and simmer for 10 minutes.
Cook the pasta in a saucepan with salted boiling water, according to the package directions. Drain.
Put the pasta in 4 plates, top with the tomato sauce and a few meatballs.
When I first moved to Peru,gratineed dishes were in vogue. For example, a simple dish of fish with vegetables was fashionably covered with Bechamel sauce, a layer of grated cheese, and then ran under the broiler until bubbly and lightly golden. Seafood was a frequent addition to this entree, and vegetables were always on the side.
This recipe has been published before in our cookbook, The Everything Peruvian Cookbook, and I invite you to make it this weekend or some other, when you have time for cooking. I promise you are going to love it. Provecho!
4 seabass filets (use sole, flounder, grouper, or any other white fleshed fish)
1 pound spinach leaves, discard the stems
2 cups light Bechamel sauce
½ cup Parmesan cheese, grated
3 cups steamed green beans
4 medium potatoes, steamed and peeled
Instructions
Preheat the broiler.
Heat 1 tablespoon butter in a skillet over medium heat. Add the shrimp and sauté until they turn pink, about 3 minutes.
Transfer to a bowl using a slotted spoon, and keep warm.
In the same skillet, with the remaining butter, sauté the scallops for 2 minutes, or until they look opaque. Put them in the bowl with the shrimp.
Season the fish fillets with salt and pepper. Heat 2 tablespoons olive oil in a skillet over medium heat, add the fillets and cook for 3 minutes or until lightly brown. Turn and cook for 1 more minute. Put on a plate and keep warm.
Heat the remaining olive oil in the same skillet, add spinach and heat until wilted. Season with salt and pepper.
Put the spinach in a baking dish. With a slotted spoon, transfer the fish fillets to the baking dish and place over the spinach.
Cover with the Bechamel sauce, sprinkle with Parmesan cheese, and run under the broiler until the cheese melts and turns golden.
Garnish with the cooked shrimp and scallops and serve at once with green beans and steamed potatoes on the side.
*To make the Bechamel Sauce: In a small saucepan over medium low heat, melt 4 tablespoons butter, and add 4 tablespoons all-purpose flour, stirring constantly with a wooden spoon or a wire whisk. Add 2 cups milk, stirring to avoid lumps, 1 bay leaf, salt, pepper, and a pinch of grated nutmeg. Turn the heat to low and cook for 10 minutes, stirring often. The sauce should be slightly thick. Taste for seasoning.
Peruvians love all kinds of empanadas: filled with meat, chicken, aji de gallina, lomo saltado, artichokes, spinach, cheese, and more. Sweet empanadas, however, are not something we see too often, except for the odd apple empanada in just a few places. There is no real reason for this, and we refuse to settle for only savory empanadas. Here is a sweet version that I created for Que Rica Vida, with cream cheese and apricots, inspired by the guava and cream cheese pastelitos from my childhood.
Papa rellena is one of my favorite Peruvian dishes. It’s satisfying, bursting with flavor, and you can have it as an appetizer or entrée, hot or cold, day & night, night & day, and fill it with whatever you want. I especially enjoy the fact that a lot of die-hard meat eaters, who go by the slogan of “if I don’t have meat in a meal I feel like I haven’t eaten at all”, are so easily fooled by this dish when it’s made with soy meat. In my house they have always made the regular, with meat, and a few portions on the side for me, with soy meat. Now that it’s just me and my dad, and I’m the nutritional dictator of our kitchen, everyone eats soy, and nobody complains. It really is as good when it’s karma-free.
But I’m not trying to convert you here. You can do the exact same recipe I’m gonna share here with minced beef instead of soy. This is just the way I eat it, definitely not the way 99.9% of Peruvians do. Whichever way you make it, you will be getting the real deal as there’s hardly any difference in taste and appearance between the two. If you want the original version, just pretend that what you see in these pictures is real meat, and replace accordingly.
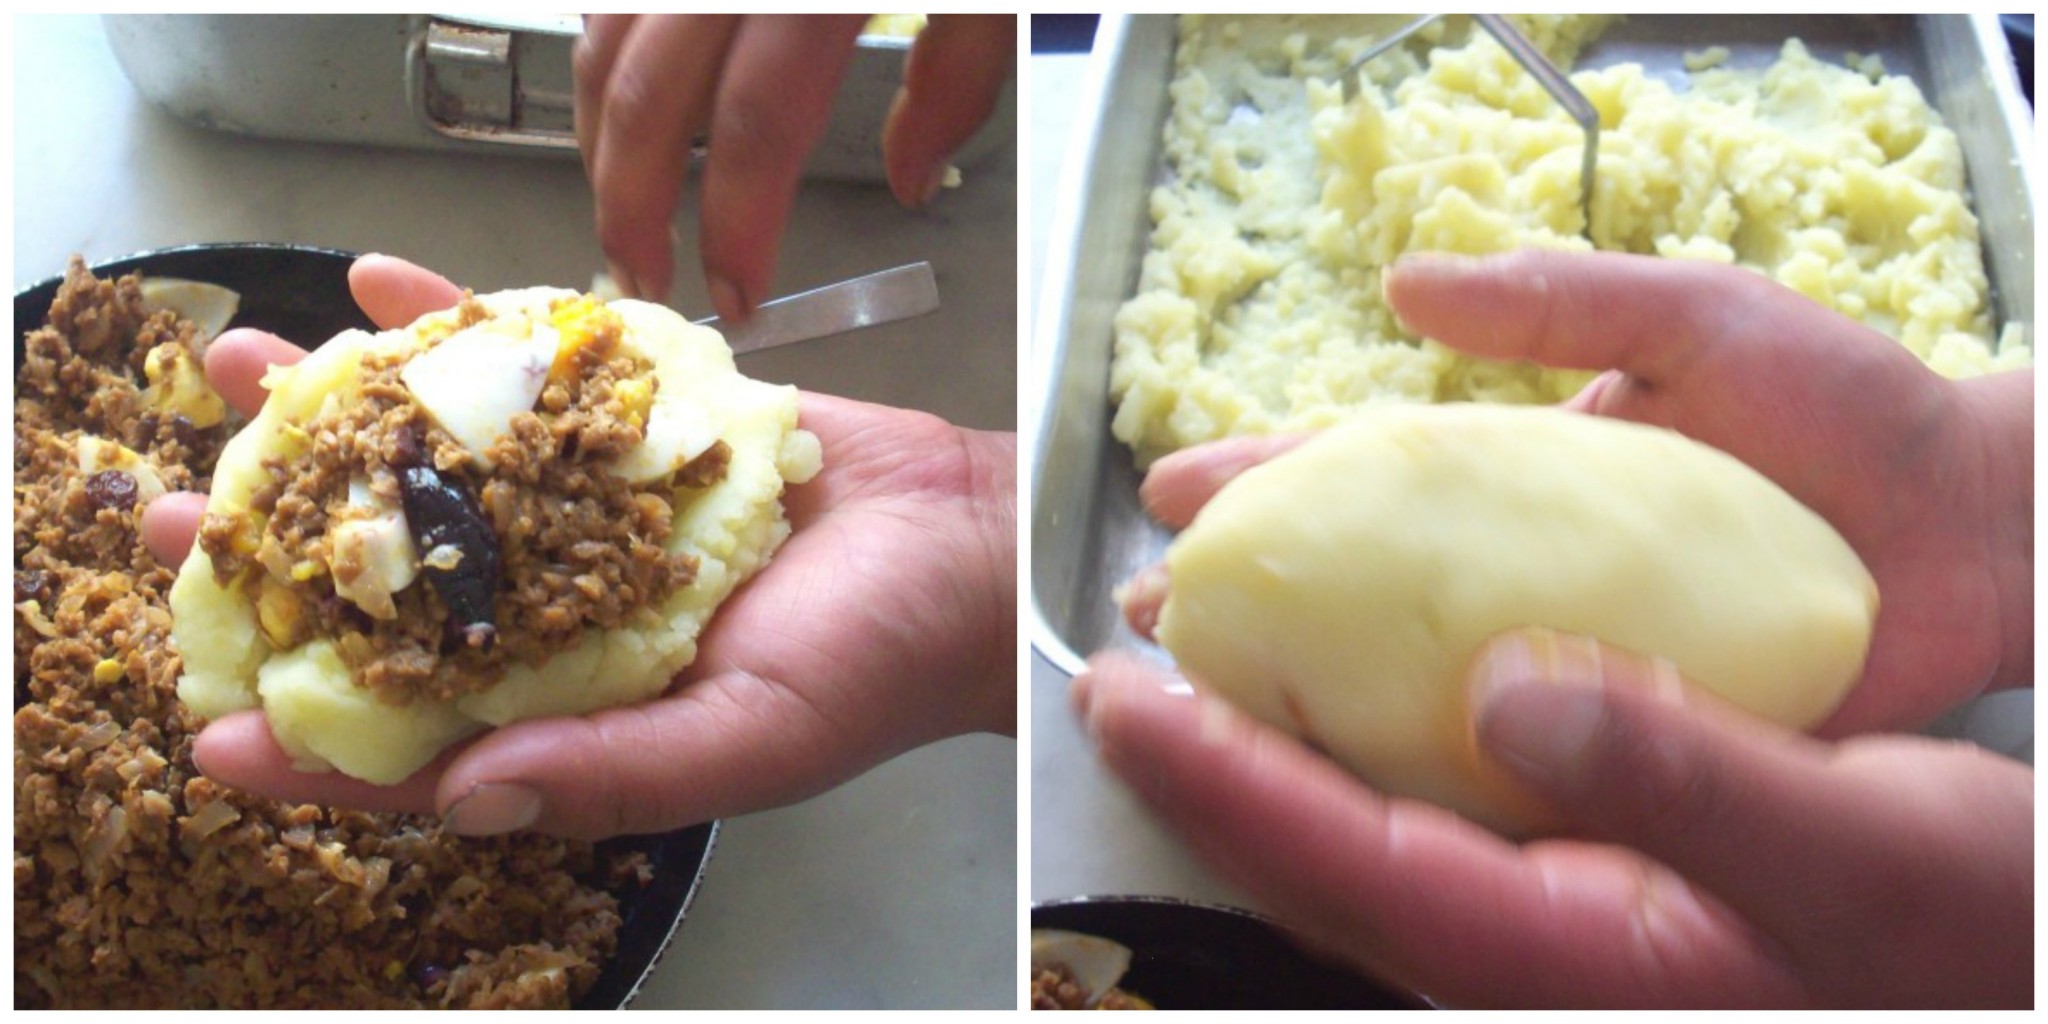
Papa rellena means “stuffed potato”, and it basically is mashed potato stuffed with minced beef, raisins, olives, and hard-boiled egg, and pan fried untill it’s golden on the outside. Like most creolle dishes, it’s accompanied with salsa criolla, and although it was originally created as an appetizer, in most households it’s eaten as an entrée nowadays, with white rice on the side.
In the past, the mash had lard and eggs in it, and the stuffing included parsley, chili peppers, almonds, and even peanuts. It can be made either with Peruvian yellow potatoes, or with regular white potatoes, and some people add yucca to achieve that perfectly creamy-but-structured texture. The basic recipe is very flexible, as any kind of stuffing will work well with the potatoes. Some of the favorites stuffings are chicken, fish, seafood, vegetables and cheese.
Some say its origin (supposedly the Spanish Empanada) is really Arab, because Spain was influenced by that culture for 700 years. Spanish colonizers came to the New World with Arab cooks, wives, and lovers, along with their appetizing recipes of sweets -such as rice pudding-, and savory dishes, and these women were experts at stuffing all kinds of vegetables with juicy and tasty minced meat preparations. This didn’t change when they arrived in exotic lands; they just learned to stuff all the new ingredients they found, such as tomatoes, potatoes, rocotos, caiguas, etc.
This easy dish is very practical too. You can make it ahead and freeze it when it’s already fried. When you’re hungry or need a quick meal just take it out, heat it up a bit and you’re ready to go. The size is traditionally small (like in the pictures), but you can make them bigger, (even twice the size), for a very filling and succulent meal. A good potato to use for this is yukon, but any white potato that is not floury should do.
1 tablespoon ají panca paste (panca chili pepper paste that you can find in many stores or online. Optional)
1 tablespoon tomato paste
2 hard-boiled eggs, peeled and chopped
½ cup raisins
½ cup black olives, sliced
Salt, pepper
Parsley, chopped
All-purpose flour
2 eggs
Instructions
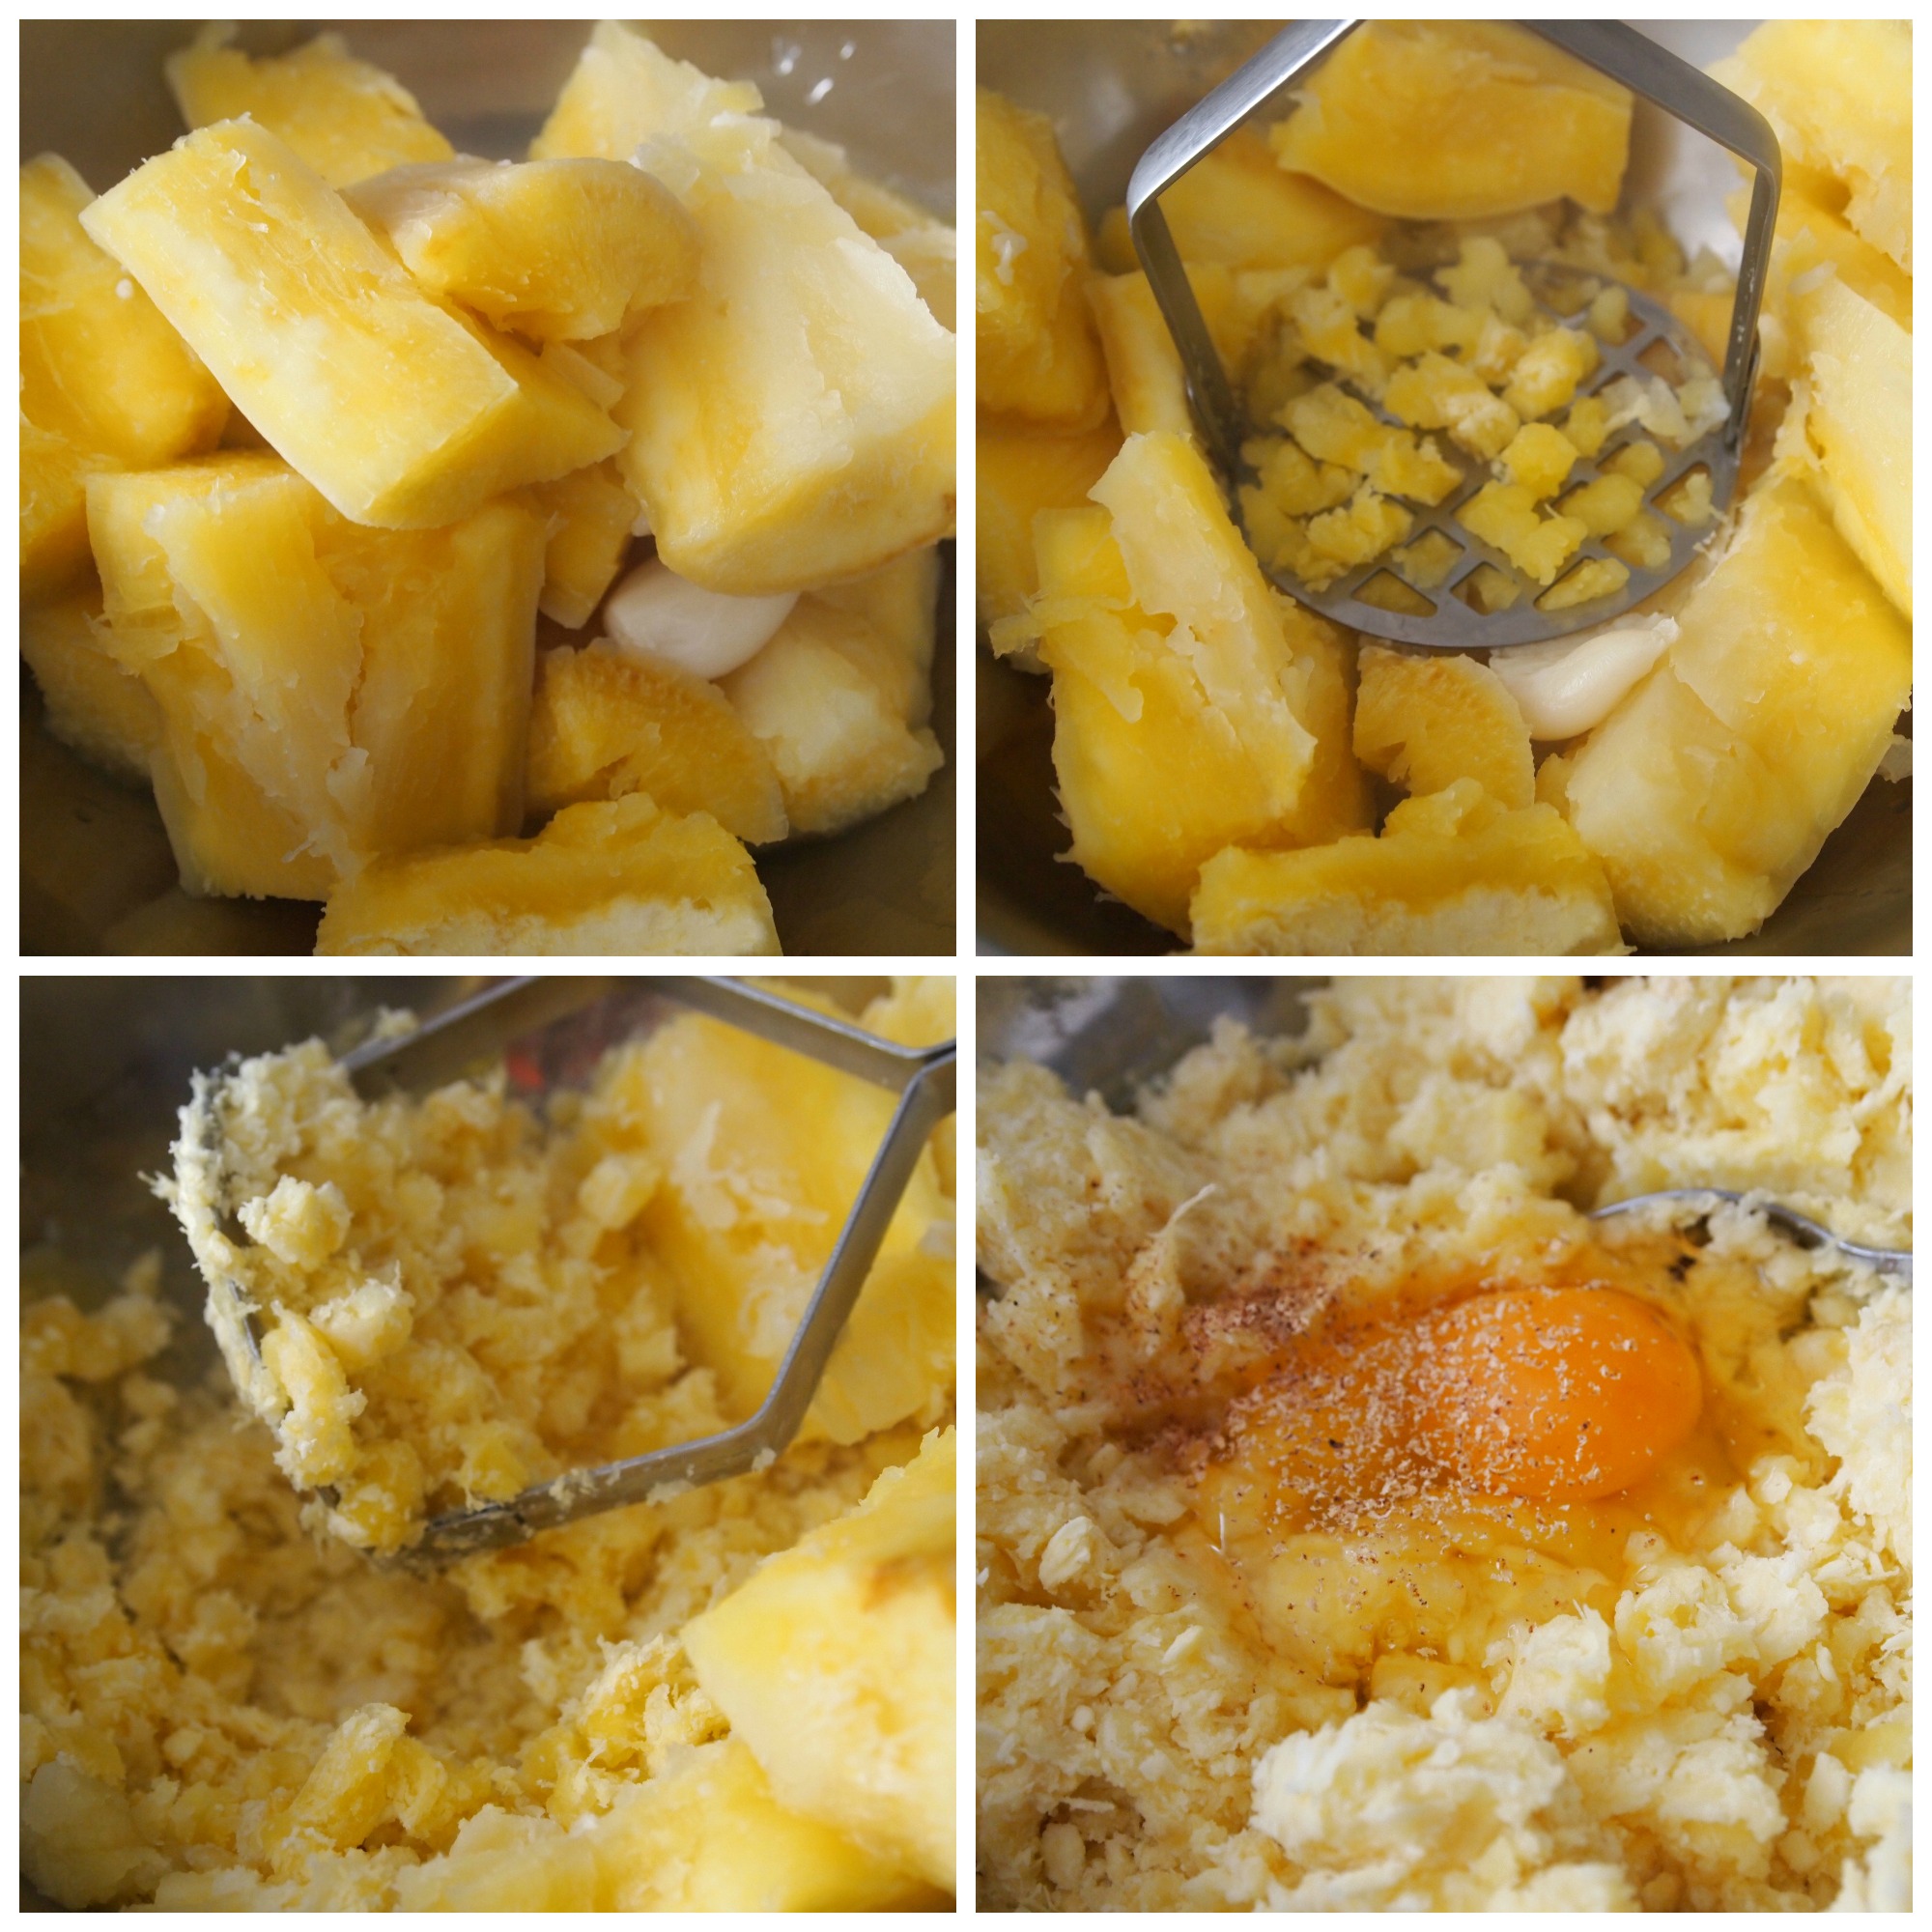
Cook the potatoes in a saucepan with boiling water until they are tender (around 20 minutes, but it depends on the potato). Peel them while hot, as fast as you can. Pass them through the ricer at once. Add salt and pepper. Keep covered while you cook the filling.
In a saucepan heat the oil over high heat, add the onion and garlic stirring, then the tomato paste and ají panca, if using. Add the soy meat (or ground beef), salt, pepper. Stir and cover the saucepan. Cook over low heat for around 15 minutes, stirring every now and then.
Incorporate hard-boiled eggs, raisins, olives, and parsley. Turn off the heat.
With floured hands, knead the potatoes for a few seconds. Take a portion of the potato dough and flatten it between your hands. With a spoon put a portion of the soy filling in the center of the potato round. Close it with some extra potato dough and form a little “football”.
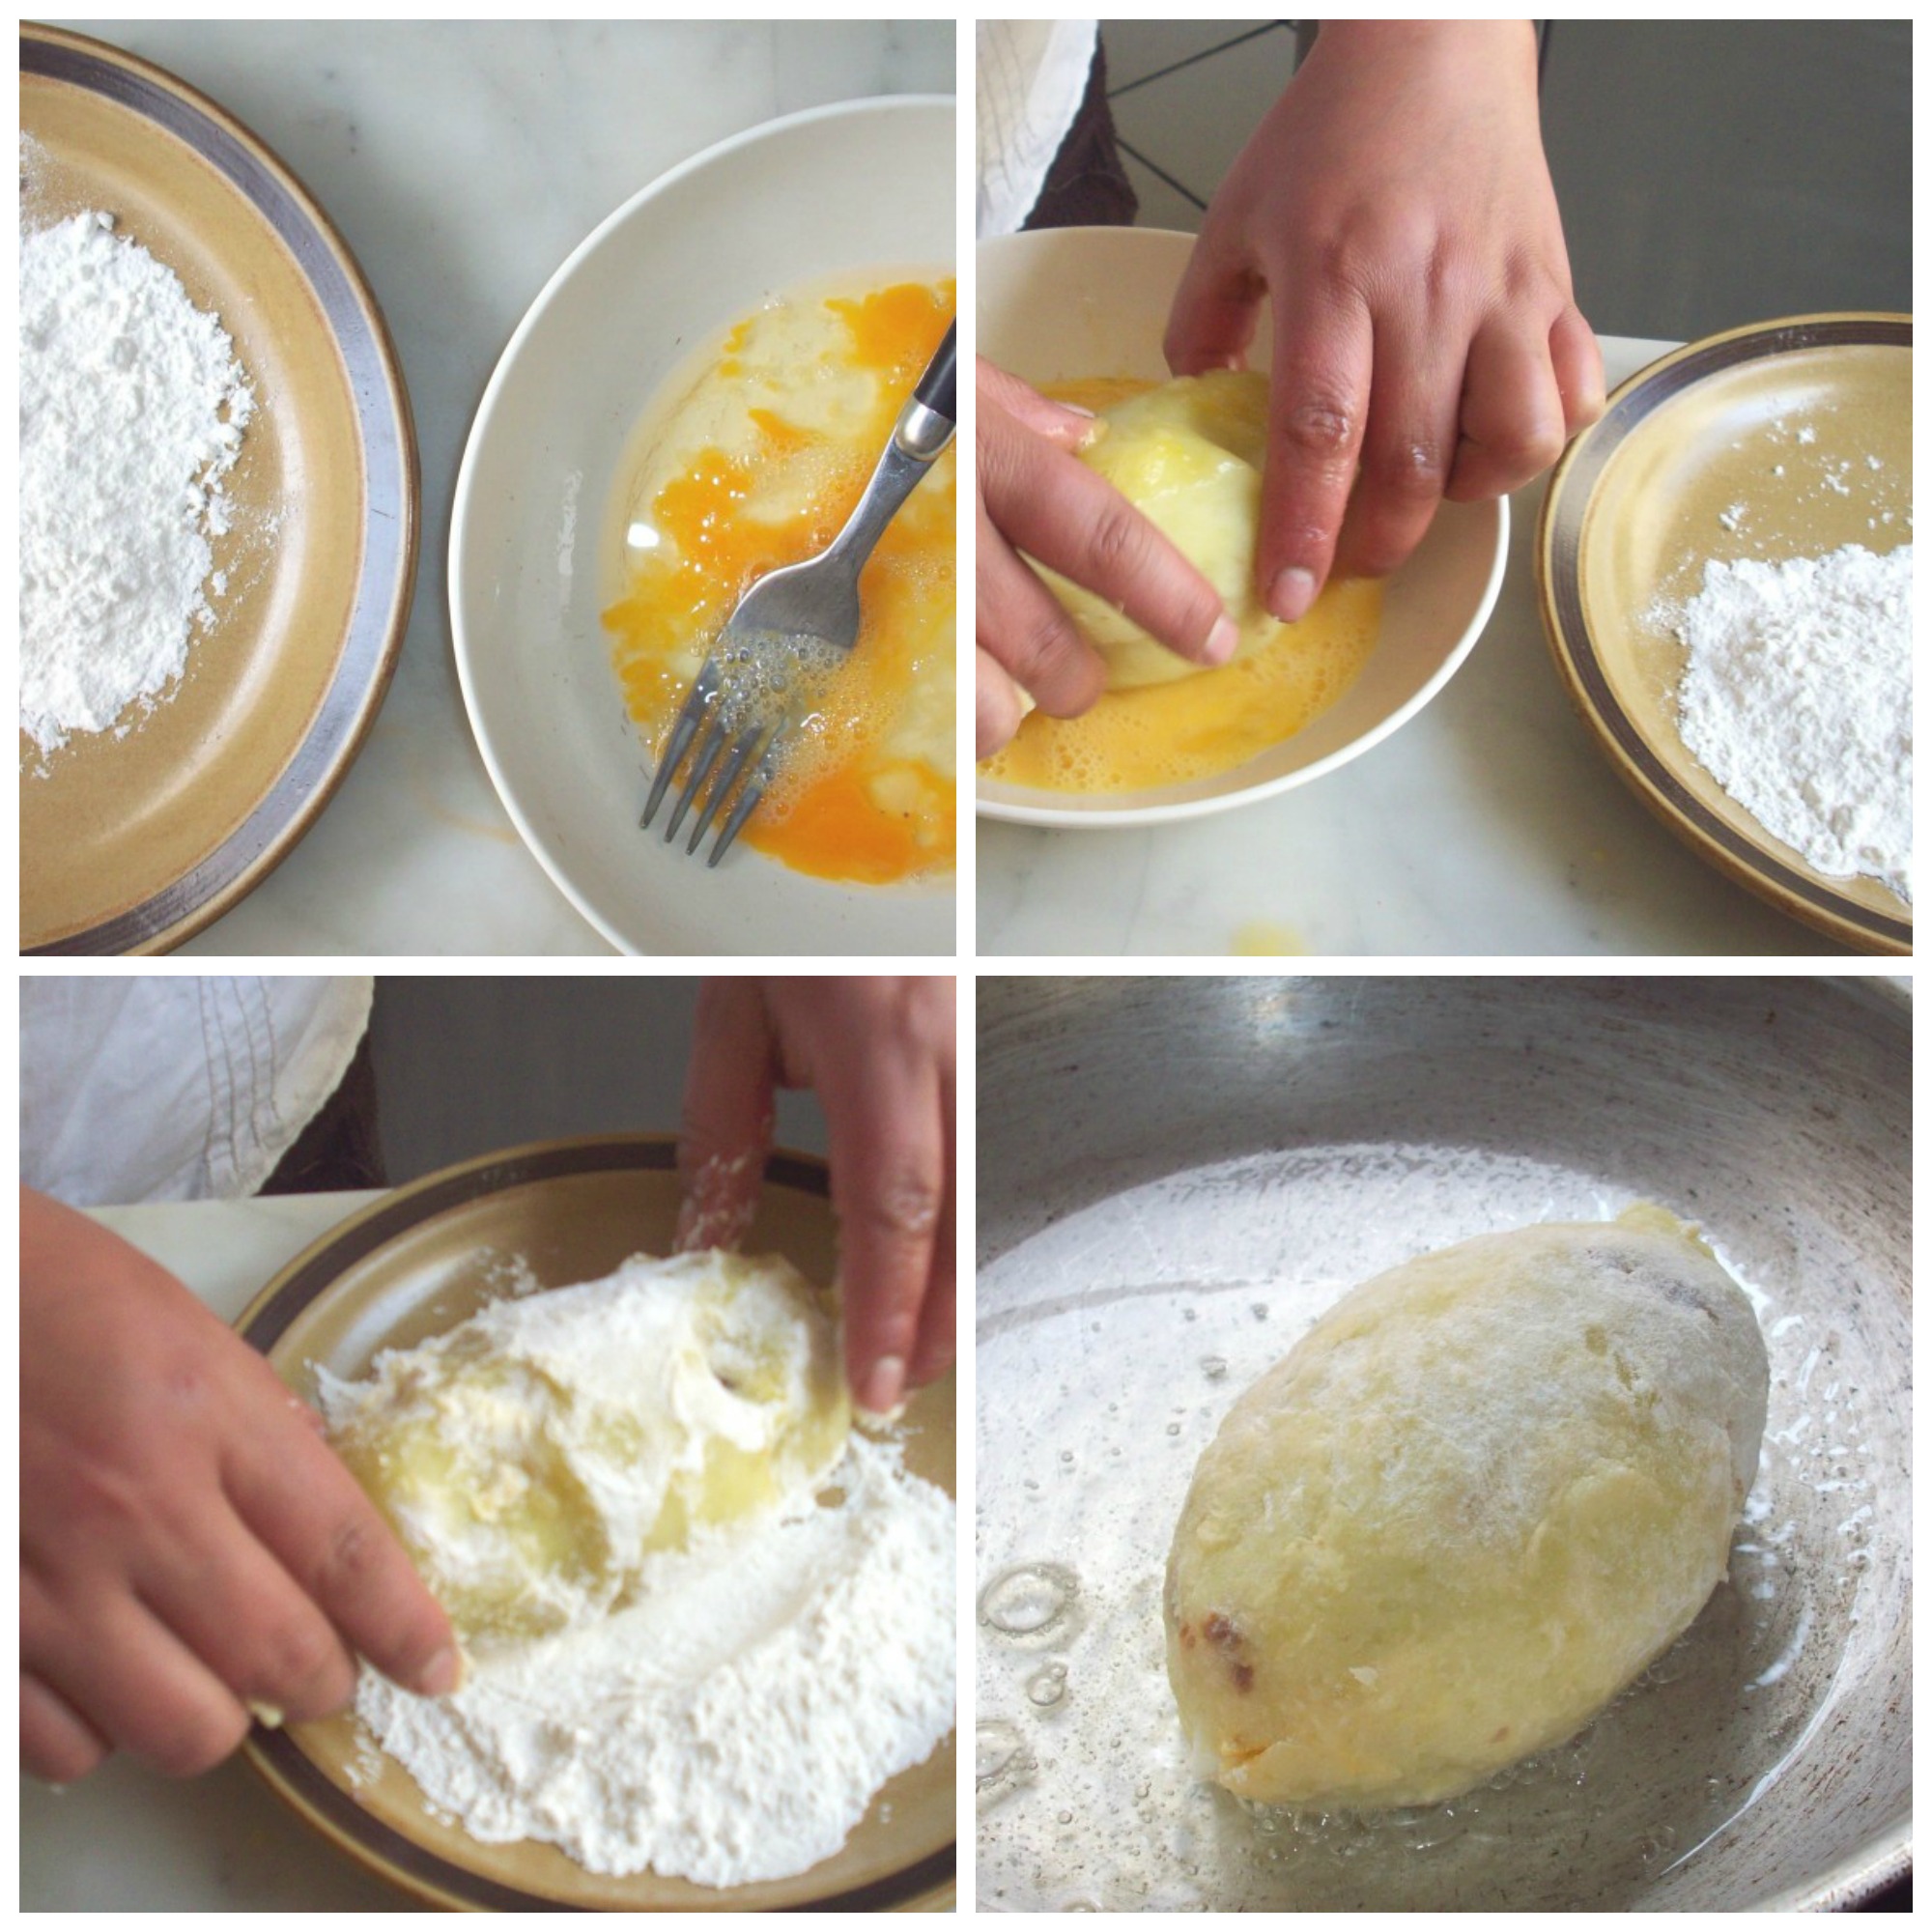
Put the flour in a bowl, and mix the 2 extra eggs in another bowl. Roll every roll in the eggs, then in the flour, shaking the excess, and fry in a hot pan with hot oil until the potato forms a thin golden a crusty layer. Move around every now and then to make sure every side becomes golden.
Drain over paper towel and serve immediately, with Salsa Criolla or plain rice.
Whenever I think about having eggs for breakfast or brunch, this easy dish comes to my mind. This is also my friend Thelma´s favorite lunch when she feels like having something quick and super light. Huevos a la Rabona consist of sliced and golden-fried bread, a sunny-side-up egg on each slice, and a topping of onion and chili pepper. Simple and delicious.
Food historians say that this was a war-time dish, prepared by the soldier´s women during the war against Chile, more than a century ago. The reasons why this meal was favored during these times of trouble is obvious: it can be eaten on the go, it needs very few ingredients, and it’s always satisfying. This men moved from one part of the country to the other, crossing the harsh Andean geography, and this humble dish was what kept them energized.
If you have eggs in the fridge, bread in the pantry, a red onion, and a piece of rocoto (or any other red hot chili pepper), you are set to make this fast breakfast, brunch, or lunch.
2 tablespoons rocoto, finely diced (or any red hot chili pepper)
2 tablespoons cilantro leaves, chopped (optional)
Salt and pepper
1 tablespoon vinegar or lime juice
1 tablespoon oil
4 tbread slices
2 tablespoons vegetable oil
4 eggs
Instructions
Put the onion and rocoto in a bowl, cover with cold water and rest for 10 minutes. Drain well.
Transfer onion and rocoto mix to a bowl and add cilantro leaves, salt, pepper, vinegar and 1 tablespoon oil. Reserve.
Toast the bread in the oven or a skiller until lightly golden. Put 2 slices in each plate. (You can also fry it with some oil, which is the original way of making this dish).
Heat the vegetable oil in a small frying pan and fry the eggs, sunny-side-up.Season with salt.
Put a fried egg on top of each toast.
Put a tablespoon of the onion mixture on top of each fried egg, and serve immediately.
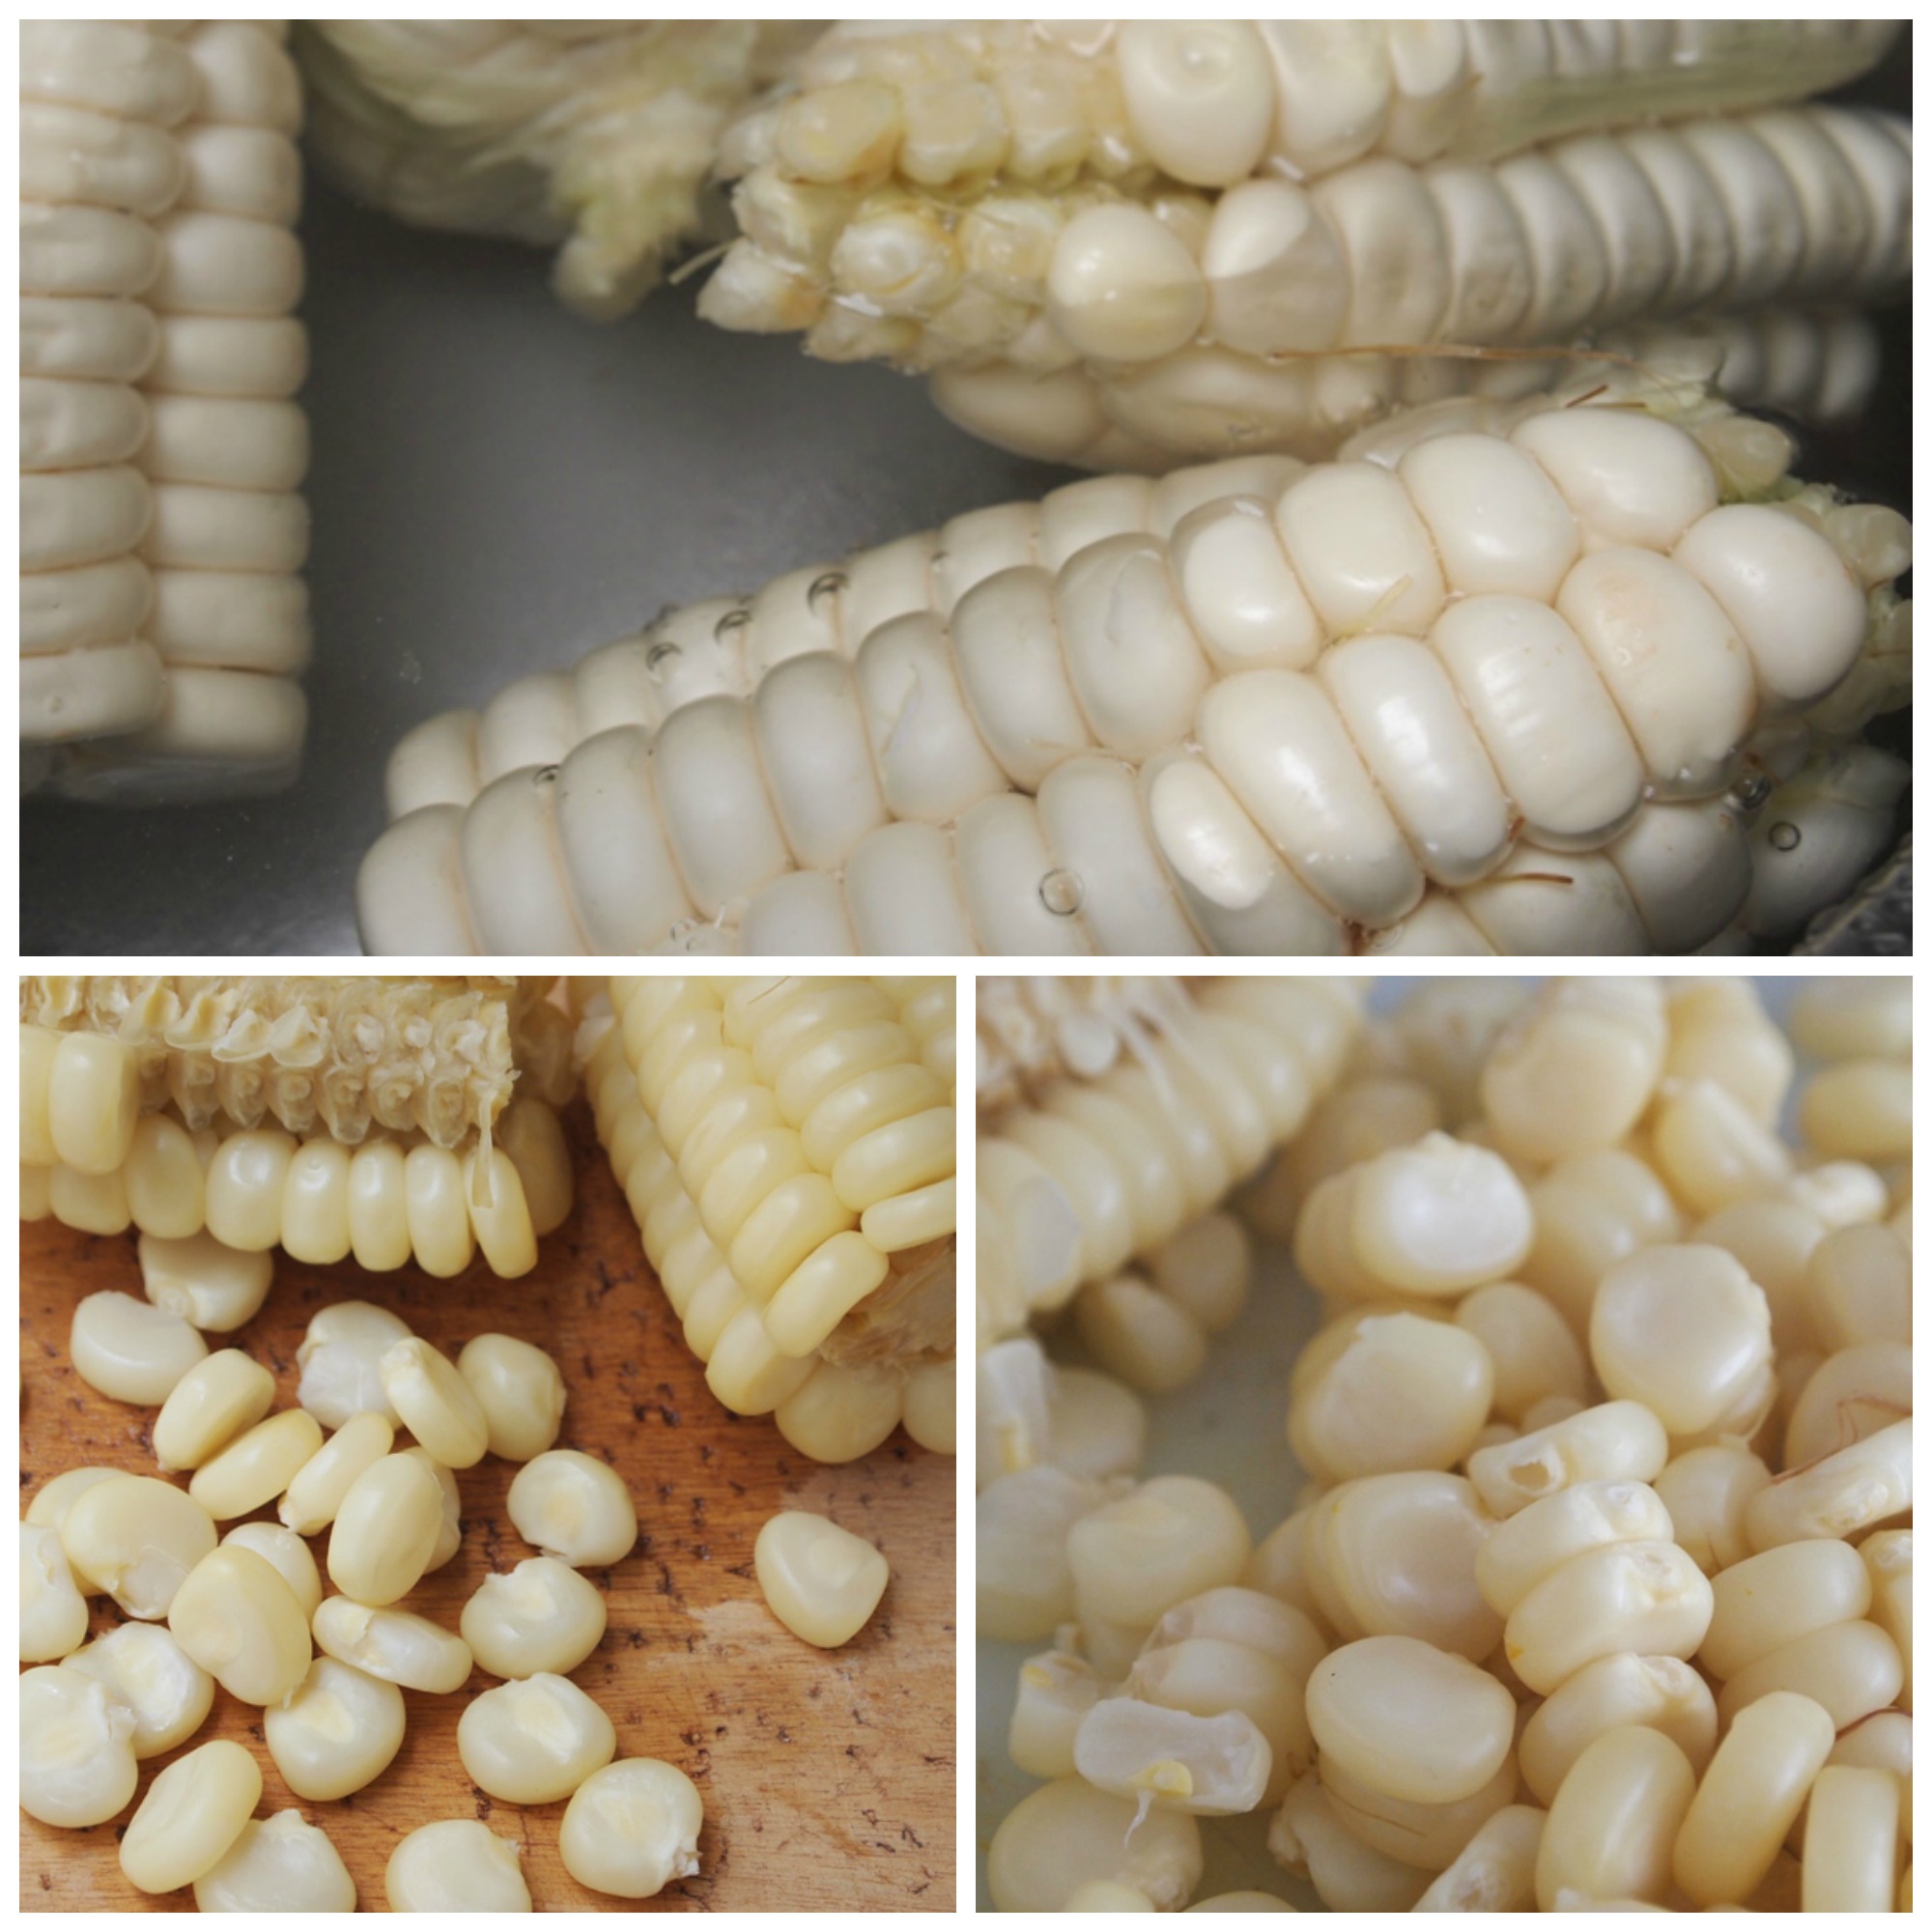
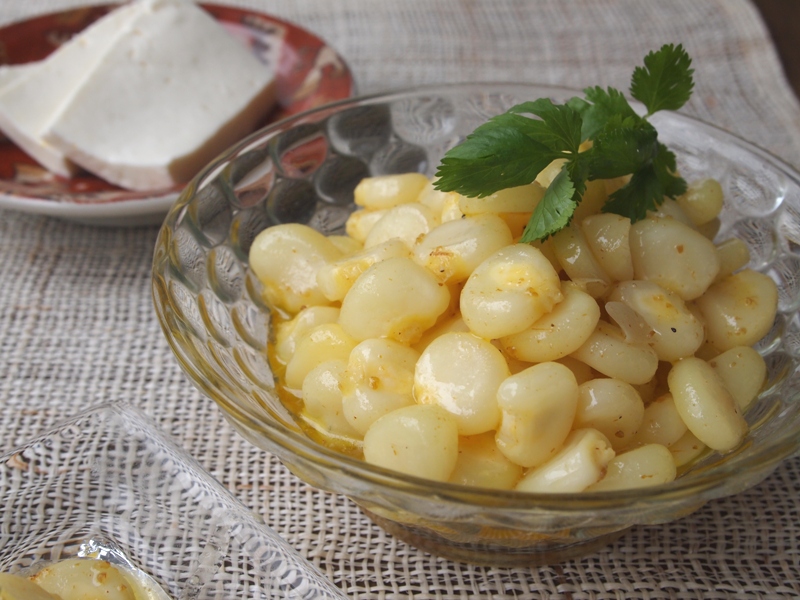
If you have a craving for Peruvian corn, or haven’t tried it yet and would like an easy way to make it, this popular “piqueo” (hors d’oeuvre) recipe, is a good place to start. Made with boiled corn kernels, butter, cumin, and a squeeze of lime juice, choclito al comino also goes well with a number of dishes as a delicious side.
Like many items in our gastronomy, this dish has three different names: choclo Jose Antonio, for the restaurant that made it famous; choclo al comino, literally “cumin corn”; and choclo al Pacayal.
Ok, this third name is not used by many people. I just happen to call it that way because the first time I had this dish was in a restaurant called El Pacayal. I didn’t make the name up however, that’s how they called it in their menu. Every time we ate there, the owner greeted us with a bowl of steamy and aromatic corn seasoned with cumin and butter.
This is another easy and tasty dish that hardly needs a recipe at all. You can make it with any fresh corn kernels, but if you find Peruvian giant corn, all the better.
And just for fun, and because I like cheese so much, I love to serve some slices of queso fresco next to this juicy corn preparation. What about you?
Choclito al comino – Corn with cumin, butter, and lime
Author: Peru Delights
Recipe type: Side
Prep time:
Cook time:
Total time:
Serves: 2
Ingredients
2 corns
1 tablespoon sugar
⅓ cup butter
1 teaspoon ground cumin
Salt and pepper
1 lime
Instructions
Boil the corn with the sugar in a saucepan with water.
Transfer to a plate when cooked, and cut off the kernels.
Melt the butter in a skillet over medium hear, add the corn kernels, ground cumin, salt and pepper, and stir for a couple of minutes until heated through.
Squeeze the lime over the corn and serve immediately.
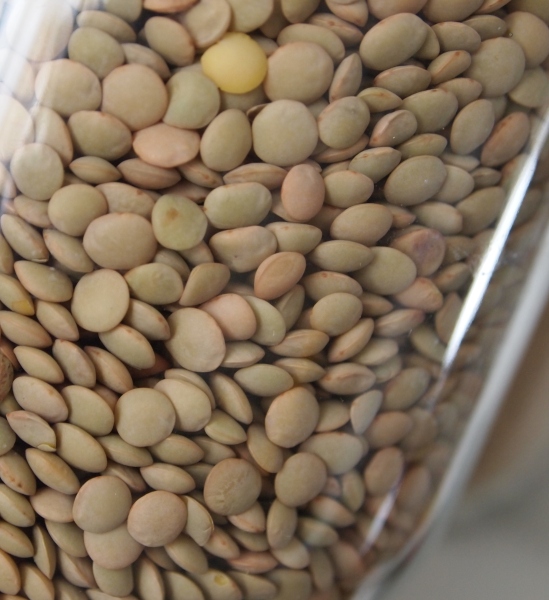
I love legumes in all the colors of the rainbow. This comforting lentil soup is one of my favorite ways of eating them, and if I could, I would have it for dinner every night. Not only are they tasty and healthy, but lentils are also supposed to bring good luck and abundance to your life. In some countries it is believed that you should have a huge lentil dish on January 1st, to assure yourself a prosperous year.
I may or may not believe all this, but the real reason why I eat them so often is simply that I like the earthy flavor and texture of these legumes. At home, we love having this heart warming vegetarian lentil soup with lots of veggies, but sometimes a little chopped bacon is a nice addition that gives the lentils an intense smoky flavor.
I´ve tried hundreds of variations of this simple lentil soup. Sometimes with fried morcilla (blood sausages), or cooked with a ham hock, which adds lots of flavor. Herbs also play an important role flavoring the soup. Feel free to add parsley, chives, cilantro or fresh or dried oregano. Bay leaves are a must, and to tell you the truth, I use them not just here, but in most of my dishes. I even have my own plant in a pot, so I don´t need to buy leaves in the grocery store.
You can freeze any leftover lentil soup for several months to use later. Or you can maketacu tacu, substituting the beans with lentils. Another simple idea is to drain the soup and serve the lentils with a fried egg on top and rice on the side.
Here you have our basic lentil soup recipe. You may add any diced vegetables of your choice to make it a complete, colorful meal.
Put the lentils in a saucepan with vegetable stock. Bring to a boil over medium heat. Turn the heat to low, add celery, carrot, and bay leaves. Put the lid on and simmer for 20 minutes.
In the meantime, heat the vegetable oil in a skillet over medium heat. Add onion and garlic, and cook stirring frequently for about 7 minutes. Do not let them brown.
Add tomato paste and cook for two more minutes. Pour this mixture over the lentils. Season with salt and pepper, and continue simmering until tender, adding more vegetable stock or water as needed.
Serve in bowls with rice, avocado, and chili sauce.
I remember when my mom used to make this dessert for us. It was our special treat after school, and even though we didn´t like it warm -because of the hot weather in Central America-, she always served it like that mostly because she loved it that way.
At the time I didn´t like the flavor of the lemon peel or the raisins, but now I love them and try to add them to my rice pudding every now and them. I also add sliced almonds and a tablespoon or so of Amaretto; or coarsely grated coconut and a tablespoon Rum for a Caribbean touch! This delicious dessert is like a canvas, ready to host all kinds of colors, flavors and perfumes which transform a regular rice pudding into a new and exciting experience each time.
Sometimes I also add 2 tablespoons pichuberry (aguaymanto, goldenberry) or sauco (elderberry) marmalade and stir it into the warm rice. Dried apricots are one of my favorite ingredients in rice pudding. And more than once I added a little white chocolate, and its creaminess when melted, and flavor were lovely, to say the least.
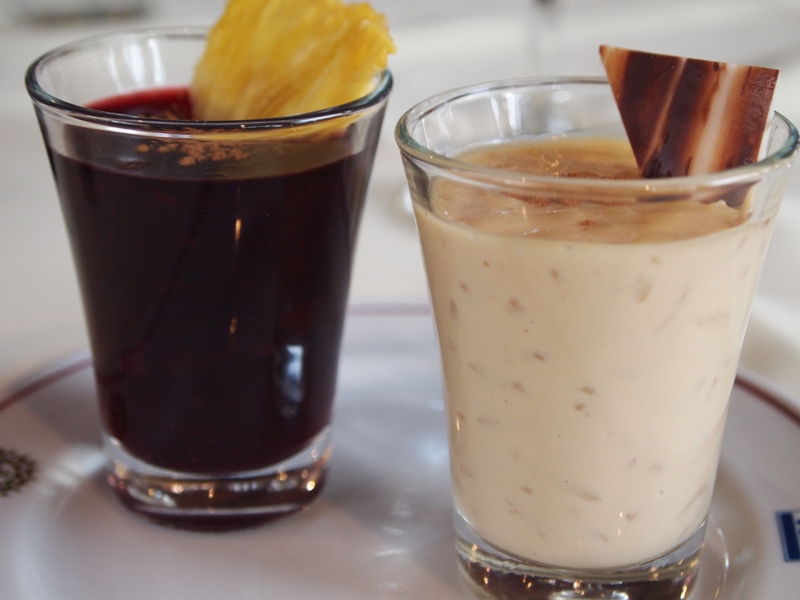
In Peru I learned to combine two of favorite homey desserts into one: rice pudding and mazamorra morada. I like to have them in two separate glasses, one next to the other, but in Lima both desserts are served in the same cup, making one of the most delicious combinations I´ve tried. Creamy, fruity, and spicy at the same time. The textures are different but complement each other to create a beautiful treat.
In a heavy saucepan put the whole milk with the cinnamon sticks and the rice, cook over low heat, uncovered, stirring frequently and taking care that the milk doesn´t boil over.
When the rice is tender (about 25 minutes), add the evaporated milk, water, sugar and lemon peel. Continue cooking over low heat, stirring with a wooden spoon, until it is slightly creamy and soupy (about 20 minutes). Add raisins and stir to combine. Don´t let it dry because the mixture will become thicker as it cools because the rice will absorb most of the liquid.
Remove from the heat and fish out the lemon peel and the cinnamon sticks. Add vanilla essence.
Pour the warm pudding in cups or glasses or in a nice container. Dust with powdered cinnamon and serve. Can be refrigerated and eaten cold.
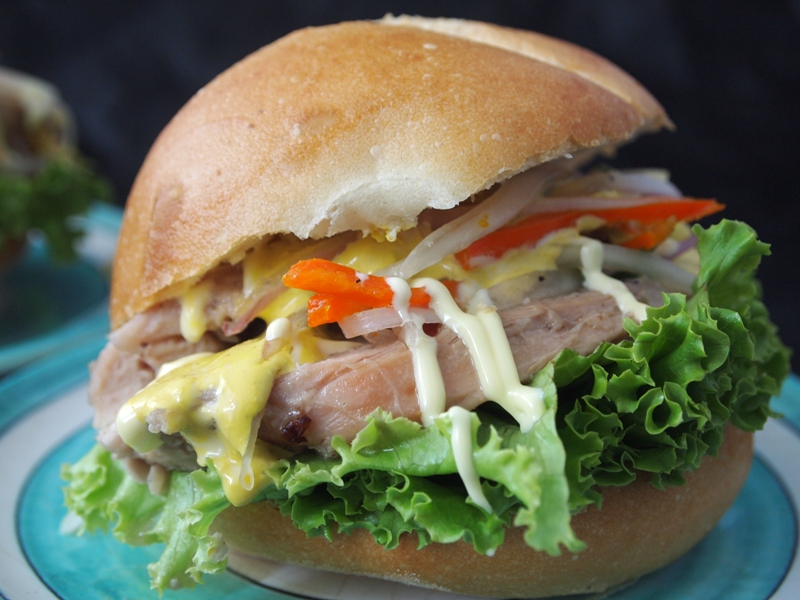
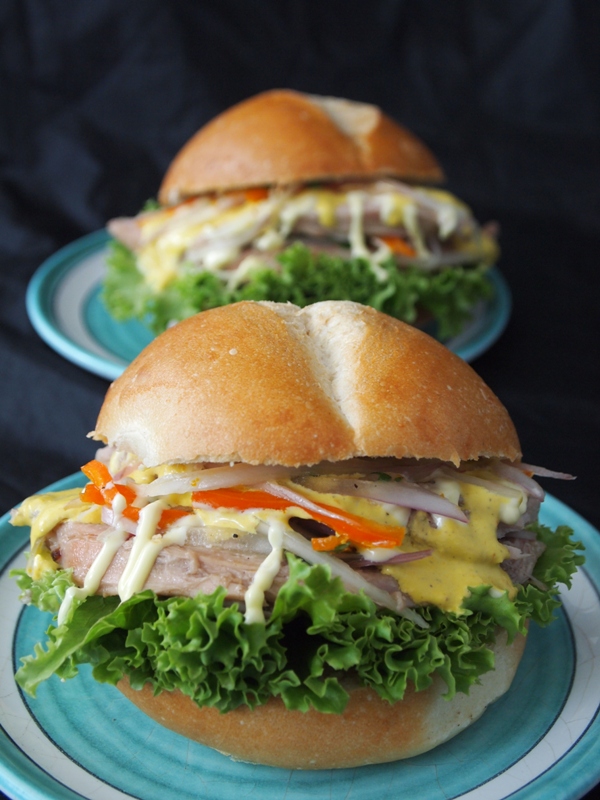
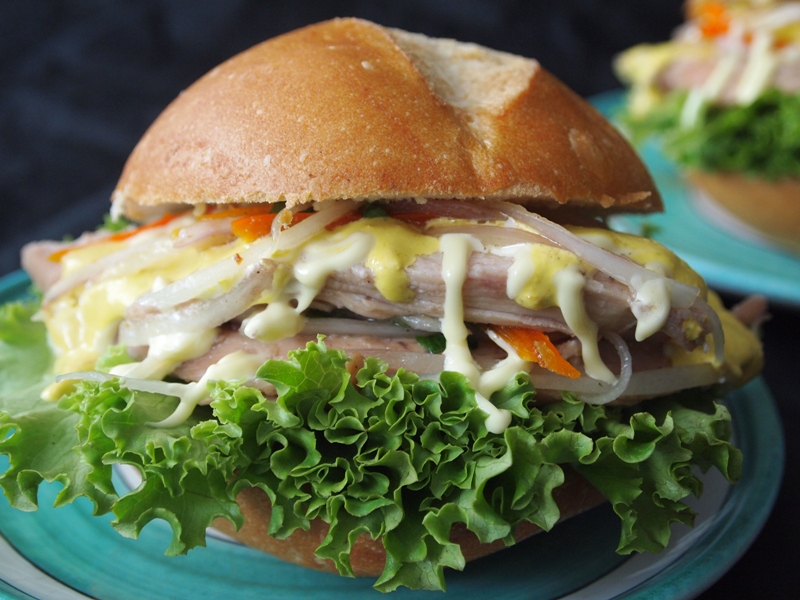
There is a place in Lima called El Peruanito, where I used to stop by for delicious turkey sandwiches -or sánguche de pavo, as we call them in Peru. The ingredients were simple: a crispy roll, perfectly roasted turkey, gravy, lettuce, salsa criolla, and a varied choice of sauces: mayonnaise, aji amarillo, rocoto, huacatay,mustard, and the like.
These huge sandwiches have such a fantastic flavor, that after many years of being a fan, I finally decided to replicate them at home. Leftover turkey is perfect for this, so if you’re trying to be creative and find ways to use the remains of the bird during the upcoming holiday season, now you know what to do.
To make these, we usually use a bread roll called roseta, which has a crispy crust and a light interior, (it’s almost empty on the inside), with enough room to accommodate all the ingredients you want to stuff your sandwich with.
Homemade mayonnaise with aji amarillo paste makes a delicious addition to this sandwich.
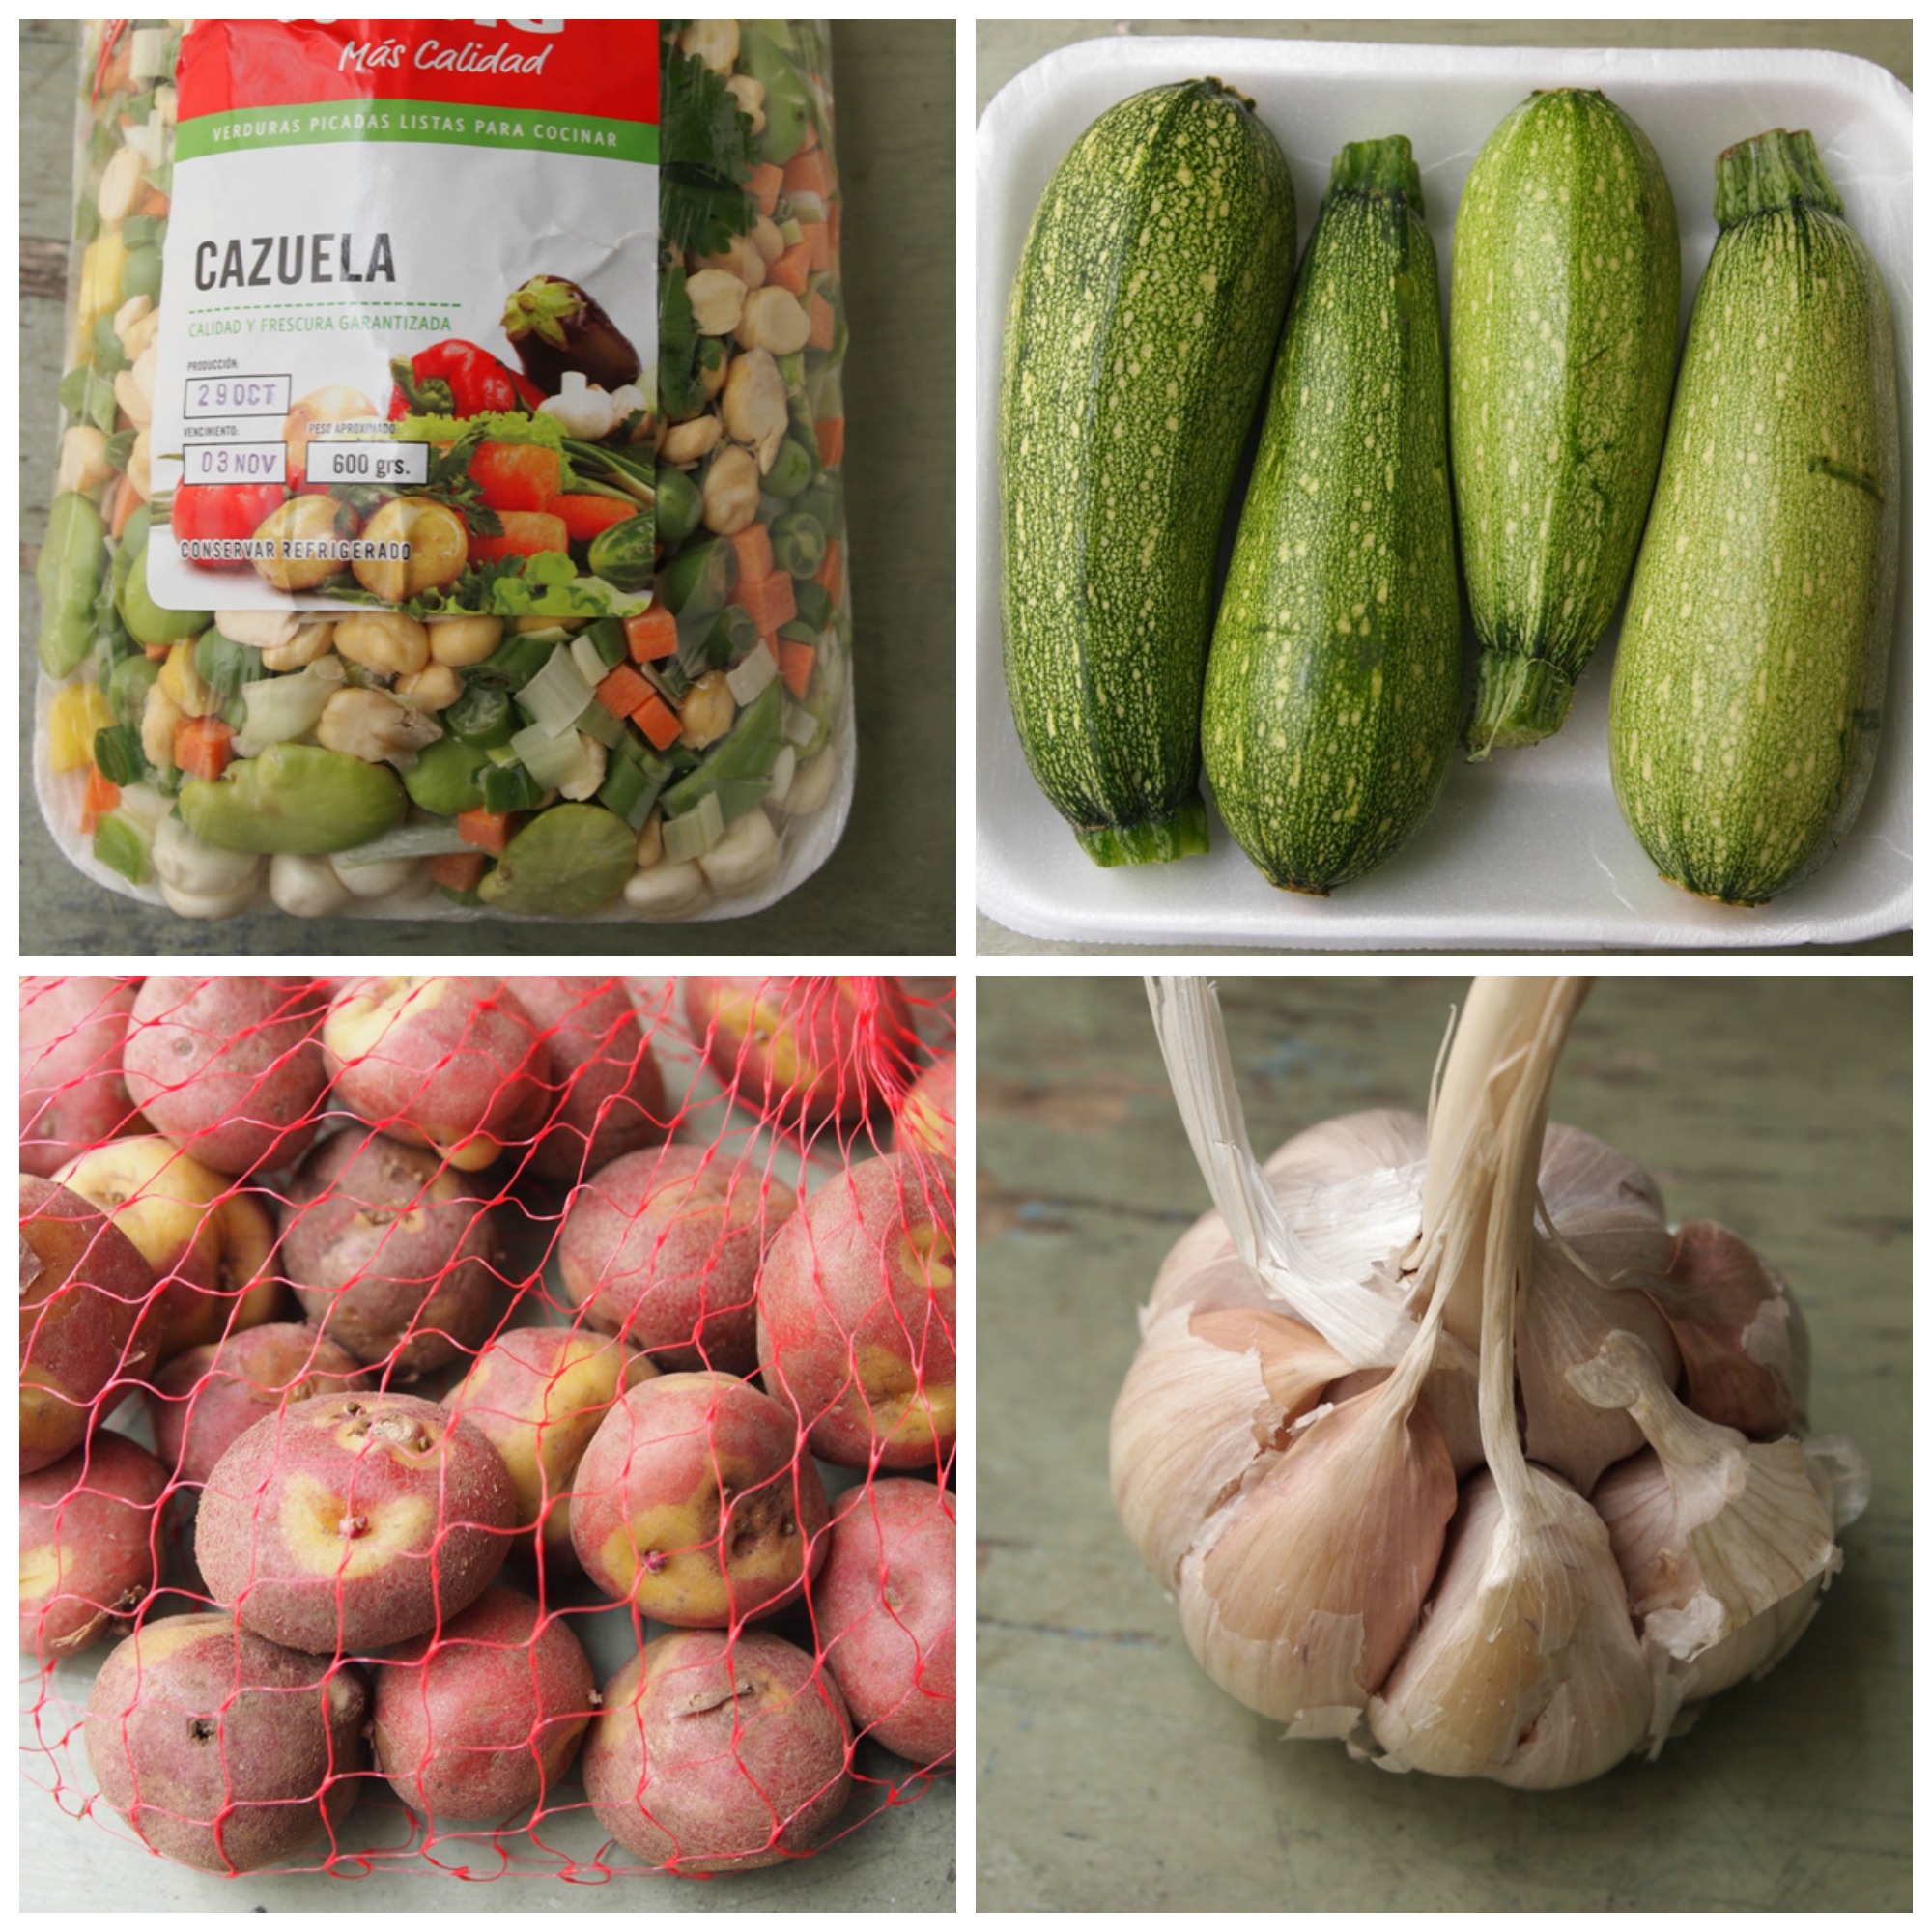
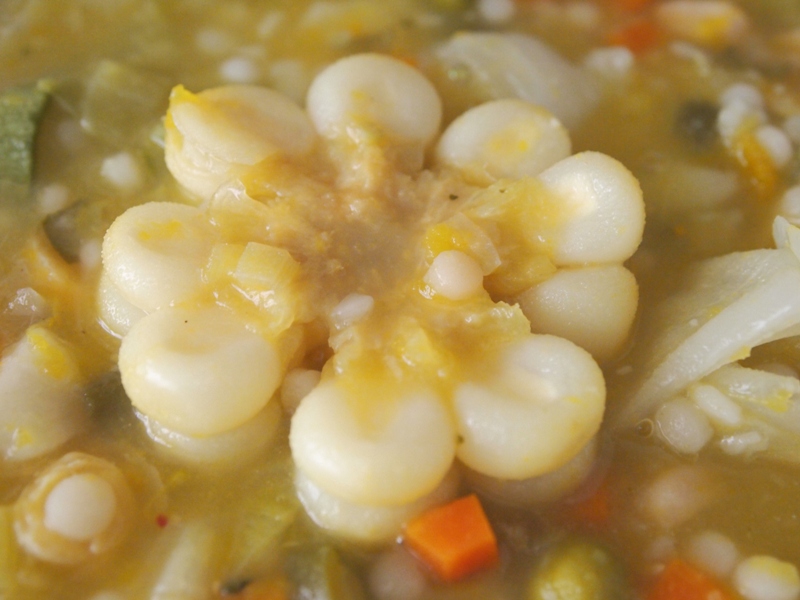
Cazuela is one of those comforting dishes you can find in most homes, but rarely in restaurants. The reason is probably its extreme simplicity, but sometimes the best things in life are the less pompous ones, right? This is our vegetarian version of Cazuela, (in fact, it is vegan), and if you add quinoa or barley instead of the Israeli couscous I used simply because I had it in the pantry, it can also be a gluten free, and virtually fat free meal.
The traditional recipe is made with beef and / or lamb and hen, which, as you can imagine, makes a very hearty soup. But even though these ingredients add a lot of flavor to the dish, I prefer to make it meat-less and enjoy the taste of each vegetable in all its simple glory.
I usually add some small pasta or rice to this soup, but Israeli couscous is just as delicious and it slightly thickens the dish, which makes it more filling and satisfying. Quinoa, barley, amaranth, oats, or any other grain would also be a perfect addition. Serve in soup bowls with toasted bread on the side (optional), and some aji amarillo paste, if you like it spicy.
Who says winter is synonymous of greasy, heavy, fattening food? This could very well become your go-to vegetarian dish for the winter. It certainly is one of mine.
I´m sure most of you are familiar with the traditional potato gnocchi, covered in creamy sauces and cheeses. But what if you used yucca instead of potatoes? That is exactly what I did today, and I knew beforehand that they were going to be delicious, because I often replace potatoes with yucca, or combine these two ingredients to improve the texture of my potato preparations. Such is the case with the classic papa rellena, for example.
Yucca is neutral in flavor and has an amazing texture, perfect for gnocchi. Follow the instructions in the recipe, and when you add the flour start with half a cup, and check if that amount is enough to keep the dough together. If it’s not, add more, little by little. You don´t want your gnocchi to be heavy, and that will happen if you add too much flour to the yucca.
I served these gnocchi with a parsley cream sauce because I had a bunch of parsley in the fridge and wanted to use it. I could have used cilantro instead, or basil, to make a more typical pesto cream sauce. Sometimes, when I don’t feel like making a pasta sauce, I use the leftover sauce of some stew, which almost always go very well with these gnocchi.
This parsley cream sauce is pale green and has a very intense parsley flavor. If you don´t want to process the parsley in the blender, chop it finely and add it to the boiling cream. This will give cover the sauce with pretty green speckles.
Whenever I make gnocchi I love to make more than I need. Then I put them in a floured tray and freeze them. Once they’re frozen, I transfer them to plastic bags or containers, and leave them in the freezer for up to a month. This way I can have impromptu dinners ready in no time at all (just however long it takes to cook them and make a light sauce). What could be better than having homemade gnocchi ready in minutes?
• 1 cup parsley leaves, processed in the blender with ¼ cup water
• 4 oz Parmesan cheese, grated
Instructions
Peel and cook the yucca and garlic cloves in boiling water. When the yucca is almost tender, season with salt to taste. Turn off the heat when the yucca is completely cooked. Drain and transfer to a bowl.
Puree the yucca and garlic.
Taste for seasoning, adding salt, grated nutmeg, and pepper to taste. Add the egg, stirring with a wooden spoon, and then add ½ cup flour and knead lightly with your hands. If the dough sticks to your fingers, add the remaining flour, little by little, until it doesn’t stick anymore.
Transfer the dough to a floured table, and working with a small portion at a time, roll to form a log. Cut in ½ inch pieces and press each one lightly with the tines of a fork.
Bring a pan with salted water to a boil. Add the gnocchi and simmer until they float on the surface.
Melt the butter in a skillet over medium heat, add the cream and the processed parsley. Season with salt and pepper.
Transfer the cooked gnocchi to the sauce and heat. Taste for seasoning.
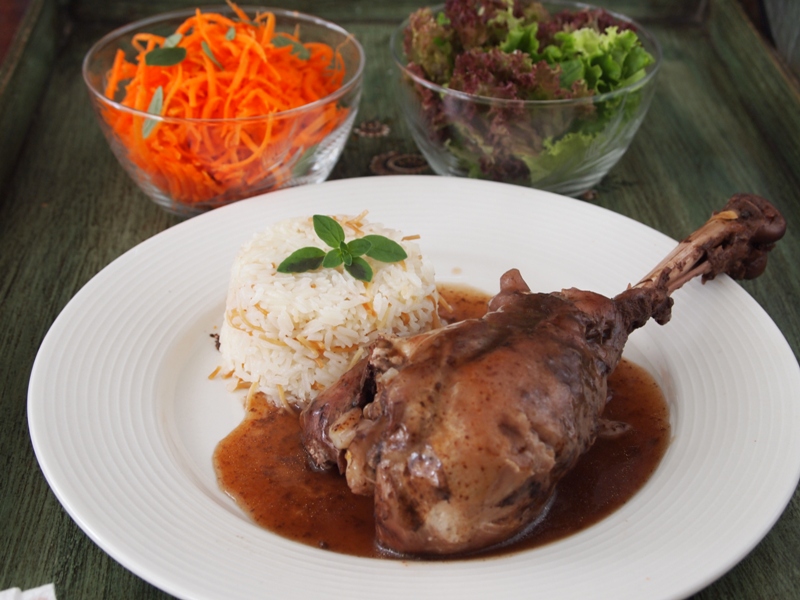
Today was one of those busy mornings when I don’t have the time to think about lunch. When this happens, I sometimes like to buy breaded chicken paillards that will be ready in no time. All I need to do is add a fresh salad of finely shredded green cabbage with with carrots, apples, and onion, and a side of mashed yellow potatoes that goes great with the chicken.
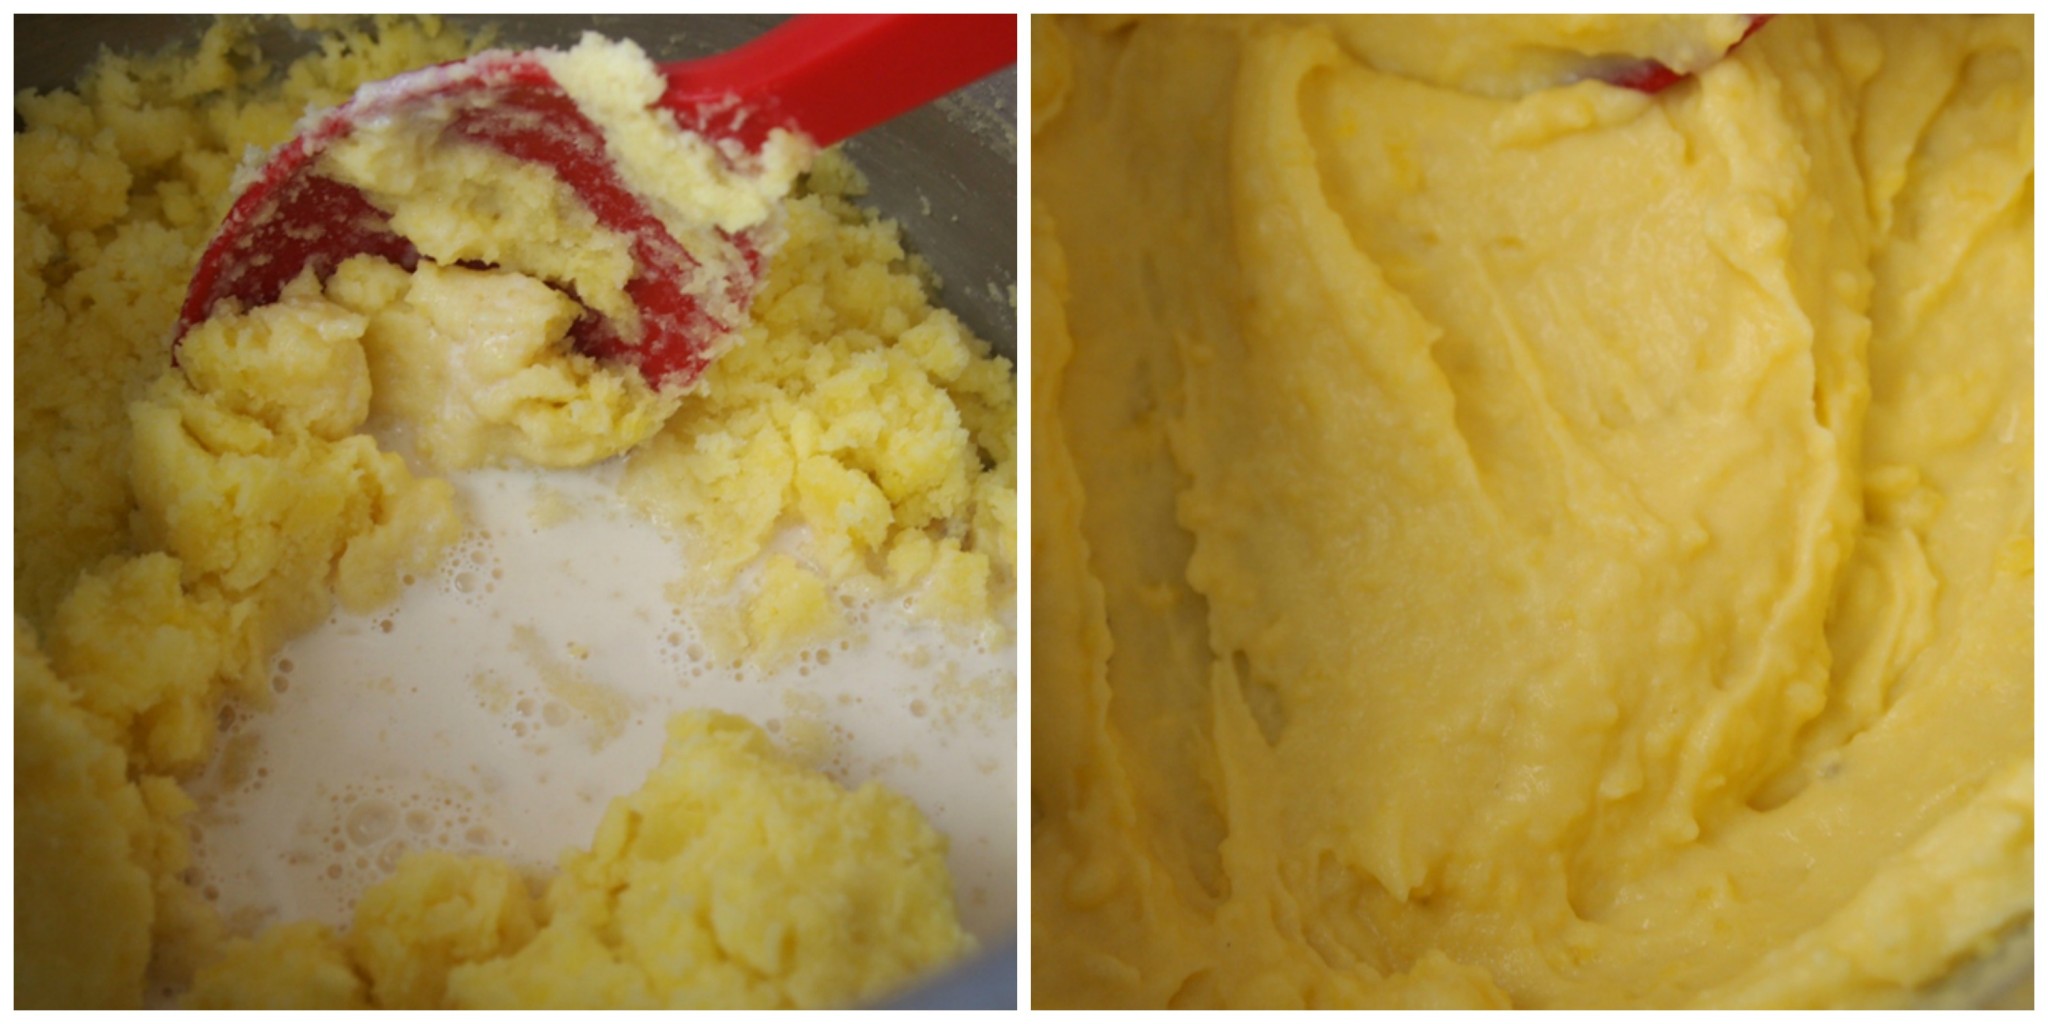
To make this delicious homey dish, first prepare the mashed potatoes. Cook them in boiling water until soft. Drain, peel and press them with a potato masher or pass them through a ricer. Add butter, hot milk, salt to taste, stir, and voilá! Mashed potatoes are ready.
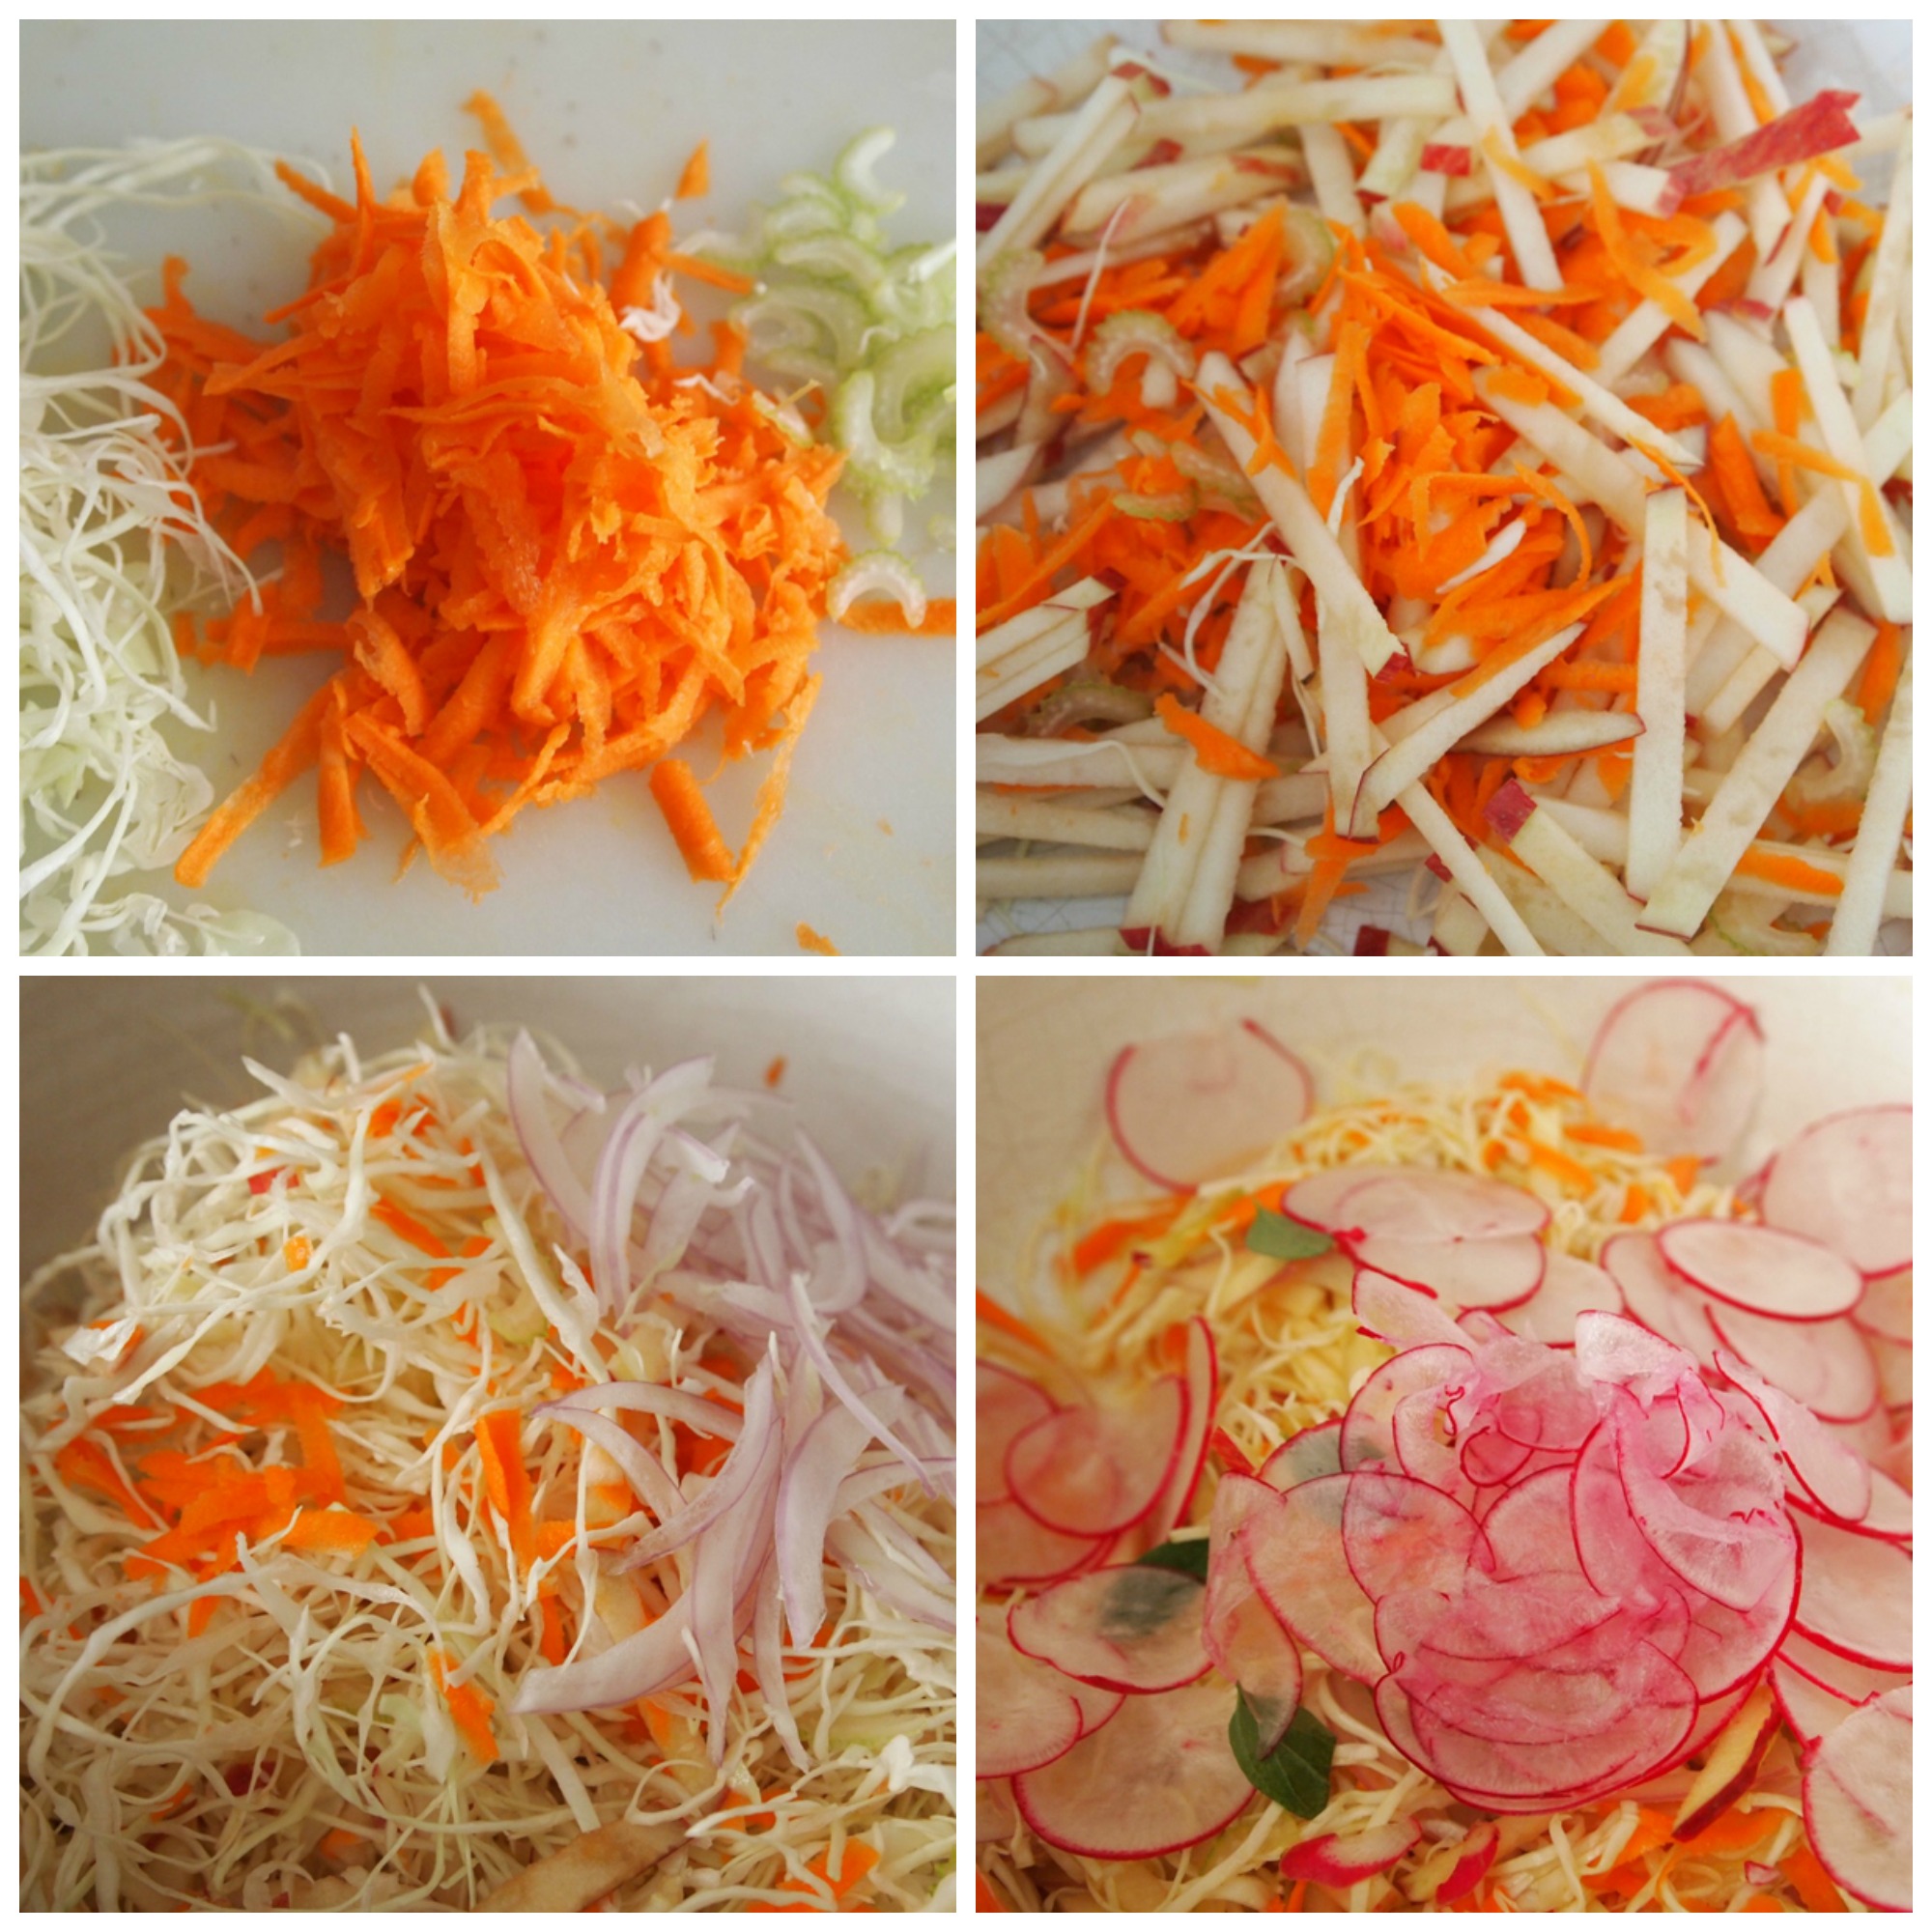
To make the salad I like to slice the cabbage with a mandoline because that way I get very thin slices. Add grated carrots, finely sliced onion, a red apple cut thinly like matchsticks, celery, finely sliced radish, and some fresh oregano leaves. Season with salt and pepper, add lemon juice and olive oil and combine well.
To cook the chicken, heat 2 tablespoons vegetable oil in a skillet over medium heat. Fry the paillards one by one, turning after five minutes or when the edges look golden brown. Transfer to a dish covered with paper towels to drain the excess oil.
Place a mound of mashed potatoes in each plate. Top with the chicken paillards, and serve the salad on the side.
Kids love chicken paillards, especially when served with French fries. Some people add mayonnaise to the dish, or aji amarillo paste, and I love it with hot pepper marmalade,because the sweet-spicy flavor complements the chicken nicely.
What about you? What’s your go-to dish when you have nothing planned for lunch?
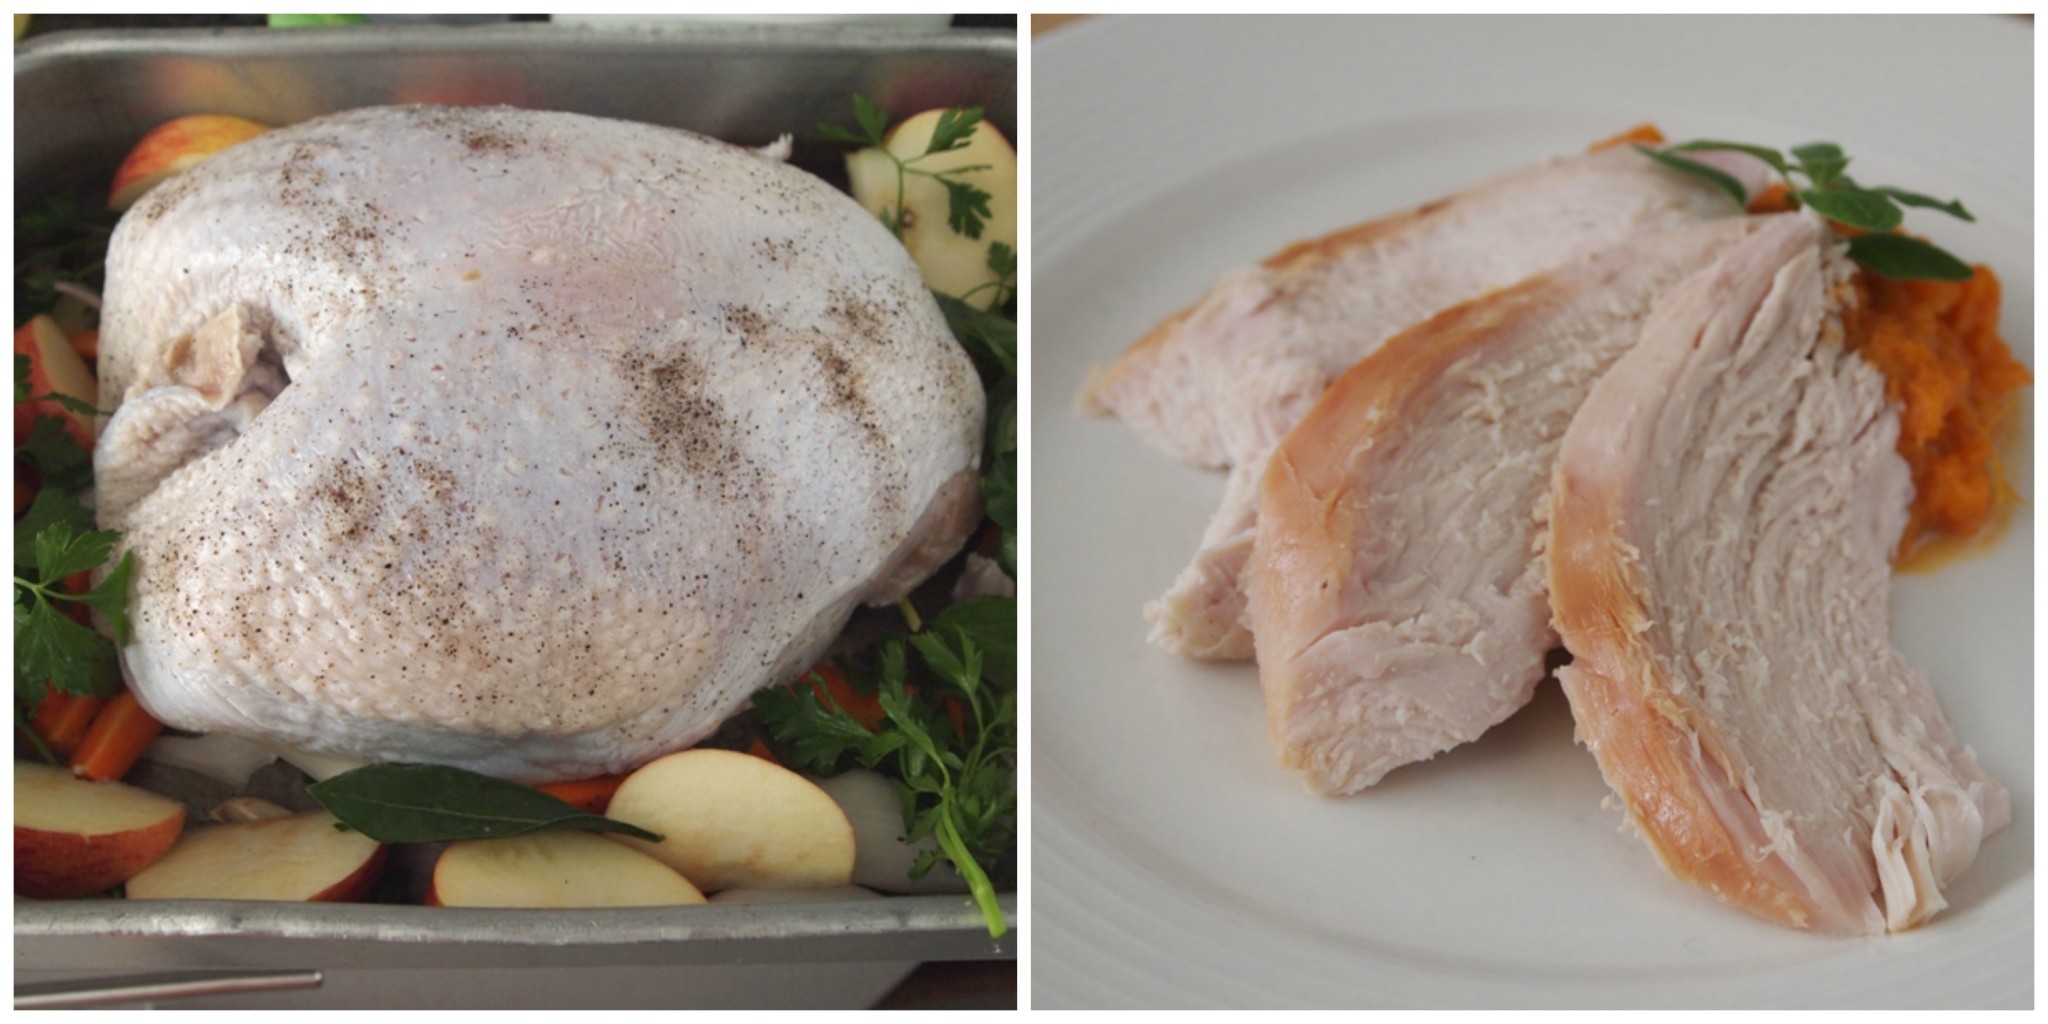
Do you feel like sometimes cooking a whole turkey is far more than you need? I certainly felt this way many times, when the holidays were over and I realized the huge amount of leftovers that filled my freezer and that took a long time to finish off. In the months following Christmas we made sandwiches, chili, Aguadito, salads, ravioli and Empanadas filled with turkey, rice with turkey…. We had to get creative to eat it quickly enough, without getting bored.
After a few years of becoming a slave to my Christmas leftovers, I learned my lesson and started cooking only the turkey breast. And it worked perfectly for us! My son only likes white meat anyway, so it was the best option. After a good marination it resulted in a tender, succulent, and juicy piece of meat that we all enjoyed.
After a while, I got a bit more experimental with this small-portion turkey cooking, and one of the resulting recipes consisted of turkey drumsticks, made by following a traditional and very criollo recipe. I marinate the drumsticks in soy sauce, garlic, and aji panca, and cook them in a flavorful broth with bay leaves and dried mushrooms. This dish was such a hit that I have been using the same recipe -with slight variations- for many years now. It’s always a success.
You can serve it with the typical holiday sides of apple and quince puree and mashed sweet potatoes. Another typical side in Peru is what we call arroz moro, which, to put it simply, is rice with toasted angel hair. A fresh salad can never be missing from my Christmas table, and one of my favorite options is to make a simple shredded carrot salad.
Season the legs with garlic, ginger, aji panca paste, soy sauce, wine, bay leaves, and pepper. Marinade overnight.
The following day transfer the turkey legs and the marinade to a saucepan. Add 1 ½ cups water and cook covered, over medium heat, until the legs are tender, (about 1 hour and 30 minutes).
Chop the dried mushrooms, and add to the saucepan with their water after 30 minutes of cooking.
Taste for seasoning, and discard the bay leaves.
Dissolve the potato starch with 3 tablespoons cold water. Add to the saucepan, stirring until the sauce is lightly thick.
Arroz moro is the perfect festive side dish to accompany turkey, pork, chicken, or beef in any buffet, especially during the holiday season. It is very easy to make, every bite is bursting with flavor, and it keeps well…so what more could one ask for? It’s very probable that you have most of the ingredients to make it in your kitchen already, but if you don’t, feel free to substitute any of the them or to change them to suit your taste.
Dark cola is a must if you want to give this dish a pretty tanned color and a hint of sweetness (it´s amazing how the sugar in the cola is almost imperceptible in the rice). If you want to avoid the cola, use plain water or vegetable stock instead, but for me it’s not the same without it. I like golden raisins but sometimes I use dark ones, or dried cranberries, or dried cherries. The bell pepper can be yellow or orange, to give the rice its vibrant color.
Bacon is always a great addition and a fantastic flavor enhancer. Fry two or three slices of chopped bacon in the saucepan, transfer to a dish covered with paper towels, and proceed with the recipe, adding the bacon with the rice. At this moment you may also add 1/2 cup green or black chopped olives (or a combination), for extra flavor, but in this case be very careful with the salt when you season the rice.
For a quick change, use orzo, red quinoa, or Israeli couscous instead of angel hair pasta. They will look beautiful in the rice, and will give the impression that you have been working for hours in the kitchen.
In Peru we eat all kinds of hot stews, both in the summer and winter. Perhaps because the temperature is so mild throughout the year in many parts of the country, we don’t seem to be guided by the seasons (at least not too much) when it comes to making food choices. For example, we have adopted the Northern tradition of drinking hot chocolate during the Christmas holidays, even though they take place in the summer for us.
If you, however, are looking for seasonal alternatives, here is a great one for the fall and winter, making use of the veggie of the moment in the Northern hemisphere: pumpkin. This seasonal pumpkin stew-turned-rissotto is a warm and comforting option to keep you cozy throughout the next few months.
Locro is traditionally prepared with a giant kind of pumpkin called macreor loche, native to Lambayeque, in the north of Peru. You can use any pumpkin available, however, as long as it has an intense golden color and is semi-sweet. Like most Peruvian stews, locro is served with rice on the side. Combining both in one tasty rissotto is a natural fusion that can’t go wrong.
People from the northern part of Peru are very fond of black shells, which are abundant in the frontier with Ecuador. They are famous not only for their taste, but even more so because they are considered powerful aphrodisiacs. Usually eaten raw, andstraight out of the shell (juices and all), chefs are always creating new ways for diners to enjoy them. If they are in season, you can have them in cebiche, risotto, and many other dishes. The recipe for this rice entree is not only delicious but very easy to make. Hopefully, you’ll be lucky and find very fresh seafood (the kind we find in all the coast of Peru on a daily basis) in the market.
This recipe is the creation of celebrity chef Roberto Cuadra.
Open the black shells and take out the meat, reserving the juices. Discard the shells.
Heat the vegetable oil in a skillet over medium heat, add garlic and ginger, but do not let the garlic brown because it will turn bitter.
Add bell pepper and scallions, and cook for five minutes. Add the reserved black shells without the juice.
Add the rice and stir. Incorporate the juice of the black shells with the sesame oil and the soy sauce. Taste for seasoning, adding salt and pepper if needed.
Serve in two plates, with salsa criolla, chifles, and lime.
* You can find the recipes for chifles and Salsa Criolla in this blog.
As complicated as it looks, this cake is actually very easy to make. I know, I know… by now you must be thinking that my favorite word, regarding my recipes, is “easy”, but they really are. I’m serious.
This peach cake, made with canned peaches in syrup, was one of the first cakes I learned how to make. It was my kids´favorite dessert and they had many of them throughout their childhood, not only with peaches but with grapes, mango, tangerines, and oranges as well.
The cake is made in four easy steps: 1) The sponge cake. 2) The pastry cream. 3) The sliced canned peaches. 4) The topping. You can serve the chilled cake plain, with whipped cream, or maybe with a little ice cream. If you prefer to use your foolproof sponge cake recipe to make this dessert, feel free to use it.
Whenever I make it, I usually prepare everything at once. No previous steps are needed unless you want to bake the cake the day before and get this out of the way. The following steps should be performed in quick succession. Then the cake is let to rest in the fridge until serving time.
If I don´t feel like baking a cake, I replace it with a graham cracker crust, and then continue with the recipe. It´s delicious.
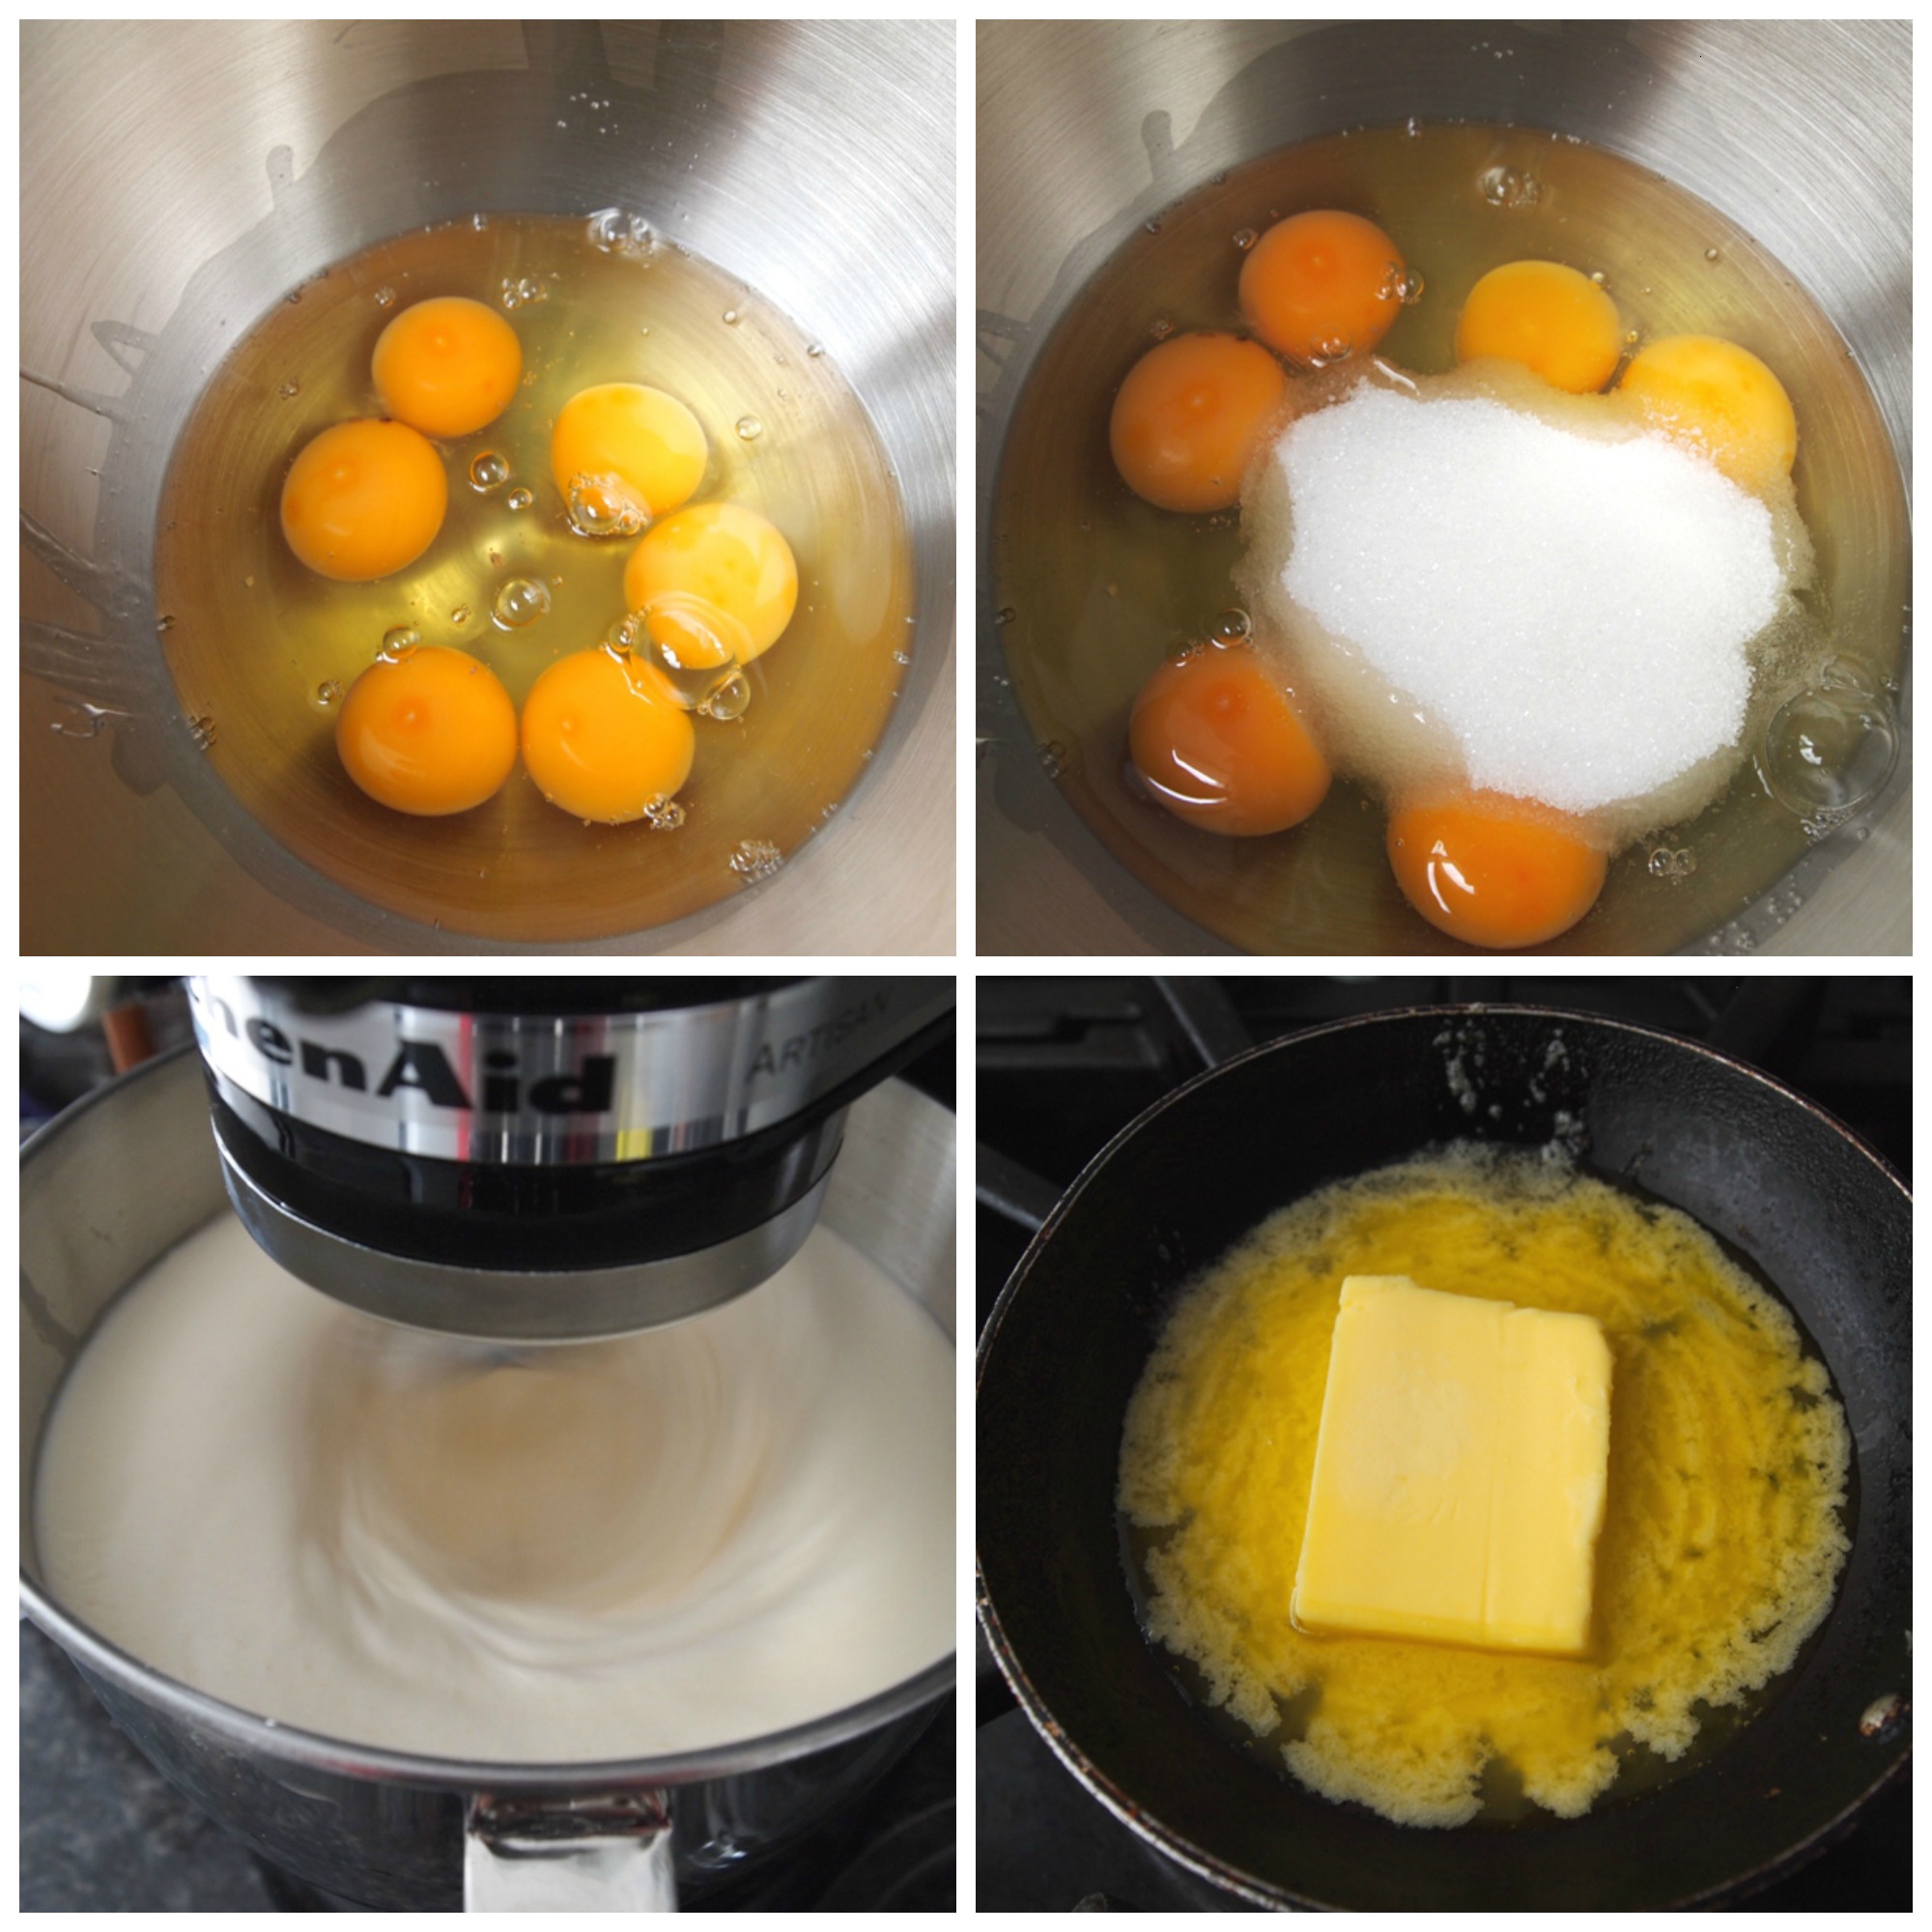
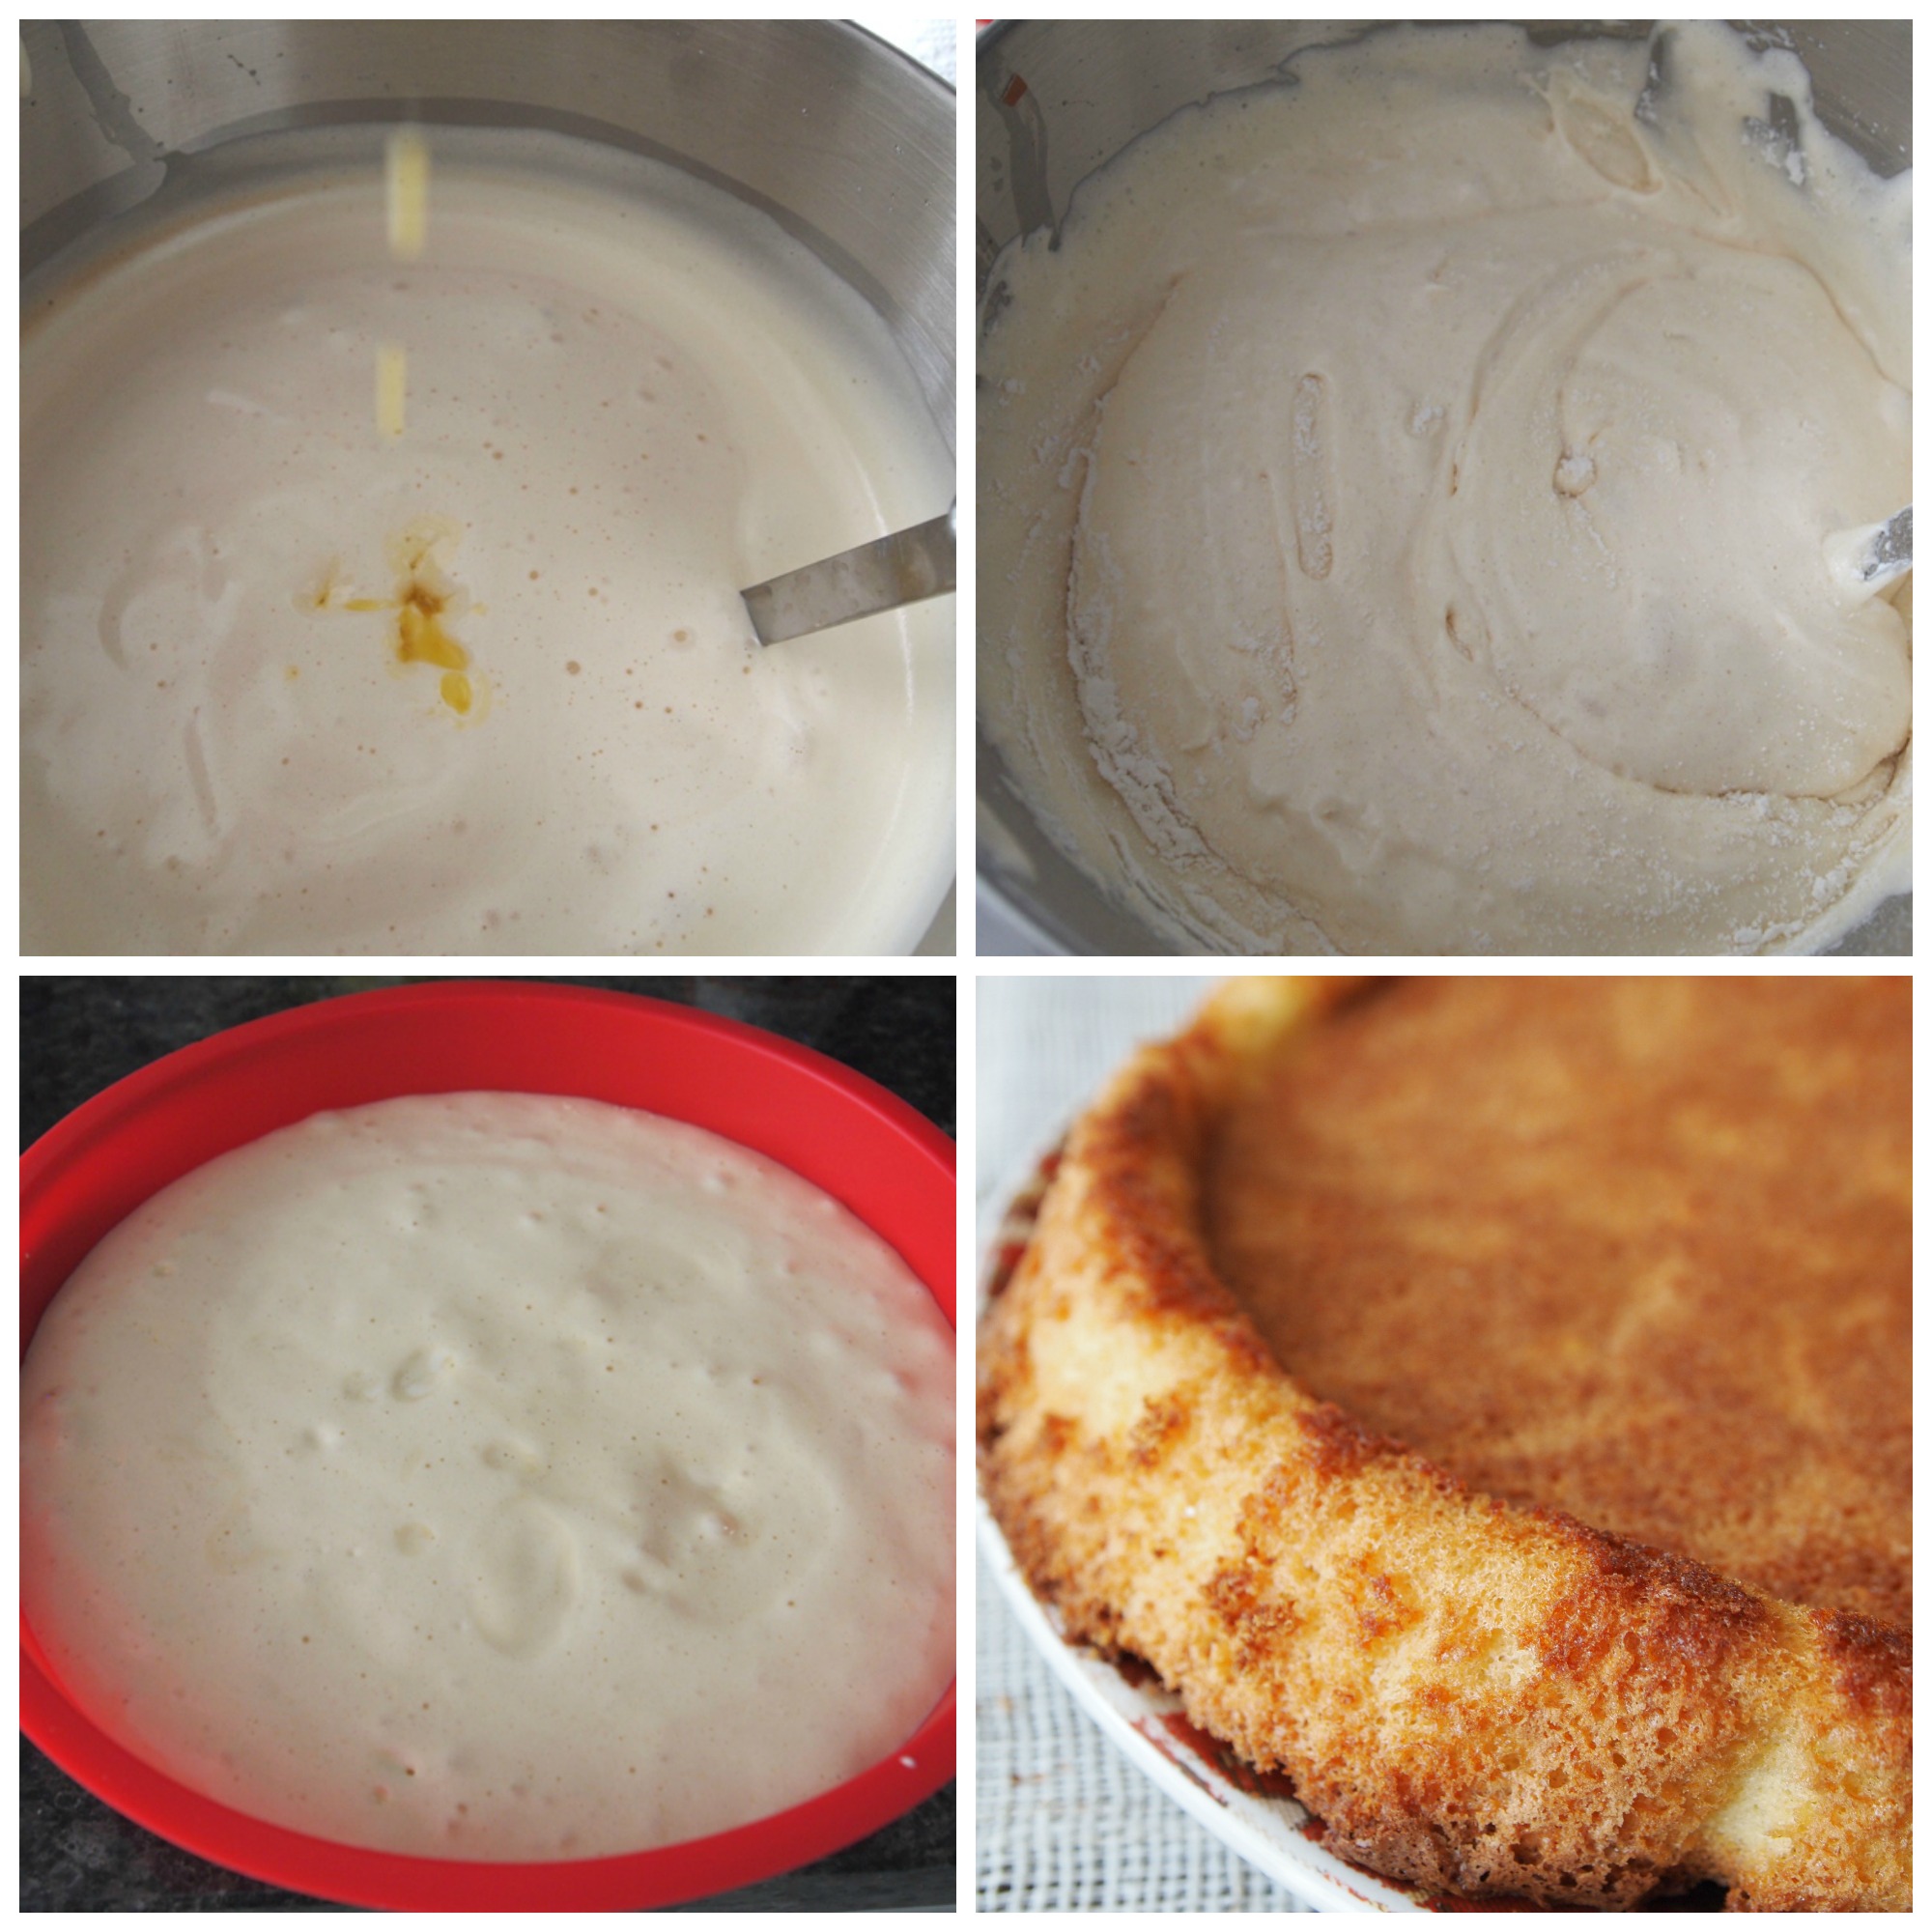
Beat 3 eggs in the mixer at high speed, with the sugar until tripled in volume. Turn off the mixer. Add the melted butter, mixing with a spatula.
Fold in the flour and pour the batter in a greased and floured baking pan. Bake for 25 – 30 minutes.
Cool in a rack and unmold.
Pastry cream:
Bring one cup milk to a boil in a medium saucepan over medium heat. Pur the remaining milk in the vase of a blender with egg yolks, sugar, flour, a pinch of salt, and process until smooth. Pour into the saucepan with the hot milk.
Cook, stirring often, until thick. Add the vanilla and butter, and turn off the heat. Cool for 10 minutes and pour over the cake.
Slice the peaches and put on top of the pastry cream.
To make the topping: Combine sugar and cornstarch in a small saucepan. Add the syrup, stir and cook over medium heat until thick and clear.
Last night we had dinner at a Peruvian restaurant in NYC, and one of the desserts on the menu was chocolate cake with dulce de lecheand lucuma ice cream. Heaven!
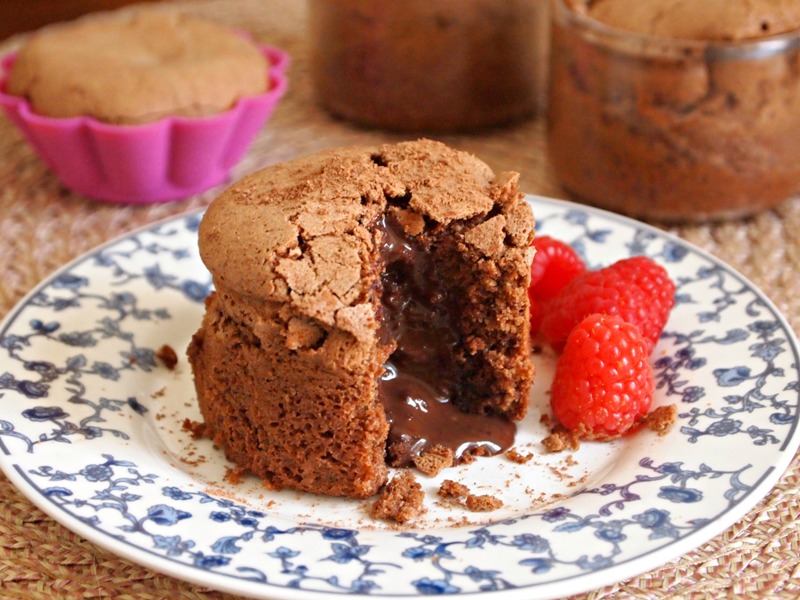
As you may recall, Peruvians are very fond of chocolate cake, and it is by far the most common cake used to blow birthday candles on. Having it last night reminded us of a different version of chocolate cake we made a few weeks ago: gluten-free mini chocolate cakes. These are the perfect dessert for any occasion, and especially for Christmas or New Years Eve, as they are decadent and festive, and can be enjoyed by most people, even those with food restrictions.
The best part is that you can make them several hours before baking time, and keep them refrigerated to bake at the last minute. Serve warm with chocolate sauce or raspberry coulis, ice cream or some fruit on the side.
If you are trying to avoid gluten, this may be the best dessert for you this Christmas or any other time of the year.