Quantcast
Channel: morena cuadra – PERU DELIGHTS
Viewing all 144 articles
Browse latest View live

ámaZ – Vibrant jungle in the city

$
0
0

Barra y Jaguar Fiesta

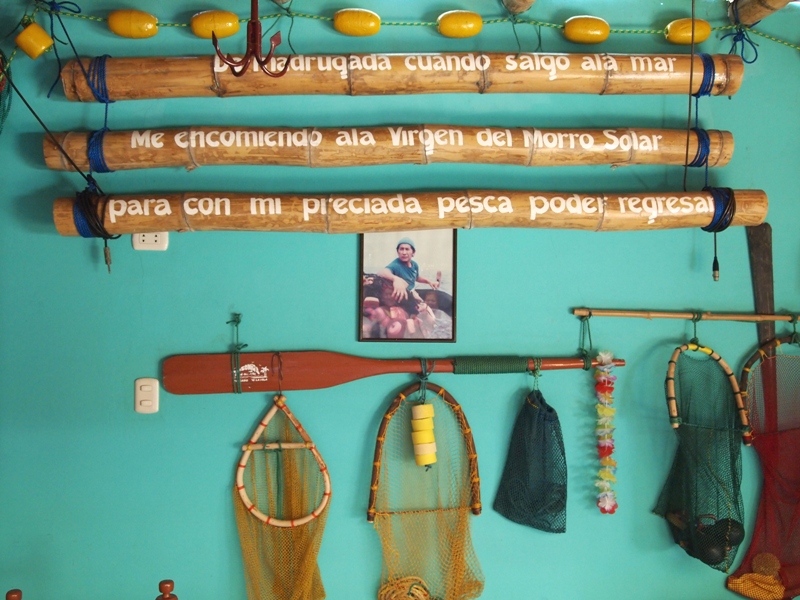
As soon as I entered this restaurant, my senses were transported to the lush Amazon, full of vibrant smells and colors, with the sound of cumbia on the background. ámaZ is beautiful and, like everything touched by the hands of Pedro Miguel Schiaffino, it is refreshingly unique. An upscale Amazonian restaurant has been lacking in Lima for far too long, and no one better than one of our most talented and creative chefs to fill in this gap. I´m ready to dig in and discover its many secrets.

Causa de pituca

Juane de Chonta

The menu offers a long list of items, some of them typical Amazonian food, while others are fusion dishes made with local ingredients and traditional local flavors. If you’re a newbie with regard to this exotic gastronomy, the best suggestion I can give you is to order several plates to share. My friends and I were encouraged to do this by our waiter, and we were very thankful for the tip, as it allowed us to really experience the complexity and originality of this regional cuisine in its full glory.

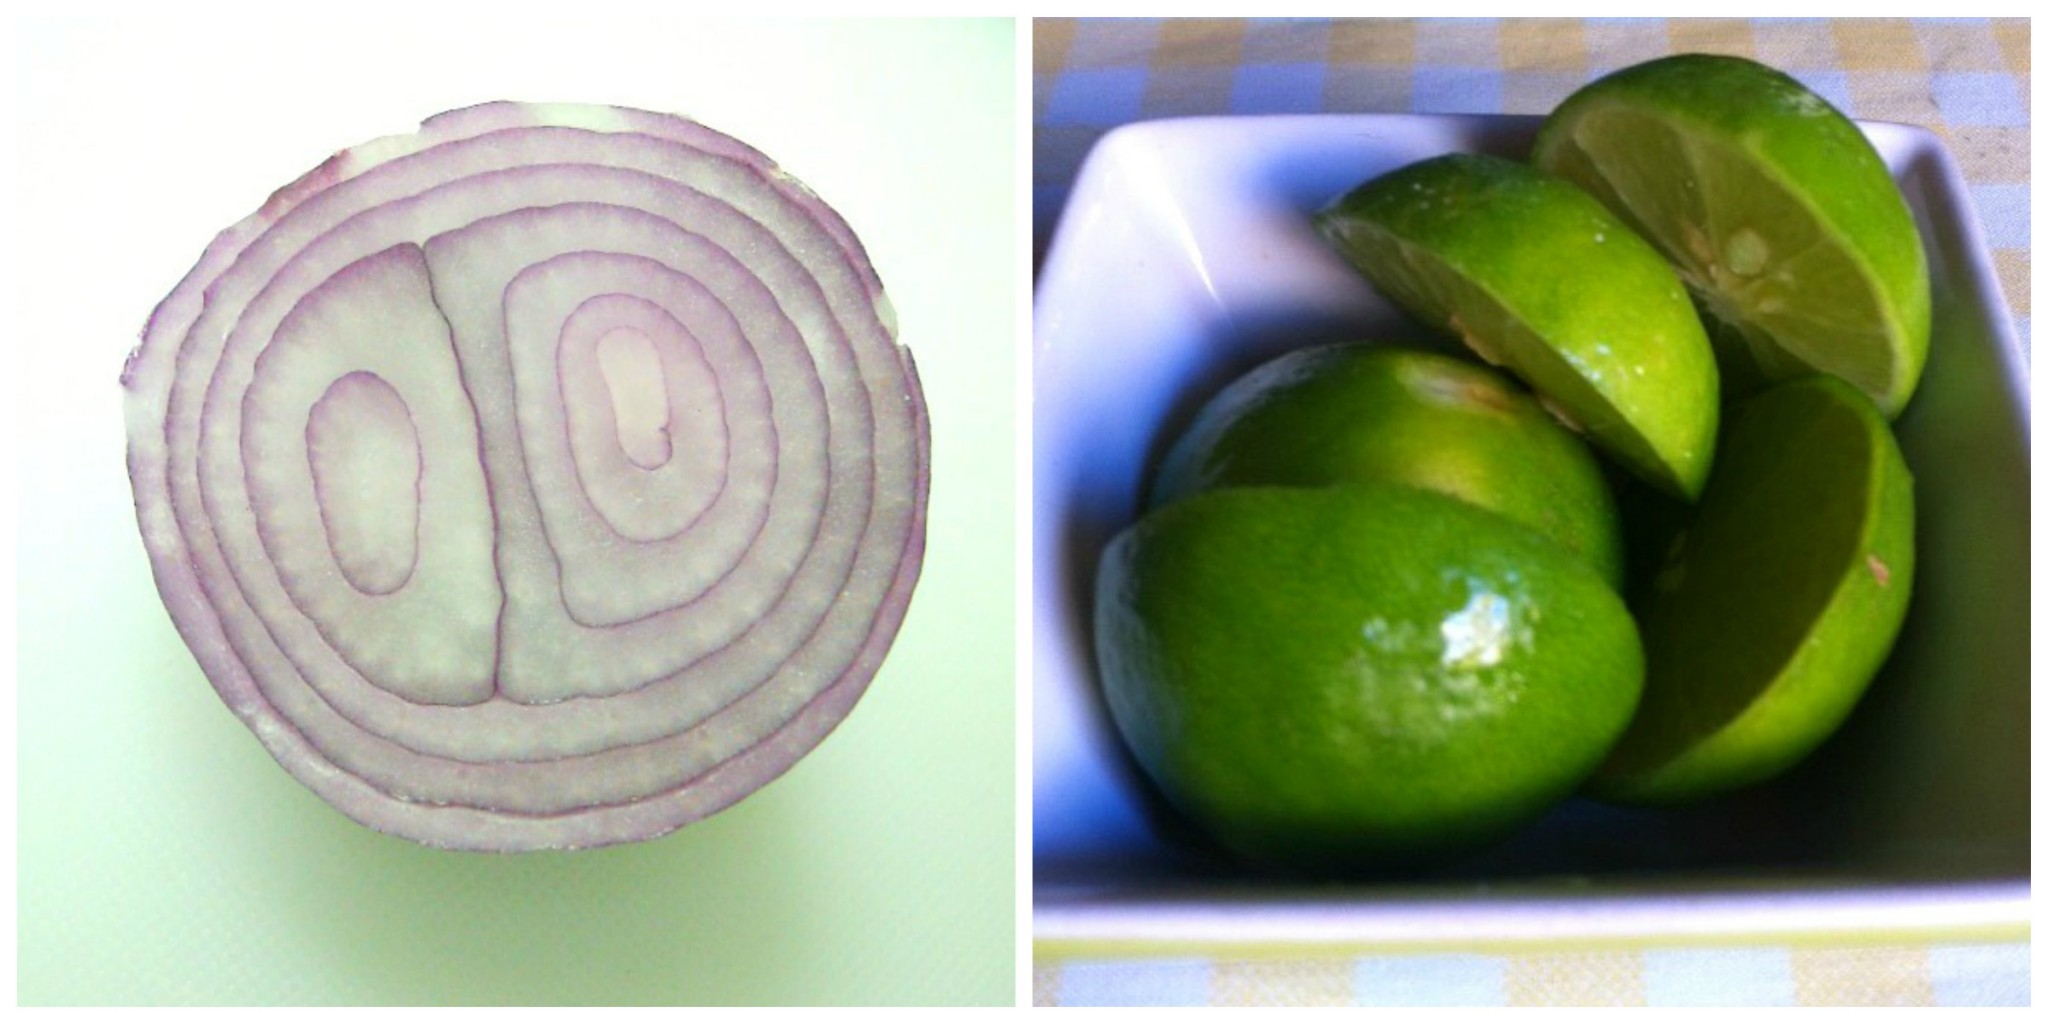
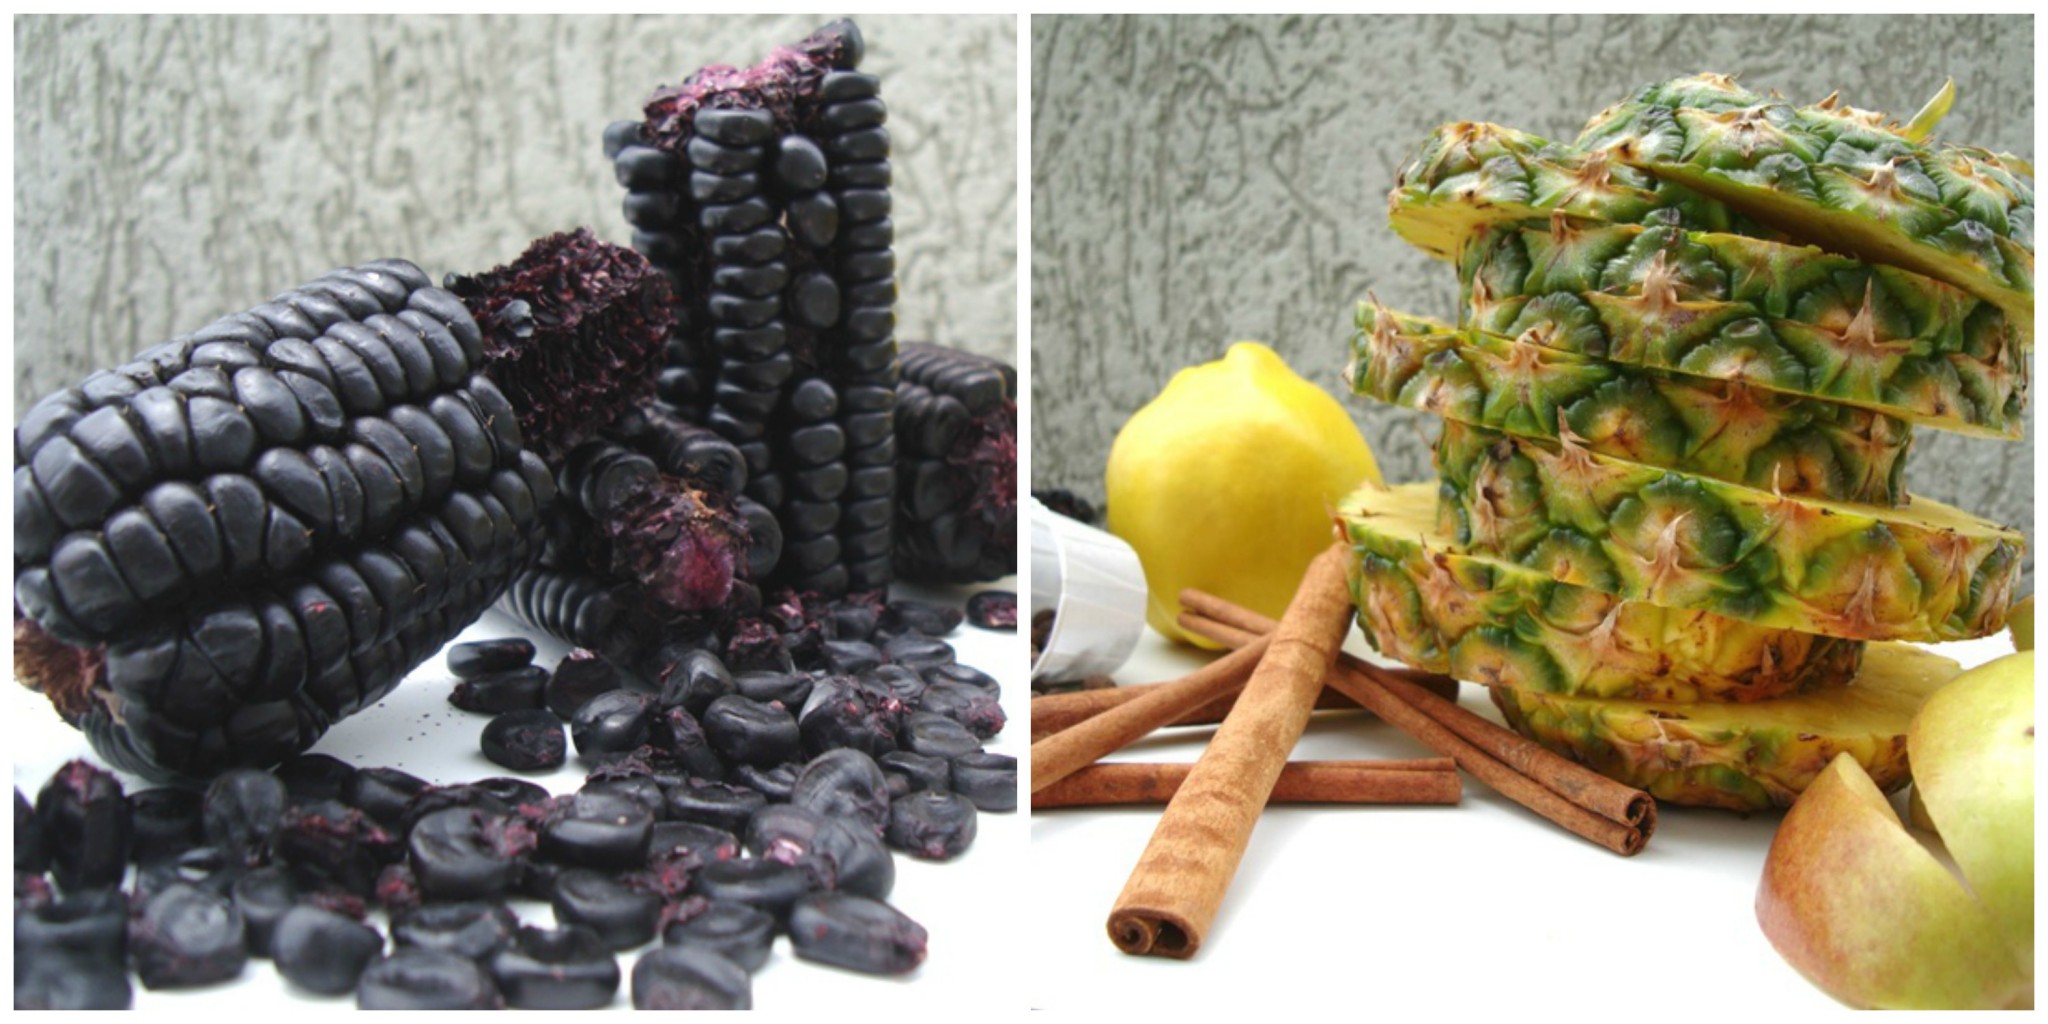
To start the meal, we were offered a wooven basket full of addictive yucca bread, and some transparent-thin and crispy tostones, acompanied by a small bowl of guasacaca (the Venezuelan sauce made with avocado, green bell pepper, and lime juice).  A jar with an ensemble of pickled chili peppers from the jungle stood at the center of the table, waiting to be spread over anything and everything.

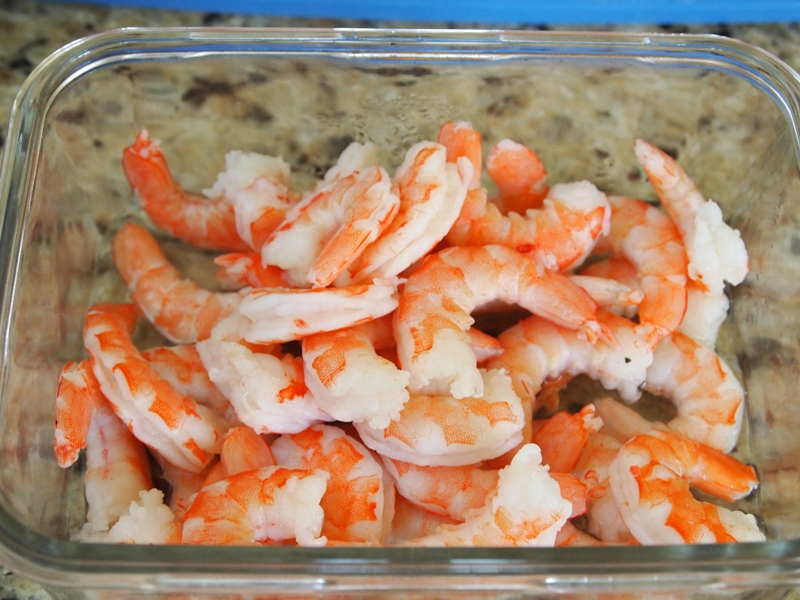
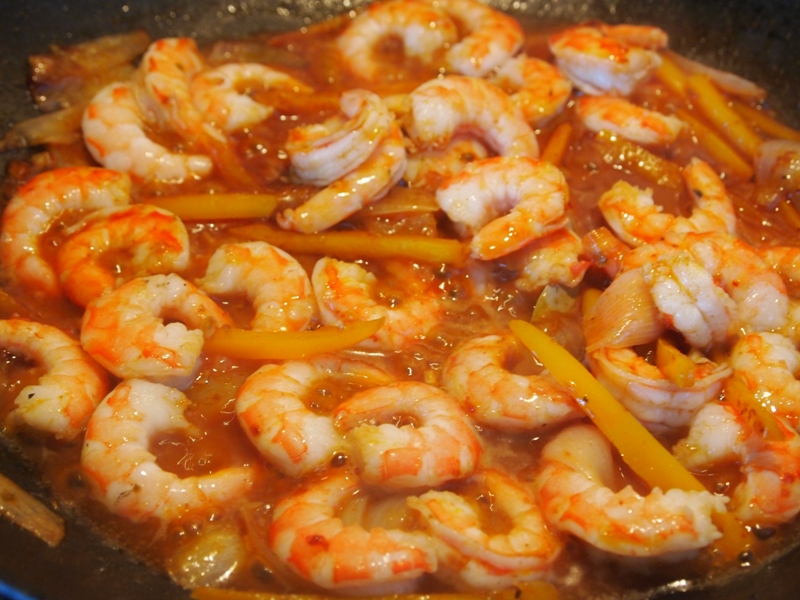
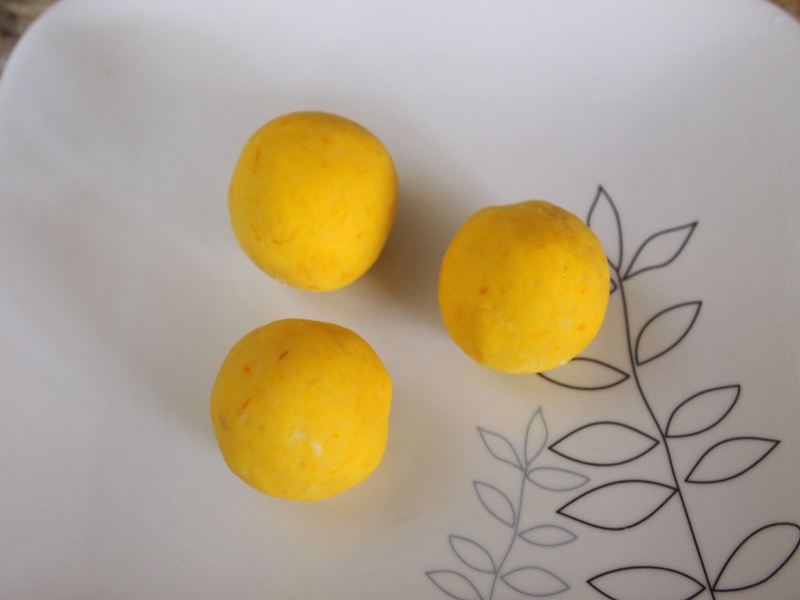
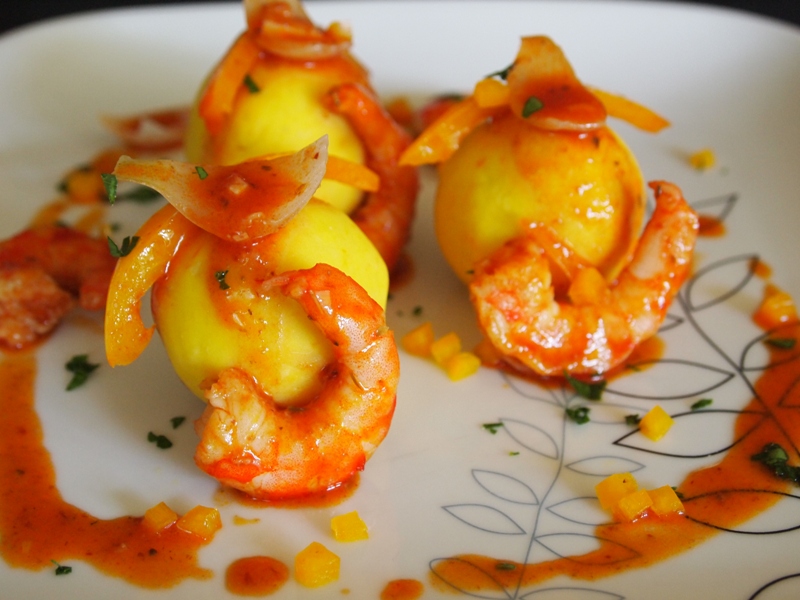
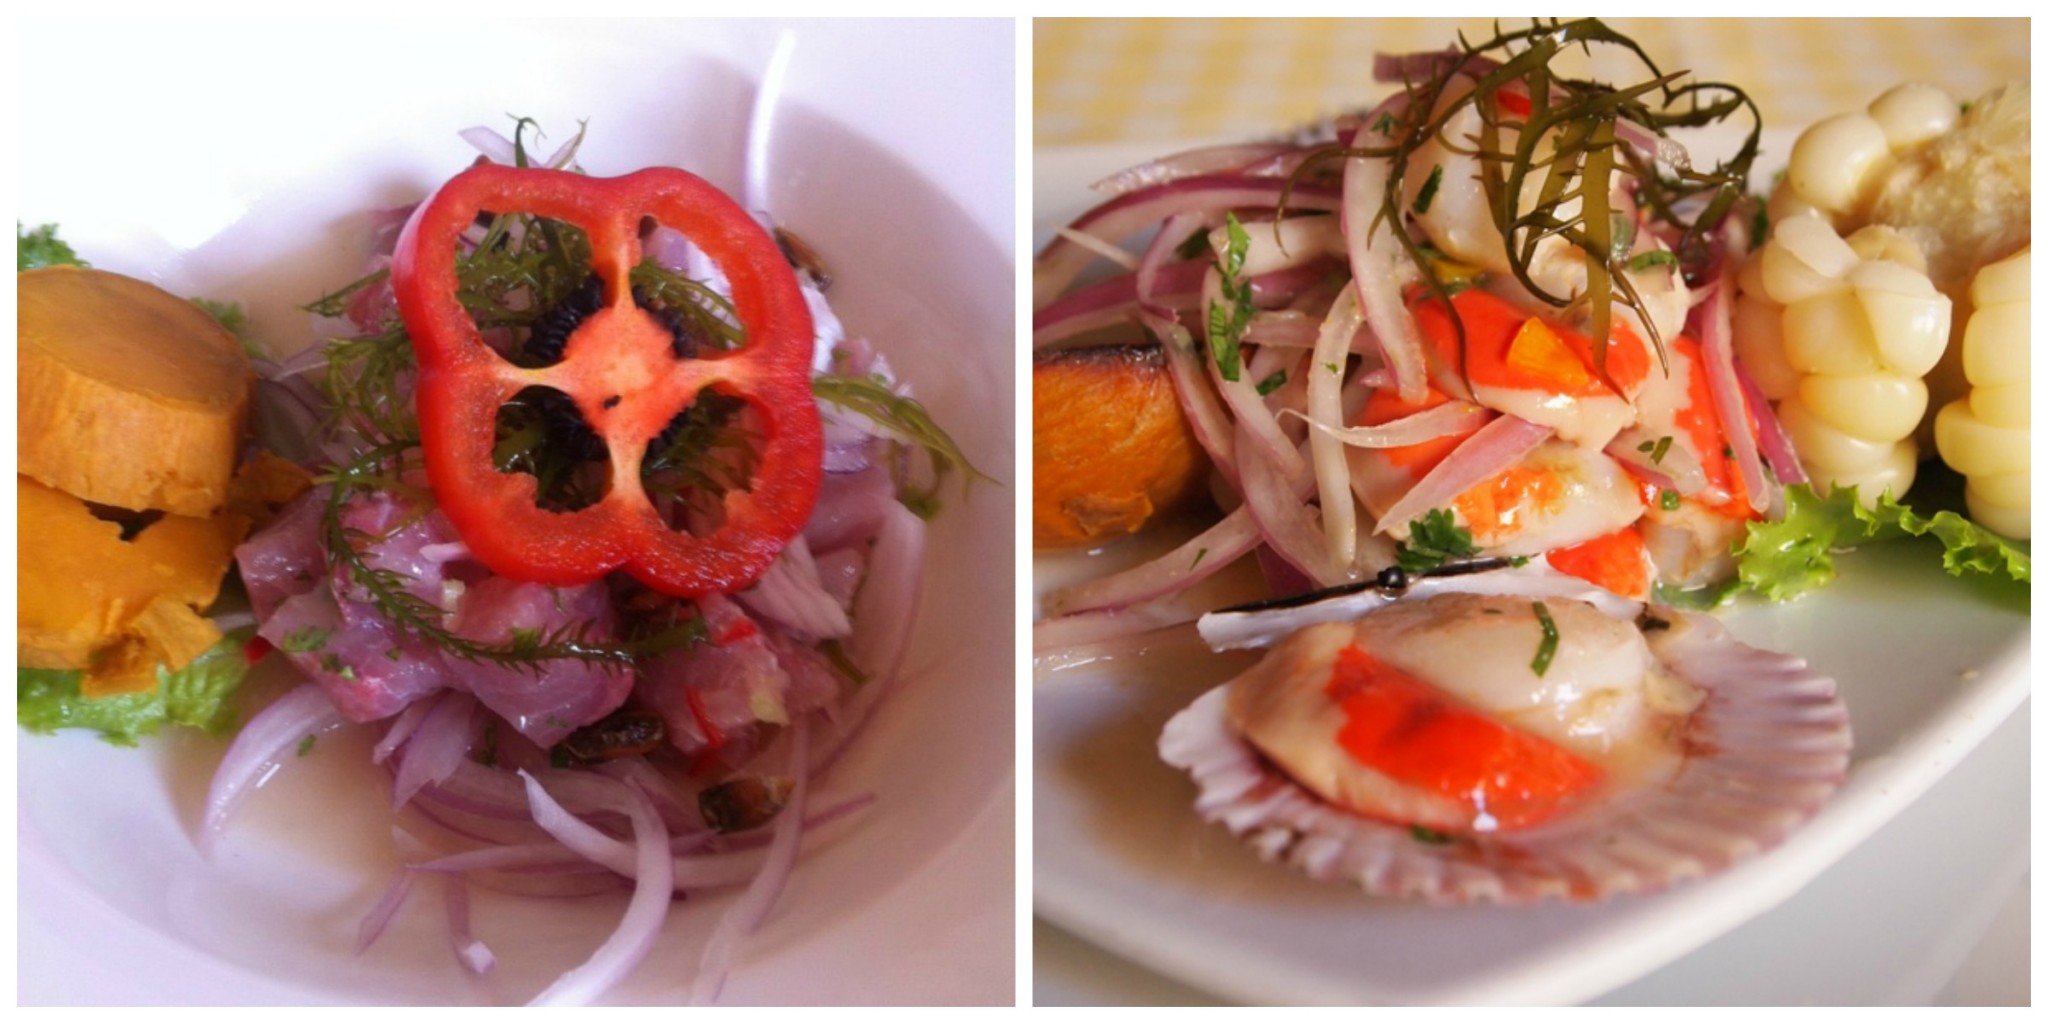
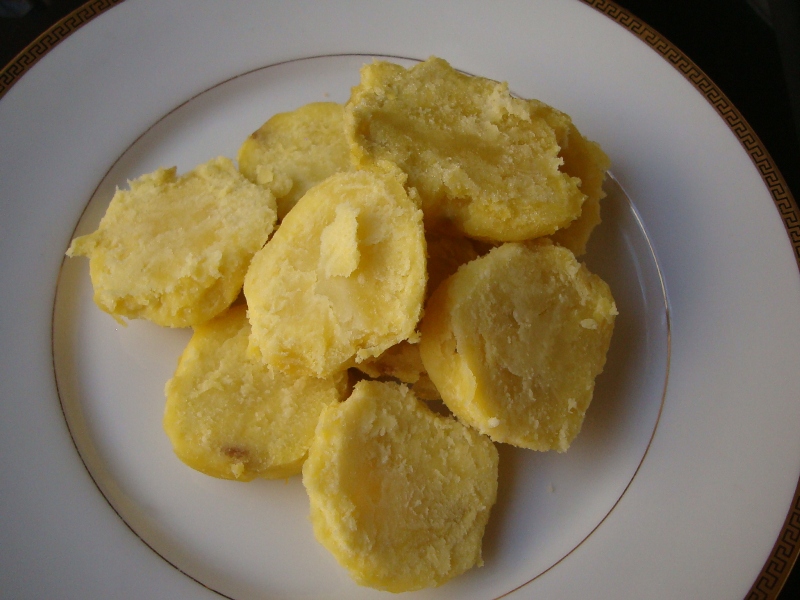
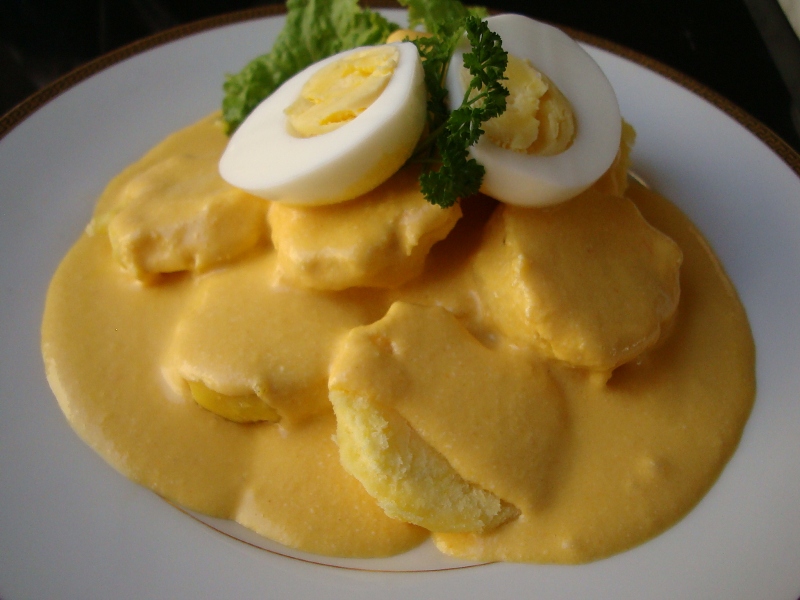
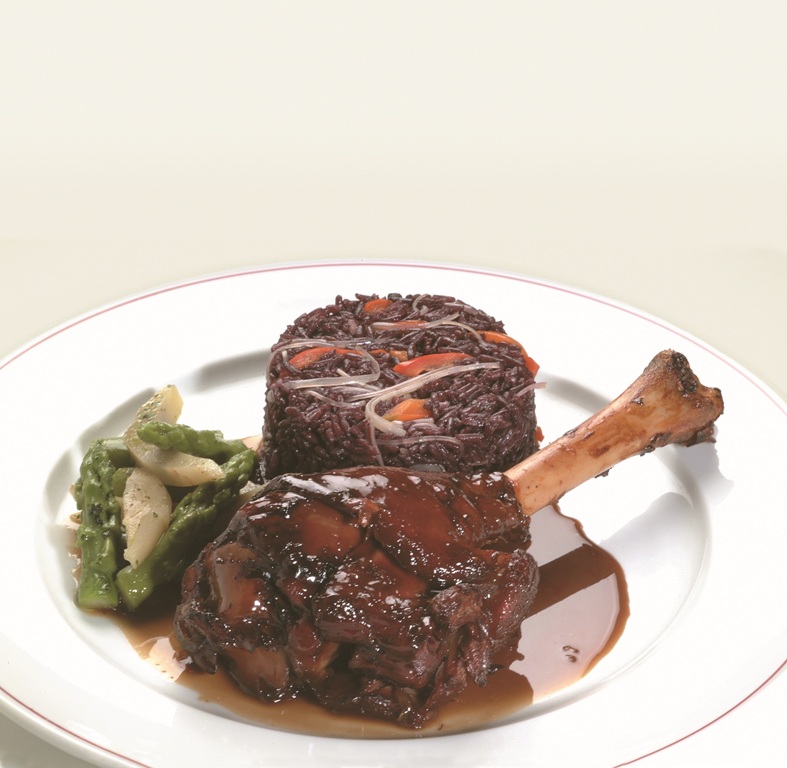
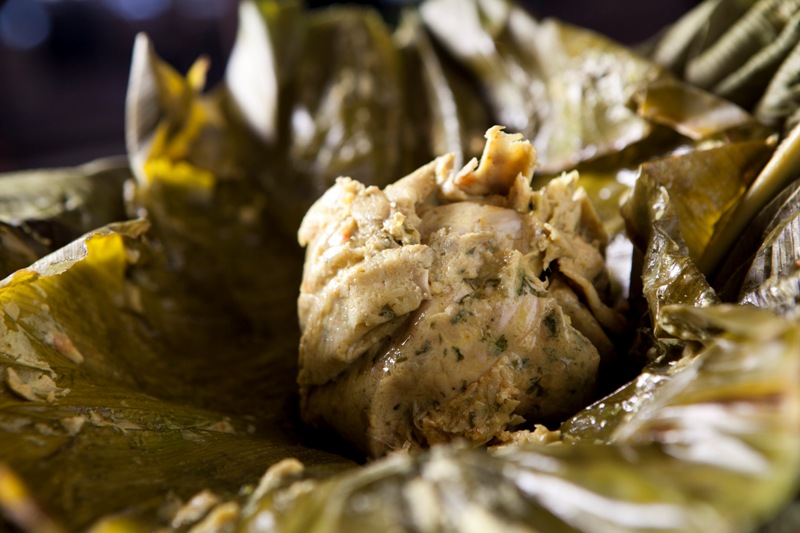
The first appetizer to come was a duck juane. Usually filled with hen meat, not stewed duck, the herb mixture that gives it its distinct taste is the secret preparation of every chef. We loved it as much as the light tiradito with creamy coconut milk and the causa made with pituca (taro) that followed. Taro has a silky texture and lilac color, very different from the Andean yellow potato usually used to make causa. It contrasted wonderfully with the shrimp and spicy sauce. The tiradito, on the other hand, was creamy, velvety, and simply beautiful. Decorated with delicate flowers, the visual was in complete harmony with the subtle coconut aftertaste, and just the right amount of spice.

Fish sudado / Tongoro

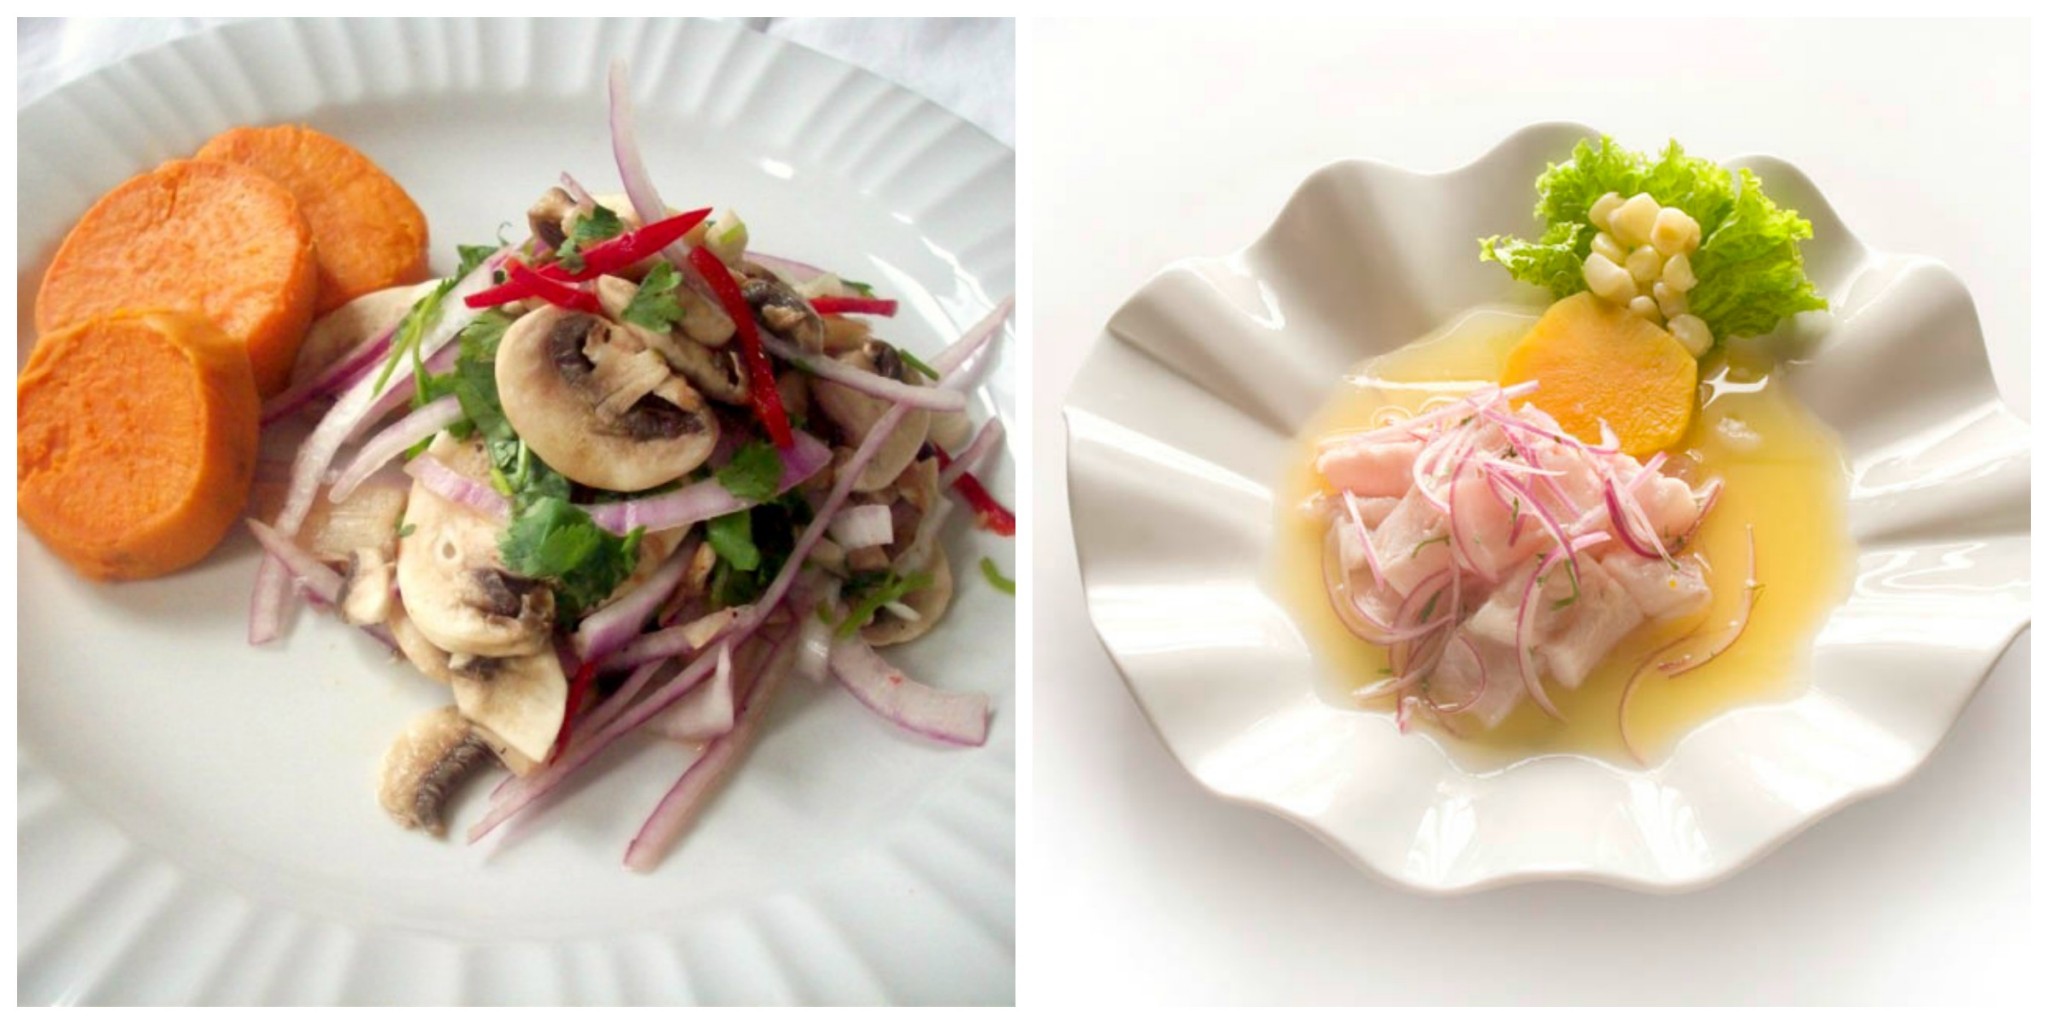
You may find this to be a bit of an exaggeration, but I thought the chonta salad was divine. Made with raw hearts of palm cut in strings like fettucini, it was seasoned with a wise hand to highlight the delicate palm flavor. No distractions, just a refreshing cloud of chonta on the plate. This makes me somewhat jealous of Amazonians, as this is the salad sold at their markets everyday, made with the freshest ingredients, straight out of the earth.

Chonta Salad. AMAZ

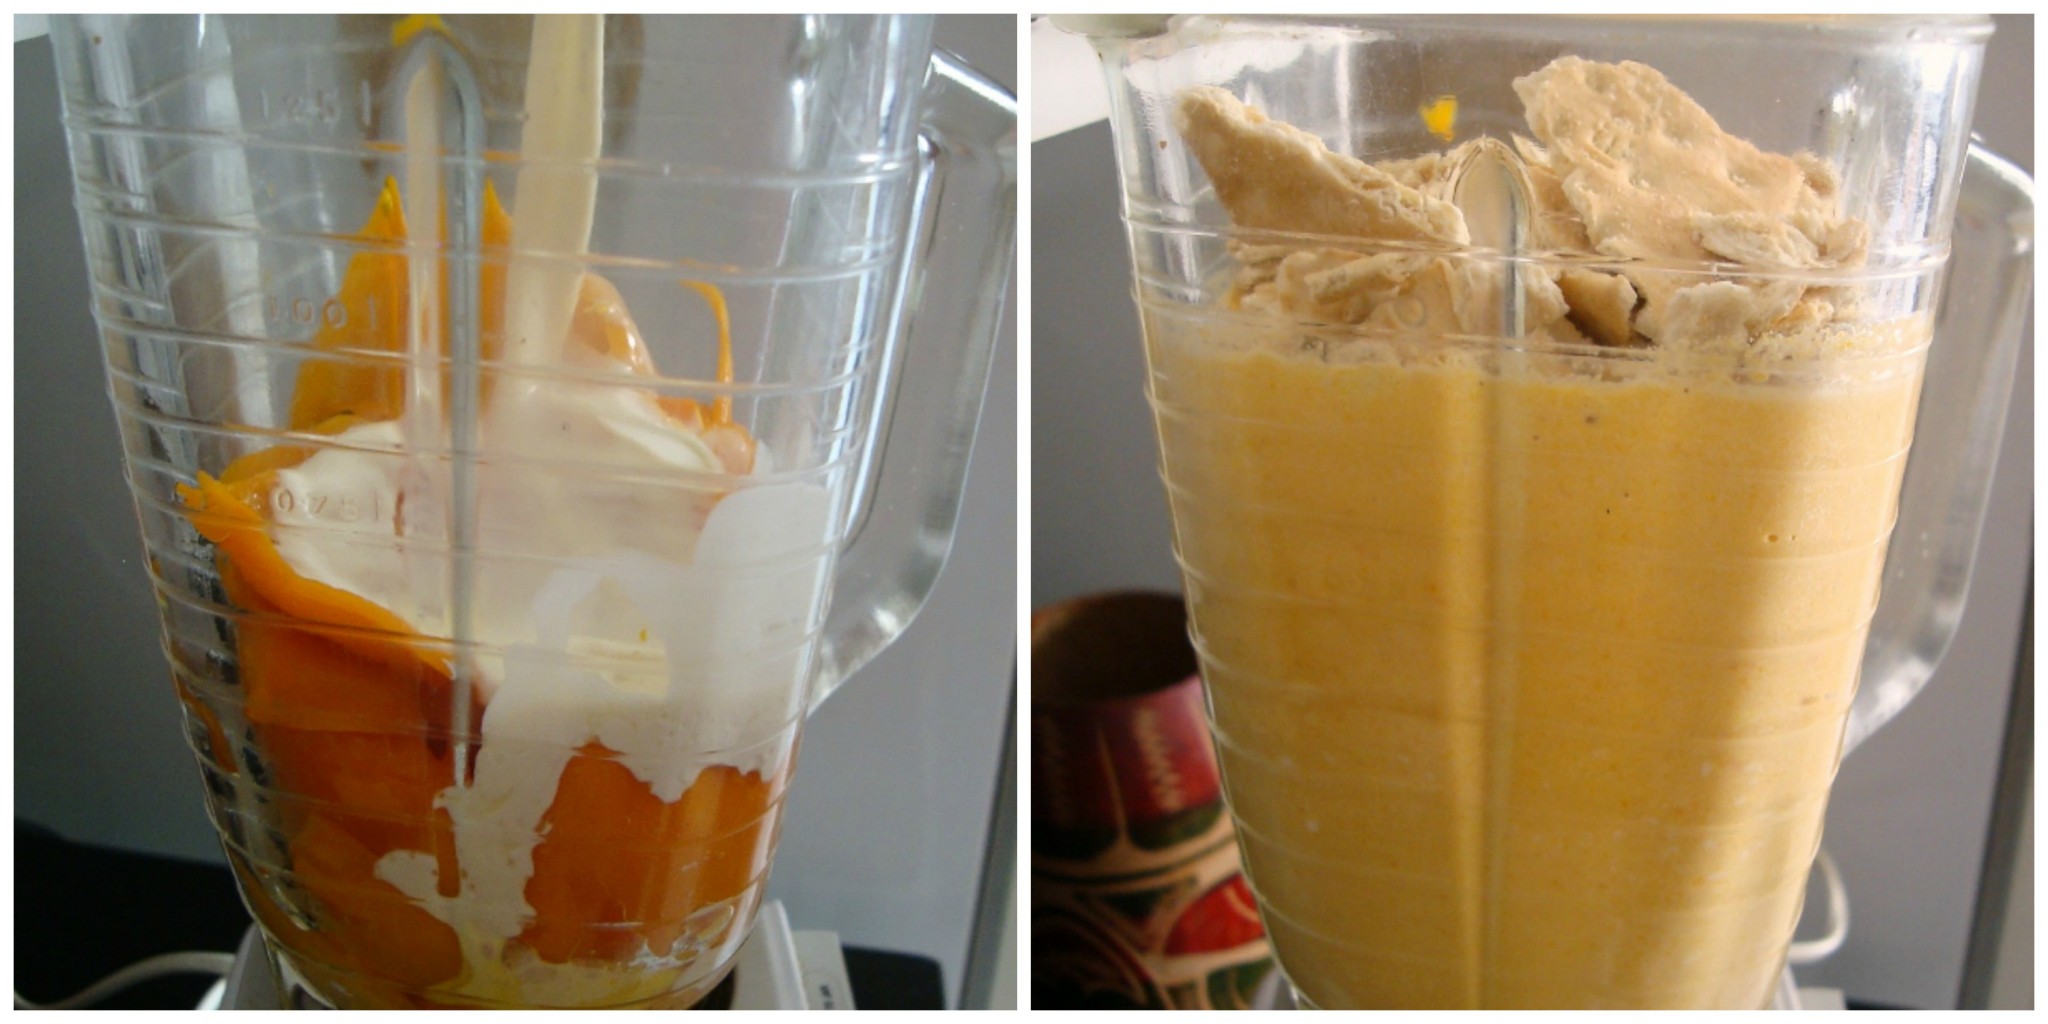
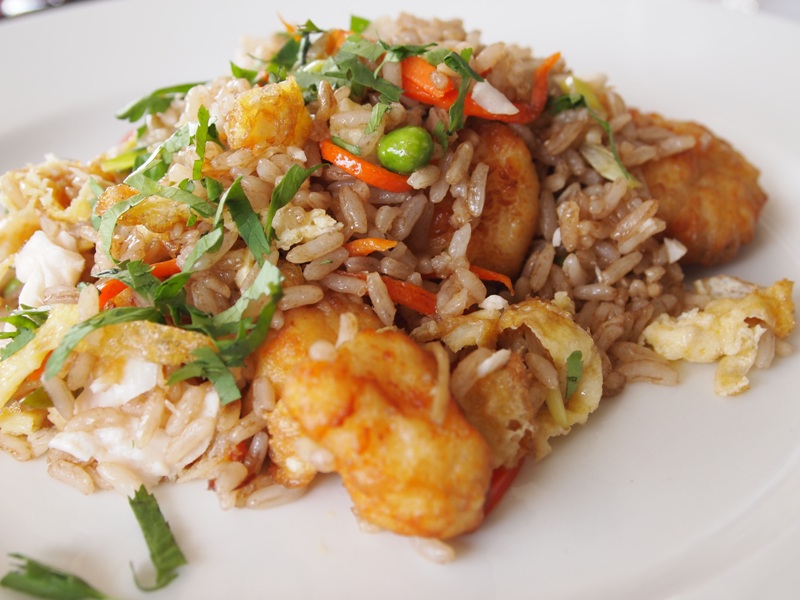
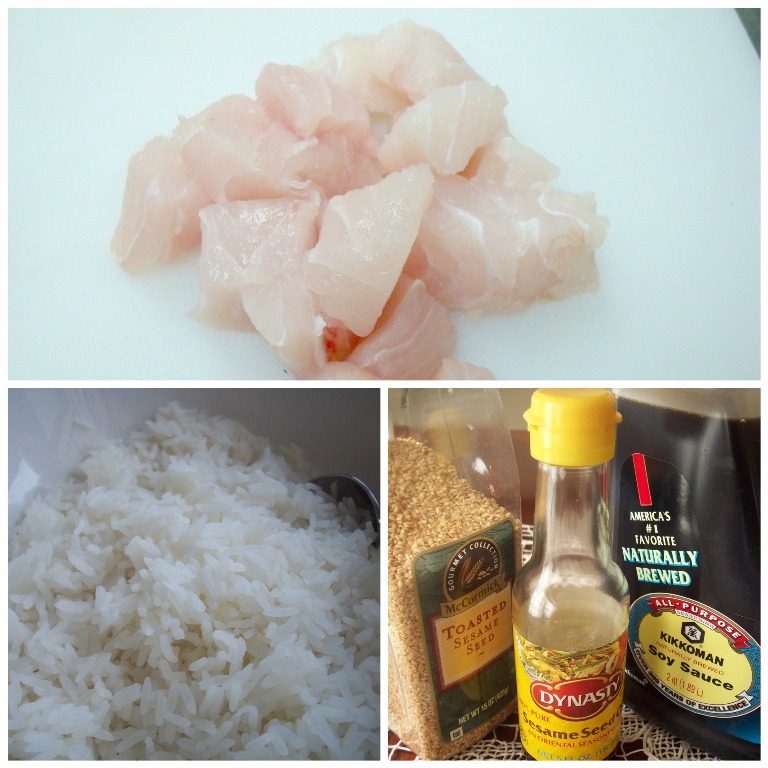
The Amazonian chaufa had cecina (dried salty meat) instead of the traditional shrimp and/or chicken; and the lomo saltado came with fried sweet plantains instead of French fries, giving it a comforting sweet touch that we really enjoyed. Paiche, the Amazon river fish that weighs more than 300 pounds of white meat, came in the form of a stew seasoned with exotic fruit juices that made an original sauce. I wish I had rice to soak in that sauce! The roasted chicken skewers with peanut and coconut sauce were amazingly juicy, and I will be sure to have them when I go back.

Tucsichis de arroz

Vista completa bar de ámaZ

Pedro Miguel 2
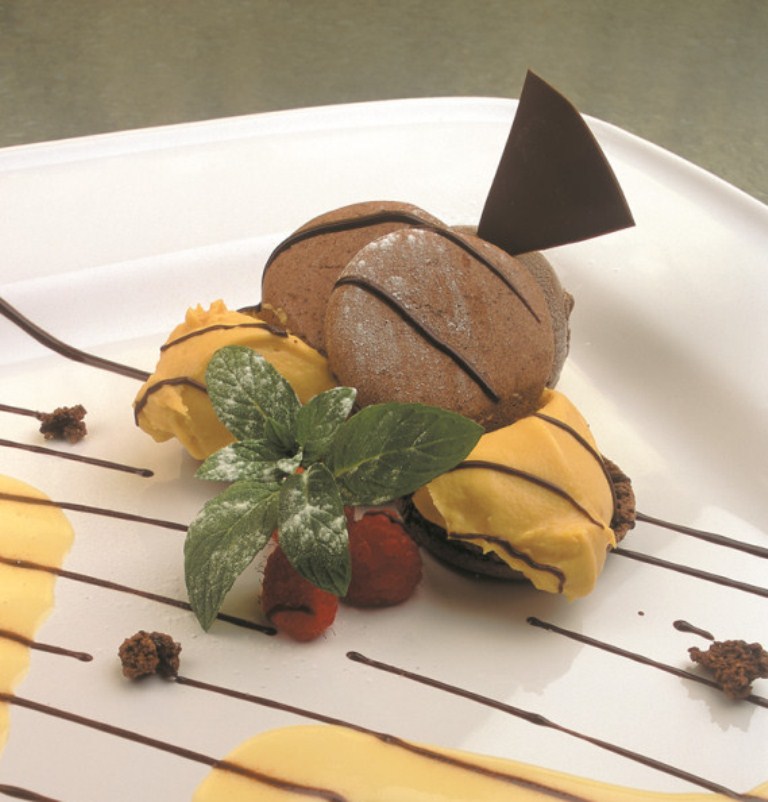
As you can see, we got carried away and ordered way too much food. But I don’t eat this kind of cuisine every day, not even every year! Unfortunately, this extreme feasting left no room for dessert, but I already have my eye on the fruit sorbet samples for the next time I visit.

I can’t forget to mention the stunning drinks based in traditional (and some say aphrodisiac) ingredients like 7 raíces (7 roots), and a mixture of Amazonian fruits like aguajecocona, and taperibá. These are not very well known elsewhere, and are difficult to describe, so you will have to visit ámaZ and try them for yourselves.

Pedro Miguel 1 A few words about the chef. Pedro Miguel Schiaffino is also the owner of Malabar, considered one of the best 100 restaurants in the world. He is one of the first Peruvian chefs to work with Amazonian food and ingredients, making them accesible to people in Lima and other places, and traveling extensively through the Amazon jungle to do research and get the best produce for his restaurants. He is the host of the TV show Desde el Jardín, where he makes many of his recipes, always emphasizing the use of local, sustainable ingredients. Above all, he is one of the loveliest guys I know. If what they say about the cook’s energies going into the pan is right, I’m not surprised that his food is considered one of the best in the world.

Where: La Paz 1079. Miraflores. Lima.


Brazil Nut Turrón

$
0
0

turrón de castañas

We call this cake turrón although it has nothing in common with the Spanish turrón, or the Italian torrone or nougat. This very sweet cake can have either a chewy or a crunchy texture, depending on how finely or coarsely grated the Brazil nuts are. As you can see in the photos below, I grated them so finely that they resembled grated Parmesan cheese, but chopping them instead is another good option. Use pecans if they are easier to find, and they will add a lovely texture and flavor to the cake. In this case it will be a pecan turrón.

turrón de castañas

turrón de castañas

I like to make this dessert up to three days in advance because it keeps fresh and moist. You can use ready-made manjarblanco -or dulce de leche-, unless you are willing to make your own, which is not difficult but takes a lot of time stirring the milks over medium heat to avoid them from scorching in the bottom of the pan. If you decide to do it yourself, just keep in mind that it should have a spreadable consistency and must be cool before using it.turrón de castañas

turrón de castañas

The easiest way to prepare this recipe is to have all the ingredients ready, at room temperature, before you start to make the batter. Preheat the oven, grease the baking pans, and then line the bottom with parchment paper to unmold the cakes with ease. Cool them completely before filling and covering with manjarblanco.

When serving, remember that the filling makes this cake very sweet, so there is no need to add ice cream or whipped cream on top. Just eat it as it is.

turrón de castañas

turrón de castañas

turrón de castañas

5.0 from 1 reviews
Brazil nut turrón
Author: 
Recipe type: Dessert
Prep time: 
Cook time: 
Total time: 
Serves: 8 – 10
 
Ingredients
  • 4 eggs
  • ¾ cup butter, melted
  • 2 cups sugar
  • 1 cup cake flour
  • 1 teaspoon baking powder
  • ¼ teaspoon salt
  • 2 cups Brazil nuts, grated or finely chopped
  • 2 – 3 cups manjarblanco (dulce de leche)
Instructions
  1. Preheat the oven to 350ºF.
  2. In a bowl beat eggs and sugar on medium speed until light and fluffy. Add melted butter.
  3. Add flour and baking powder and beat on low speed. Then add grated Brazil nuts, stirring with a spatula.
  4. Have 2 round baking pans ready, oiled and lined at the bottom with parchment paper.
  5. Pour the batter into the pans and bake for 25 minutes.
  6. Cool on racks. Unmold and when completely cool, cover one cake with manjarblanco.
  7. Put the other cake on top, and cover the whole two-layered cake with more manjarblanco.
  8. To decorate, make lines all over the outer layer of manjarblanco with the tines of a fork.

Turrón

Nutty sweets to impress

$
0
0

Brazil nut candies

Last Friday we posted a recipe for Brazil nut turron, one of my favorite cakes. When I made it a few days ago, I was left with a few cups of spare nuts, and I immediately started brainstorming recipes, because I never like to throw or waste food. Brazil nuts are also quite expensive in Peru, so even a bigger reason to put them to good use.

As I was browsing through my cookbooks, I remembered a recipe I learned at the first cooking class I took when I moved to Lima over 30 years ago. This was a traditional sweets class with the famous cooking teachers Ada and Maricarmen, where I learned to make mana, chocolate melcochas, and this chewy nut balls. From the first time I tried them I was hooked.

Brazil nuts

Brazil nut balls

These sweets are very easy to make, and last for many days. For example, when I made them this time around, I prepared a large container that I kept in the fridge, and formed the balls only when I felt like having one -or many-. The best part of doing this is that they actually become tastier, and the texture becomes chewier and more addictive as the days go by. This is probably the result of the nuts slowly releasing their oils into the mixture.

Brazil nut candies

Brazil nut candies

Brazil nut candies

If you´re a coffee drinker like me, try putting 1 or 2 of these tiny treats next to your steaming cup. They look beautiful and are the perfect complement to your afternoon pick-me- up, as they are not cloyingly sweet. They will also make your friends feel very special if you do this when you have them over for coffee or tea, or use them at business meetings to look extra professional and meticulous.

Another thing you could do with them, is pack them in a pretty decorated box and bring them along to your next birthday party, baby shower, or any other special occasion. I assure you your friends and family will love you for it, and the candy won´t last long. You can even cover half of them in melted chocolate, and put them in the frige until the choc hardens. Mixing these with the regular ones in your gift box will add a dramatic touch, and make you look like Martha Stewart.

Brazil nut candies

Brazil nut candies

Brazil nut balls
Author: 
Recipe type: Dessert / Sweets
Prep time: 
Cook time: 
Total time: 
Serves: 48 candies
 
Ingredients
  • 2 cans condensed milk
  • 3 egg yolks
  • 2½ cups Brazil nuts, coarsely grated, divided
Instructions
  1. Put condensed milk, eggs yolks and 2 cups Brazil nuts in a heavy saucepan over medium heat.
  2. Cook, stirring all the time until you can see the bottom of the pan.
  3. Transfer the mixture to an oiled plate and cool completely.
  4. Toast the remaining ½ cup Brazil nuts until lightly golden and fragrant.
  5. When the milk-nut mixture is cool, put a little vegetable oil in your hands, and form balls with ¾ teaspoon of the mixture. Roll the little balls on the toasted Brazil nuts until completely covered.
  6. Put in candy paper cups.

Sonia – The Queen of Chorrillos

$
0
0

scallop cebiche

You may have never heard of Sonia -or perhaps you have-, but in Lima, this unassuming woman is a rockstar of the culinary world. The story goes like this: a little girl was born in the fishermen’s district of Chorrillos, next to the Pacific Ocean, and grew up lulled by the sound of the waves, and nourished with the freshest fish in every meal. She learned to cook at a young age and married a fisherman, Freddy Guardia, who then became the father of her children.

More than twenty years ago, a famous journalist called Doris Gibson, discovered her talent in the kitchen. At the time, Sonia had opened a small cebiche joint, against her husband´s will, where she served the best cebiche in town. It didn’t take long for word of mouth to start working its magic, and she became an instant hit. From then on, her restaurant, Sonia, has bursted with diners, eager to enjoy the simple but exquisite food that she and her family put on each table.

OLYMPUS DIGITAL CAMERA

OLYMPUS DIGITAL CAMERA

I’ve been to Sonia so many times, that visiting this cebicheria feels like home. Sonia herself used to dance in front of everyone with the live piano music, and Freddy, her husband, charmed the customers with his recited poetry. Their daughter, Sonia Guardia, also trained as a cook and learned all of her mother´s secrets (lucky her), and to this day she remains one of the most knowledgeable and talented fish and shellfish experts I’ve met.

mussels Callao-style

chita a la Sonia

The restaurant is so popular, that you are likely to bump into every famous person in the city, and even celebrities from abroad, such as Anthony Bourdain. Bourdain fell under the spell of Sonia´s food while visiting Lima for his TV show, No Reservations. Ferran Adria, the most famous chef in the world, also praised her food and the freshness of the fish.

rice with langoustines

Oriental fish with soy sauce

But despite all these glamorous visitors, don´t expect fancy decorations or upscale dining here. Instead, be ready for an overwhelmingly tasty experience and a friendly and homey atmosphere accompanied by live music. Freddy may even be weaving his fishing nets in front of everyone, and have a nice chat with you.

Sonia

Chef Sonia Guardia

Freddy Guardia

Sonia

Where: Calle Santa Rosa 173. Altura Regatas. Chorrillos. Lima. Perú.


Graduation Day Cannelloni

$
0
0

Chard cannelloni

*This post has been written in collaboration with Latina Bloggers Connect and the California Milk Advisory Board. We received compensation for it, but the recipe and stories are our own.*

These past few days people have been celebrating many graduations all around the country, and I have been lucky to be part of all the excitement. Two weeks ago, my son, Eduardo, graduated from his Masters Degree. There are no words to describe the happiness and pride I feel for him, and I can understand what many parents like me have felt, looking at their kids pursuing their dreams and making them true.

Chard cannelloni

For this occasion, we started the party with a few bottles of Champagne, and many different kinds of cupcakes. And then, after a much deserved nap, my son woke up ready to celebrate some more. In Peru there’s a strong Italian culinary influence, and pasta dishes are a favorite in many homes, including ours. So for this special day, I planned to make chard cannelloni, filled with ricotta and chard, covered in tomato sauce and topped with Parmesan cheese. It is delicious and feeds a crowd easily, served with a nice green salad on the side.

Chard cannelloni

I had been wanting to share this recipe here for quite a while, but for one reason or another, it never happened. This was the perfect occasion to prepare and photograph it, since we spent the day with my son’s wife and in-laws. They come from an Italian family and some of the Italian/Peruvian recipes in our book, The Everything Peruvian Cookbook, are old recipes that we got from them (including the cannelloni recipe).

Chard cannelloni

Hugo, my son’s father-in-law, is a firm believer that the best way to make this dish is using cow’s brains in the filling to get the perfect texture and flavor, something that my vegetarian daughter would never forgive me! This is the best example of an entrée that can easily be turned vegetarian.  

Chard cannelloni

For me, ricotta is the best part of the filling, made with sautéed chard in olive oil and garlic. A sprinkling of nutmeg adds an amazing flavor to the mixture. I used Real California Cheese, as this post was made in collaboration with them. I´ve been finding it more an more often in the supermarket isles, and was very curious to try their ricotta. What I got was mildly sweet and creamy, ideal for the filling of this dish. Next time I´ll be sure to try their Latin cheeses. As it turns out, California is the leading  producer of Hispanic dairy products. Yum! (Have I ever mentioned my daughter and I are crazy about cheese?) 

In the event that you have leftovers (which I don´t think is possible), cover the dish with plastic film or foil, and reheat as needed in the microwave or in the oven.

Chard cannelloniChard cannelloni


Chard Cannelloni
Author: 
Recipe type: Entree
Prep time: 
Cook time: 
Total time: 
Serves: 8
 
Ingredients
  • Olive oil
  • 4 garlic cloves, chopped, divided
  • 1 medium white onion, chopped
  • 2 pounds tomatoes, chopped
  • 1 teaspoon dried oregano
  • 1 teaspoon sugar
  • 2 bunches rainbow chard
  • ½ pound Californian Ricotta
  • ½ pound Parmesan cheese, grated, divided
  • 1 egg
  • Salt and pepper
  • ½ teaspoon ground nutmeg
  • 1 pound lasagna pasta or cannelloni pasta
Instructions
  1. In a saucepan pour about ⅓ cup olive oil and heat over medium heat.
  2. Add garlic and onion and cook for five minutes. Add tomatoes and dried oregano and cook until the vegetables are falling apart. Season with salt and pepper. Cool to room temperature. If you want a smooth texture you may process the tomatoes in the blender.
  3. In another saucepan heat about ⅓ cup olive oil over medium heat. Add the garlic and the chopped chard stems. When they are tender add the chopped leaves and cook until wilted, stirring every now and then. Season with salt and pepper. Cool to room temperature.
  4. Transfer the chard to a bowl, add Californian Ricotta, ½ the Parmesan cheese, egg, and nutmeg. Stir and taste for seasoning.
  5. Preheat the oven to 350ºF.
  6. Boil the pasta for about 4 minutes, or until al dente. You should be able to roll it in the shape of cannelloni without it breaking.
  7. Put on a flat surface, and place about 2 tablespoons of filling along one of the shorter edges. Roll in the shape of a tube, and place in an oiled pyrex or baking pan. (If using cannelloni pasta, just fill them in).
  8. Put the cannelloni next to one another covering the whole baking dish. Cover the cannelloni with tomato sauce, then with Parmesan cheese.
  9. Bake until the cheese is bubbling and light brown in some spots. Take the pan out of the oven and rest for 10 minutes.
  10. Serve immediately.

Chocolate macaroons with lucuma mousse and custard

$
0
0

chocolate macaroons

As you can see, this week we’re in a retro mood, revisiting old posts and recipes. These beautiful (oh yes, and they are delicious too!) chocolate macaroons with a Peruvian twist were published as part of our Thanksgiving menu almost two years ago, but they are so striking that we think they deserve a post of their own.

The recipe was given to us by Jean Paul Desmaisson, owner and chef of the raved about upscale restaurant La Cofradía, in Lima, which unfortunately doesn’t exist anymore. This fusion dessert is his creation, and I´m sure you are going to love it as much as we do.

When making it, make sure you have all the components ready before you start. The vanilla custard can be made up to a day in advance, so it can be cold when you serve it. Buy lucuma powder in health food stores or large grocery stores. If you already have it, this is the perfect opportunity to use it. Make sure you don’t undermine the whole process by using a mediocre chocolate ice cream. Choose one with an intense flavor, and the best quality ingredients you can find.

If you are looking for a great dessert to prepare for Father’s Day, this is a no brainer. Go get everything you need and surprise your father or husband with a stunning sweet.

Chocolate macaroons with lucuma mousse and custard
Author: 
Recipe type: Dessert
Prep time: 
Cook time: 
Total time: 
Serves: 6
 
Ingredients
  • Macaroons:
  • 3 oz powdered sugar
  • 8 oz cocoa
  • 3 oz almond flour
  • 2 egg whites
  • ½ tablespoon sugar
  • Lucuma mousse:
  • 2 tablespoons lucuma powder
  • 1 cup condensed milk
  • ½ teaspoon powdered, unflavored gelatin
  • 1 cup heavy cream, very cold
  • Vanilla custard:
  • 1/ 2 cup milk
  • 2 egg yolks
  • 2 tablespoons sugar
  • 1 teaspoon vanilla extract
Instructions
  1. Macaroons:
  2. Sift the dry ingredientes, except the ½ tablespoon sugar.
  3. Heat the oven to 250ºF.
  4. Beat egg whites with ½ tablespoon sugar at high speed until it forms stiff peaks. Make sure the bowl is completely clean and dry, with no traces of fat or egg yolk because the whites won´t grow the way they should.
  5. Fold the dry ingredients into the egg whites with a spatula. Pour in a piping bag and form small circles (2 inches, aprox.) in a baking sheet with parchment paper or silpat.
  6. Bake for 15 minutes.
  7. Lucuma mousse:
  8. Mix the gelatin with 1 tablespoon water in advance. Reserve. Before using, melt over very low heat.
  9. Combine lucuma powder with condensed milk.
  10. Whip the heavy cream at high speed until it is very thick, and add the melted gelatin.
  11. Combine with the lucuma mixture and refrigerate for at least 3 hours.
  12. Vanilla custard:
  13. With a wire whisk, beat the egg yolks until thick and pale. Add vanilla essence.
  14. Meanwhile, boil the milk. Turn off the heat and add in a thin stream to the egg yolks, beating all the time.
  15. Put back in the saucepan and cook over very low heat, stirring constantly until it begins to look thick.
  16. Take off the heat, strain and let cool.
  17. To serve:
  18. Put 2 macaroon halfs on each plate. Add 2 tablespoons lucuma mousse over them, and top with another macaroon half, like a sandwich.
  19. Add a scoop of chocolate ice cream, and drizzle with vanilla custard.

Shrimp Escabeche with Causa – Two favorites in one dish

$
0
0

Shrimp escabeche

Originally made with a humble fish called bonito, escabeche is a classic appetizer served cold. A fried fish fillet is covered with a very tasty sauce made with aji panca, which imparts its fantastic red color, earthy flavor, and heat to this dish.

Shrimp escabeche

The assertive flavor of red wine vinegar is an important component of this recipe. However, I´m sure that back in colonial times, the poor origins of this dish didn´t allow cooks to use fine wine vinegars, so don´t feel that you need the best vinegar in the store to make a good escabeche. Use any vinegar you have in the pantry, but keep in mind that the red one will intensify the color a little bit. I don´t recommend the use of fine balsamic because that will give a very different a result (unless that’s what you’re looking for!).

Shrimp escabeche

Shrimp escabeche

The cold appetizer I have prepared today is the fusion of two of my favorite dishes. Causa joins forces with and original shrimp escabeche in this recipe, creating a flanboyant meal that I promise tastes as good as it looks.
Causa

Shrimp escabeche

Shrimp Escabeche with Causa
Author: 
Recipe type: Appetizer
Prep time: 
Cook time: 
Total time: 
Serves: 6
 
Ingredients
  • 1 pound shrimp, peeled and cleaned
  • Salt and pepper
  • ½ cup olive oil
  • 2 small red onions, cut in thick slices cebollas rojas
  • 2 garlic cloves, chopped
  • 2 fresh aji amarillo, finely sliced
  • ¼ teaspoon ground cumin
  • ½ teaspoon dried oregano leaves
  • 1 bay leaf
  • 1 tablespoon aji panca paste
  • 9 tablespoons red wine vinegar
  • 4 black olives, sliced
  • 2 hard-boiled eggs, cut in fourths
  • 2 tablespoons aji amarillo, finely diced
  • Parsley leaves
  • 1 batch causa
Instructions
  1. Have ready a batch of causa.
  2. Season the shrimp with salt and pepper. Heat half the olive oil in a skillet and add the shrimp. Cook for 2-3 minutes or until they are a nice pink color. Transfer to a plate. Reserve.
  3. Put water in a small saucepan and bring to a boil. Add the onion slices and blanch for 3-4 minutes. Drain and reserve. The onion should remain crunchy.
  4. Heat the remaining olive oil in a skillet, add garlic, aji amarillo slices, blanched onion, bay leaf, and aji panca. Stir for 2 minutes and season with salt and pepper.
  5. Pour the red wine vinegar and boil until slightly reduced, about 3-4 minutes. Add the reserved shrimp, stir, taste for seasoning and turn off the heat. Cool to room temperature.
  6. Serve escabeche over causa, garnishing with olive slices, hard-boiled eggs, diced aji amarillo, and parsley leaves.
  7. Serve at room temperature.

Exotic Cherimoya and Raspberry Napoleon

$
0
0

cherimoya and raspberry napoleon

When I want to impress my friends with a stunning dessert that I can make in advance for the most part, this is one of my favorites. I can have the phyllo dough cookies, the créme brûlèe, and the raspberry coulis ready beforehand, and it looks so sophisticated that everyone thinks I´ve been working for hours to make it. This beauty always gets big ohhhs and ahhhs whenever I make it, so it’s the perfect dessert for a dinner party with lots of friends, or for an intimate and romantic dinner for two.

The original recipe was given to me by Coque Ossio, a very talented Peruvian chef, who was my instructor at culinary school. I´ve changed it a little bit and love the result, and I urge you to make all the changes you want because this recipe is very flexible. For example, if you don´t want to make the créme brûlèe, substitute it with whipped cream or vanilla pudding. No cherimoyas in the grocery store? Use lychees or peaches, which are in season. Be creative and have fun.

Happy weekend!

Cherimoya and Raspberry Napoleon
Author: 
Recipe type: Dessert
Prep time: 
Cook time: 
Total time: 
Serves: 8-10
 
Ingredients
  • Phyllo cookies:
  • 3 oz grated dried coconut
  • 2 tablespoons light brown sugar
  • 15 sheets phyllo dough
  • ½ cup butter, melted
  • Créme Brûlèe:
  • 4 cups heavy cream
  • 10 egg yolks
  • 1 cup sugar
  • 1 teaspoon vanilla extract
  • Garnish:
  • 1 cup cherimoya, peeled and seeded
  • 1 cup raspberries
  • 2 sprigs mint leaves
  • 1 lt. coconut sorbet
  • 1 cup raspberry coulis**
Instructions
  1. Preheat the oven to 400ºF.
  2. Lay one sheet of phyllo dough on a clean surface.
  3. Brush with melted butter. Sprinkle with a little sugar and a little grated coconut.
  4. Cover with another phyllo dough sheet, and repeat three times. Cut in triangles or squares, about 3 inches long.
  5. Place on a greased baking sheet (or covered with Silpat).
  6. Bake for 5 minutes or until lightly golden. Cool on racks.
  7. If made in advance, store in a tightly sealed container until ready to use.
  8. Créme Brûlée:
  9. Preheat the oven to 380ºF.
  10. Put the cream in a medium saucepan and bring to a boil.
  11. Meanwhile beat the egg yolks with the sugar until pale. Add the boiling cream, stirring all the time. Discard the foam.
  12. Pour in 8 ramekins and bake for 30 minutes. Cool.
  13. This can be made one day in advance. Keep refrigerated.
  14. To assemble:
  15. On dessert plates, put 1 tablespoon créme brûlèe, a phyllo cookie on top, another tablespoon créme brûlèe, bits of cherimoya, and some raspberries.
  16. Repeat the layers and finish with créme brûlèe and cherimoya.
  17. Place a scoop of sorbet at the side (optional), and garnish with mint leaves and some raspberry coulis (optional).
  18. **Raspberry coulis
  19. In the vase of a blender process 2 cups raspberries with 2-3 tablespoons sugar and the juice of ½ lemon. Strain and keep refrigerated until ready to use.

It’s National Cebiche Day – These are our favorites

$
0
0

Cebiche

Whenever someone starts a conversation about Peruvian food, the word cebiche is always one of the first to be mentioned. This simple, yet sophisticated-looking preparation of raw fish marinated in lime juice, with the vibrant heat of aji limo, rocoto, or ají amarillo, the sweet contrast of sweet potato, and the crunch of our delicious giant corn, is nowadays enjoyed and loved way beyond Peru´s borders.

In the two years that we’ve been writing this blog, we have posted a few cebiche recipes, or talked about chefs whose expertise is in cebiche making. Classic cebiche, and vegetarian cebiche, have been some of our most popular posts. I don´t think we need a special day to celebrate cebiche, because every single day of the year is a good day to have this light and refreshing dish for lunch. But we nevertheless wanted to join the fun of this National Cebiche Day, and for that we have created a colorful gallery with some of our favorite pictures of this famous dish.

Cebiches

Classic cebiche. / Cebiche mixto @ Chez Wong.

Cebiches

Catch of the day cebiche @ La Picanteria. /  Scallop cebiche @ Sonia.


Cebiche. La Mar NYC

Seafood cebiche @ La Mar NY.

Cebiches

Cebiche dos tiempos from The Everything Peruvian Cookbook. / Tangerine, ginger cebiche @ Ache

Cebiches

Degustación de cinco cebiches. La Mar. Lima

Cebiche Mixto @ Altamar. / Hot Cebiche @ Ache. / Tasting of 5 cebiches @ La Mar Lima.

Sushisamba. Sashimi Seviche Assortment

Sashimi cebiche assortment @ Sushisamba.

cebiches

Mushroom cebiche & Classic Cebiche.

Add some cancha, chifles, beer or Pisco Sour, and let´s celebrate!!!!

ají limo

Onion and limes

ají and corn

Seabass with vegetables – Add more fish to your diet

$
0
0

Seabass with vegetables

Seabass is one of my favorite fish because of its white, succulent meat. It’s also very easy to cook, and you can make cold and hot dishes with it in just a few minutes. In Peru we Love (with a capital L) eating fish and seafood whenever, and however we can, and this recipe has been part of my diet for many years. To keep it fresh, I sometimes change the vegetables according to the season, but this is my favorite combination, and I bet you will like it too.

Garlic rice

Before I tell you more about this recipe, a few words about the white fluffy rice that accompanies it. In Peru, rice is the side of choice for almost everything, from meats to beans, to quinoa, to potatoes. Some people take this tradition to the extreme, serving rice next to lasagna or other pasta dishes. As a rule, at least every protein has a side of rice -and/or potatoes- in Peruvian kitchens.

But if you’re thinking this is a bland, ordinary rice, it means you’ve never been to our country. This “basic” white rice is very flavorful, cooked with oil, garlic, and salt. The garlic we use is fresh from the market, peeled and chopped -or mashed- at the moment, and I can tell you, it imparts a wonderful flavor to any dish. Maybe this garlic is the reason we love rice so much. In addition to the tasty seasoning, feel free to add corn, chopped carrots or peas -all of them very typical too.

Artichoke hearts

Going back to the fish, artichokes are a wonderful vegetable to cook it with. In Peru,  fresh artichokes are common in every market and grocery store, and you can buy them whole or peeled (just the hearts). The hearts should be kept in a bowl of acidulated water (this means water with a little lemon juice) to keep them from darkening. Cook them in boiling, salted water, with a celery rib, a bay leaf, salt and pepper. Then slice them, and they are ready for this or any other dish. You can also add them to salads with a nice lemony dressing. If you have a steamer, this is a great opportunity to use it too.

mushrooms and bell peppers

Mushrooms and red bell peppers are 2 other tasty and colorful additions to this simple and healthy entree. Feel free to use whichever vegetable you have in the fridge, like asparagus, zucchini, corn, chayotes… it’s your choice. Use this basic recipe, and then make as many changes as you wish.

And for the fish: always remember to use the freshest in the market. Otherwise the result won´t be as spectacular as it could potentially be.

Seabass

Seabass with vegetables
Author: 
Recipe type: Entree
Prep time: 
Cook time: 
Total time: 
Serves: 4
 
Ingredients
  • For the Peruvian rice:
  • 2 tablespoons vegetable oil
  • 3 garlic cloves, finely chopped
  • 2 cups white rice
  • Salt
  • 3½ cups boiling water
  • For the fish:
  • 4 seabass fillets
  • Salt and pepper
  • ⅓ cup olive oil
  • 3 garlic cloves
  • 1 teaspoon aji amarillo (optional)
  • 1 red bell pepper, sliced
  • 1 lb mushrooms, cut in fourths
  • 6 artichoke hearts, cooked and sliced
  • ½ cup snow peas, finely sliced
  • ½ cup white wine
  • ⅓ cup butter
  • Garnish:
  • 1 cup broccoli florets, cooked
Instructions
  1. Heat the vegetable oil and the garlic in a saucepan over medium heat. Stir to avoid the garlic from burning or from scorching at the bottom of the pan.
  2. When the garlic is very fragrant, add the rice, salt, and water. Stir.
  3. Put the lid on, turn the heat to very low, and cook undisturbed for 25 minutes.
  4. In the meantime make the fish:
  5. Season the fillets with salt and pepper. Have the vegetables ready.
  6. Heat the oil in a skillet over medium heat and fry the fish, turning once. Cook for about 6 minutes per side, depending on the thickness of the fillets.
  7. Transfer to a plate and keep covered.
  8. In the same skillet cook the garlic until fragrant. Add aji amarillo, red bell pepper and the mushrooms, and sauté until tender.
  9. Finally add the artichoke hearts, and the snow peas. Add the wine, let it boil and reduce about ⅓. Finally add the butter, stirring until melted and well incorporated. Taste for seasoning.
  10. Serve the fish fillets in four plates. Cover with the vegetable sauce, and serve the rice on the side. Garnish with broccoli florets.


Strawberry mousse – Easy seasonal dessert

$
0
0

Strawberry mousse

I´m sure there is no country in the world where fruit desserts are not popular. Mousses, bavarois, tarts, pies, ice creams… the list is endless, and each item in it just gets better and better. Today I was in doubt whether I wanted to make a savory dish or a dessert to share with all of you, but on a quick visit to the grocery store I spotted some plump and beautiful strawberries. They are in season and oh-so-tempting, so I quickly made up my mind, and dessert it is!Strawberry mousse

I thought of making this simple and delicious strawberry mousse recipe because it´s perfect for the summer: there is no need to turn the oven on! It can be made in advance, -the day before serving it-, which is very convenient if you have guests or want to be outdoors enjoying the nice weather instead of slaving away in the kitchen. And did I mention I’m addicted to strawberries with whipped cream or condensed milk? This is something I learned to eat in Peru (there were no strawberries in Nicaragua when I was growing up), and this dessert reminds me of this marvelous sweet treat.

This recipe also reminds me of the “gelatina batida” (whipped gelatine) that I used to make for my kids when they were little. They loved to eat it straight out of the fridge, as a refreshing summer dessert, or took it to school in their lunchboxes. In Peru we love making all kinds of puddings with gelatine, with condensed milk, and with fruits. The options are endless. Take for example two of the easiest and most satisfying desserts I know: frozen lucuma mousse, and passion fruit mousse.
Strawberry mousse

This mousse couldn´t be easier to make. Just process the strawberries in a blender with the condensed milk, add the orange juice, the dissolved gelatin, a light meringue made with three egg whites, and pour everything into an oiled baking pan if you plan on unmolding the mousse and serving it like a cake. Otherwise, a pretty container, or a few ramekins or glasses for individual portions will be all you need.

Strawberry mousse

I like to serve whipped cream over this mousse, but I prefer to make my own whipped cream instead of buying the packaged stuff (I’m Latin, we cook from scratch). For me, this small detail makes all the difference, but if you are more convenience oriented, feel free to use either one, or you can even serve this dessert with Greek yogurt to add a tangy note that will complement the strawberry flavor. A crispy cookie or a few mint leaves will add a lovely final touch. And you are ready to enjoy!

Strawberry mousse

Strawberry mousse
Author: 
Recipe type: Dessert
Prep time: 
Total time: 
Serves: 8
 
Ingredients
  • 2 lb. strawberries
  • 1 14oz. can condensed milk
  • Juice of ½ lime or lemon
  • 1 cup orange juice
  • 2 tablespoons unflavored gelatin
  • 3 egg whites
  • ⅓ cup sugar
  • Whipped cream
Instructions
  1. Wash the strawberries and reserve some of them to use as a garnish.
  2. Process the rest in a blender with the condensed milk and lime juice.
  3. In the meantime, bloom the gelatin in the orange juice. When fully hydrated place in a small saucepan and heat over low heat, stirring until the gelatin dissolves. Cool at room temperature and add to the strawberry mixture.
  4. Beat the egg whites in the mixer until foamy. Add the sugar, a tablespoon at a time, and when firm fold this meringue into the strawberry mixture.
  5. Pour into nice glasses or a lightly oiled baking pan, and refrigerate until set, (about 4 – 6 hours or overnight).
  6. To serve: unmold if using a baking pan, add a dollop of whipped cream, and garnish with strawberries.
  7. Note: You may want to add some mint leaves next to the strawberries.

Our New eBook is out! – Delightful Quinoa Recipes

$
0
0

Delightful Quinoa RecipesHello hello, we have great and exciting news today!

Our new recipe eBook, Delightful Quinoa Recipes, is out! After several months of working hard to put together the best of our Quinoa repertoire into one book, this baby is finally ready to be delivered. And just for this week, get a 25% discount (only $4.49) when you buy it, for spreading the Quinoa love!Quinoa Empanadas & Easy Quinoa and Nutella Pudding

If you already are a regular Quinoa eater, you probably know what the international buzz about this super food is all about, and why 2013 has been named the “Year of Quinoa” by the United Nations. People are going crazy for its delicious, mild taste, its amazing versatility in the kitchen, and its mega powerful nutritional properties that have kept Peruvians strong and rugged since the times of the Incas.

If, on the other hand, you are one of the few people who still haven’t had the pleasure of eating and cooking this wonder seed, fret not! In Delightful Quinoa Recipes you will learn new and exciting ways to incorporate this rock star ingredient into your summer meals.Quinoa Pancakes & Quinoa Tagine

Some of the mouth-watering recipes you will find in our eBook include:

*Chicken-Quinoa Nuggets

* Quinoa, Apple & Almond Pancakes

* Quinoa-Stuffed Portobellos with Balsamic Carrots

* Quinoa Gnocchi with Cherry Tomatoes & Herbs

And many more!

So what are you waiting for? Get your copy of Delightful Quinoa Recipes with a 25 % discount NOW, and be one of the first to enjoy these tried and tested recipes at home!

*Still not sure what cooking with quinoa is all about? Get a sneak peak of one of our Quinoa recipes in this short video, and then go get your copy of Delightful Quinoa Recipes and join the growing number of Quinoa lovers around the world.

Provecho, and may you become happier and healthier eating Quinoa!

Click  HERE to buy our eBook.

Video by www.brightleafpictures.net


#MeatlessMondays – Vegetable Quinoa Flan

$
0
0

Vegetable flan

Our love for flan or crema volteada is such, that we are always imagining not only sweet but also savory versions of this lovely concoction. There is a huge variety of flans served all around Lima, -from vegetarian versions made with spinach, broccoli, white or green asparagus, and green peas, to fish or shrimp flan.

Vegetable flan

This flan is very easy to make and you can even use frozen vegetables, although I´m a huge advocate of using fresh veggies when possible, and always cooking from scratch. I´m also aware of the convenience of frozen produce, however, so take advantage of fresh or frozen to make this delicious vegetarian flan for your family.

Vegetable flan

My daughter-in-law, our lovely contributor Antonella Delfino, is a great cook and loves to make a wonderful vegetable soufflé for dinner, that is similar to this recipe. She shared that dish with us a while ago, which brought back to my mind memories of all the luscious savory flans I used to make at home in Lima, and inspired me to make this one today.

Because I love quinoa and have been working on a lot of recipes and new creative ways to use this superfood, I added it to the dish too. And if you want to see how else you can use this versatile and nutritious seed in your daily meals, and get some fun and delicious bonuses, don’t forget to check out our new eBook: Delightful Quinoa Recipes, and let us know what you think!

Vegetable and quinoa flan

Vegetable flan

Vegetable Quinoa Flan
Author: 
Recipe type: Entree
Prep time: 
Cook time: 
Total time: 
Serves: 6-8
 
Ingredients
  • 2½ cups cooked vegetables, diced (corn, carrot, red bell pepper, asparagus, broccoli, green beans, etc.)
  • 1 cup cooked quinoa
  • 5 eggs
  • 1½ cup Half & Half or unsweetened evaporated milk
  • ½ cup Parmesan cheese, grated
  • 1 tablespoon butter, melted
  • Salt and pepper
  • ¼ teaspoon nutmeg, grated
  • 2 cups Bechamel sauce**
  • Chopped parsley to garnish
Instructions
  1. Preheat the oven to 350ºF.
  2. In a bowl combine the vegetables, quinoa, eggs, Half & Half, Parmesan cheese, butter, salt, pepper, and nutmeg. Pour in an oiled pyrex or baking pan.
  3. Put this inside a larger roasting pan and fill with hot water up to 1 inch.
  4. Bake for 45 minutes or until set.
  5. Take off the oven and serve hot or warm with Bechamel sauce.
  6. ** To make Bechamel sauce melt 3 tablespoons butter in a saucepan. Add 3 tablespoons all-purpose flour, stirring until well incorporated. Add 2 cups hot milk, lower the heat and simmer until slightly thick. You may add 1 bay leaf to the sauce. Season with salt and white pepper.


Classic Papa a la Huancaína Revisited

$
0
0

Papa a la Huancaína

Very high in the Andes, the beautiful city of Huancayo is the flourishing commercial emporium of the region. It has fantastic food and is abundant in fresh produce, especially artichokes. Papa a la Huancai­na, (potatoes Huancayo style) are boiled yellow potatoes covered with an even yellower spicy and creamy cheese sauce, and accompanied by hard-boiled eggs and black olives. This easy recipe is so popular that you can find the Huancai­na sauce everywhere: as a dip for crudites, quail eggs, corn, or fried yucca, as a sauce for spaghetti or risotto (surprisingly good), over Causa Limeña (I love this one), with steak…you name it. If it was up to me, I would have it even for dessert.

Papa a la huancaína

Creamy or lumpy, depending if it´s made in the blender, or by hand with a fork or in a mortar, its texture and flavor charms either way. But modern cooks rely on the blender because it´s easy and they can have the sauce ready in a minute. The food processor is another good idea, but here instead of queso fresco try to use cottage cheese or cream cheese. If the sauce is too dense add more milk. When ready it should have the consistency of custard.

Papa a la huancaína

The sauce can also be made in the blink of an eye if you have aji­ amarillo paste at hand. Just process about a few tablespoons of it with all the other ingredients, y listo!

Papa a la huancaína

It is a fact that some cooks like the sauce extremely spicy and they make it with raw aji amarillo using the seeds and ribs but it can be overpowering and make it difficult to appreciate the sensations of this unpretentious and satisfying dish. Do I make it spicy? Of course! But I enjoy a nice kick that is not excessively hot.

Papa a la huancaína

Papa a la Huancaína

Papa a la Huancaína
Author: 
Recipe type: Appetizer
Prep time: 
Cook time: 
Total time: 
Serves: 4
 
Ingredients
  • 6 yellow potatoes, boiled and peeled
  • ½ cup aji amarillo paste
  • 2 tablespoons vegetable oil
  • 4 soda crackers
  • 8 oz. queso fresco (fresh white cheese)
  • 1 cup evaporated milk
  • Iceberg lettuce leaves
  • Black olives
  • 3 hard-boiled eggs, peeled and cut in slices
  • Salt
  • Parsley sprigs
Instructions
  1. Put the aji amarillo paste in the blender, add oil and milk and process with the crackers, queso fresco, and salt, until smooth.
  2. In four plates put afour lettuce leaves, some thick potato slices, and cover with a few tablespoons of the sauce.
  3. Garnish with black olives, hard boiled eggs and parsley.

Chaufa de Pescado (Stir-Fried Rice with Fish)

$
0
0

Fish chaufa

The last time I visited my brother in San Salvador we shared a delicious stir-fried rice made with fish, that he prepares at his Peruvian restaurant. It was so good and so easy to make that I want to share the recipe with all of you.

Chaufa. jpg 3

As you may know by now, Peruvians love the ubiquitous Arroz Chaufa, the famous stir-fried rice from Chinese descent which we adopted as ours many years ago. Addicted to its scrumptious simplicity –or complexity, depending on the mood- we make it at home with leftover rice, some cold meats, and any vegetable there is lingering in the fridge. Any cook can transform these simple ingredients into a tasty and colorful dish.

Chaufa

At home in Peru, there were always two versions of chaufa. One with meat, and another made with vegetables only for my vegetarian daughter. There are versions made with pork, with chicken, with seafood, with veggies, and others that only have rice, eggs, garlic, ginger, and soy sauce. The latter is pretty simple but equally flavorful, while the others offer an ample range of flavors to choose from, taking advantage of whatever you have in hand.

Here you have the basic recipe for fish chaufa. In some restaurants the fish is cut in strips, covered in tempura batter, deep fried, and then added to the rice. This gives the fish a wonderful crispy outer layer. You can also chose to keep it simple, using pieces of fried fish, and the result will be just as delicious. Provecho!

Fish Chaufa
Author: 
Recipe type: Entree
Prep time: 
Cook time: 
Total time: 
Serves: 3
 
Ingredients
  • 1 lb fish fillets, diced
  • 4 tablespoons soy sauce, divided
  • 4 tablespoons vegetable oil, divided
  • 2 eggs, lightly beaten
  • 2 garlic cloves, chopped
  • 2 teaspoons ginger, grated
  • ½ cup snow peas, sliced
  • 2 cups cold cooked white rice, without salt
  • ½ cup green peas, cooked
  • ½ cup soy sprouts
  • 1 teaspoon sesame oil
  • 2 scallions, white and green parts, sliced
  • 2 tablespoons toasted sesame seeds (optional)
Instructions
  1. Cut the fish fillet in bite size pieces and season with 1 tablespoon soy sauce. Heat a wok or pan over medium heat, and add 1 tablespoon oil and the eggs, to make a thin omelette. After a couple of minutes, turn the omelette and cook just a few seconds on the other side. Transfer to a cutting board and cut in small squares.
  2. In the same wok, heat the remaining oil and stir-fry the fish, stirring carefully until well cooked. Make a well in the center and add garlic, ginger and snow peas; incorporate the cold rice, and stir-fry until hot. Stir for a few minutes and add green peas and soy sprouts.
  3. Season with the remaining soy sauce and 1 teaspoon sesame oil. Turn off the heat and sprinkle with chopped scallions and sesame seeds. Serve immediately.

Suspiro Limeño, a sweet and poetic dessert

$
0
0

Suspiro

Also known as suspiro limeño (“sigh of Lima”), this luscious delight is up there on the list of sweetest desserts I´ve ever tried. In fact, it is so sweet that I always accompany it with a huge glass of water to cut down its intensity. It also goes well with tea, or even a small glass of Pisco (Peru´s national liquor made from distilled grapes.) But don´t get me wrong, I find this dessert exquisite and love to have it whenever I’m presented with it (in small portions, of course). If you give it a try, you won´t regret it. It´s quite an unforgettable treat for those with a sweet tooth!

Suspiro limeño

In her fabulous cookbook El Perú y sus Manjares, Un Crisol de Culturas, Jossie Sisson de De La Guerra narrates the story of this sweet indulgence, crediting the poet Jose Galvez with its peculiar name. Apparently, this artist was a romantic even when it came to the food he ate, comparing this pudding to the soft and sweet sigh of a limeña (girl from Lima).

Suspiro limeño

Suspiro limeño was probably inspired by manjarblanco, our version of the famous dulce de leche, which was at its peak of popularity during the Spanish colony. Its base of sweetened condensed milk, evaporated milk, and egg yolks, give a caramel colored cream as a result, which is culminated with Italian meringue perfumed with Port wine, and a sprinkle of ground cinnamon. It´s usually served in individual glasses, but can also be prepared in a larger container.

Supiro limeño

The number of recipes for suspiro is endless, but we’ve tried this one many times and love it. It´s much easier to make than it looks and the result is extremely pleasurable, especially when it comes to licking spatulas and bowls once you´re done with the preparation. But don’t get carried away by the fun; pastry making needs to be exact to assure the best results, so make sure you maintain a focused mind despite the sugar rush, and follow the steps thoroughly so you don´t come up with unexpected problems.

Suspiro Limeño
Author: 
Recipe type: Dessert
Prep time: 
Cook time: 
Total time: 
Serves: 4
 
Ingredients
  • 1 12-ounce can evaporated milk
  • 1 14-ounce can sweetened condensed milk
  • 3 eggs
  • 1 cup sugar
  • ¼ cup Port wine
  • 2 tablespoons water
  • Ground cinnamon
Instructions
  1. In a heavy saucepan cook the evaporated milk and the sweetened condensed milk over low heat, stirring constantly with a wooden spoon until the mixture thickens and turns a pretty caramel color, or until you can see the bottom of the saucepan when you scratch the spoon against it (about 30 – 40 minutes). Take off the heat.
  2. Separate the egg whites from the yolks, and use a wire beater to beat the egg yolks in a bowl. Add a couple of tablespoons of the hot milk mix and keep beating for a few seconds. Pour everything in the saucepan and mix carefully and reserve. This is what Peruvians call manjar blanco.
  3. In another saucepan mix the sugar, Port wine and water. Make it boil over high heat for 6 minutes without stirring. The syrup is ready when it forms a caramel thread when dropped from a spoon, (see picture).
  4. Meanwhile, beat the egg whites with an electric beater at high speed until soft peaks form (when you lift one of the beaters and it has a soft cloud of meringue foam around it). For the whites to grow perfectly, they must have no trace of yolk, and the bowl must be dry and clean, without any grease spots.
  5. Add the hot syrup in a thin and steady stream, beating vigorously until the resulting meringue is cold.
  6. Pour the cooked milk mixture (manjar blanco) in individual cups or a larger container, cover with meringue in a decorative fashion (easier if you use a piping bag, but you can do it with a regular bag with a hole cut in one corner, or with a spoon), and dust with ground cinnamon.
  7. Serve at room temperature or keep in the fridge. Both ways are delicious.

The easiest apple cake recipe I know

$
0
0

Apple Cake

There was a time when I loved to make complicated dishes and desserts. But then I realized that nothing could beat the beauty of simplicity, especially important when you are busy and want some cake to appear from out of nowhere and accompany your evening coffee… That is why I now adore this recipe. It´s so delicious and easy to make, that one can enjoy a mouth-watering dessert in an hour or so, with just about 15 minutes of preparation, and the rest of the work done by the oven.

Apple Cake

It may come as a surprise that apple desserts (pies, tarts, cakes, turnovers, etc.) are beloved by Peruvian bakers. Having a good apple recipe to share with family and friends is of the utmost significance, and this is mine!

Apple Cake

As you can see, there is nothing difficult about preparing this cake. I like to think of it as one of my daily fruit portions, because its main ingredient is apples (and that way I don´t feel guilty about it). Some berries can be added to the cake, such as blueberries, raspberries, blackberries or even cranberries. These fruits are not used in Peru, so there I would perhaps add mulberries instead. An all-apple cake is equally delightful, more so if using tart apples. In that case don´t add any lime juice to the fruit. I’ve just included it in the recipe because sometimes all I can find are sweet apples.Apple Cake

Apple Cake

Apple Cake

I serve this cake with vanilla ice cream or whipped cream. Do you want a bite?

Apple Cake

Apple cake with berries
Author: 
Recipe type: Dessert
Prep time: 
Cook time: 
Total time: 
Serves: 6
 
Ingredients
  • 6 apples
  • Grated zest of 1 lime or lemon
  • 1 teaspoon ground cinnamon
  • 1 tablespoon sugar
  • ½ cup blueberries
  • 1 cup light brown sugar
  • 1 cup cake flour
  • 3 eggs
  • 1 cup vegetable oil
  • 1 teaspoon vanilla
  • Whipped cream
  • Blueberries to decorate
Instructions
  1. Preheat the oven to 375ºF.
  2. Peel and core the apples. Cut them in thin slices, put them in a bowl and sprinkle with lime or lemon zest. Add cinnamon and 1 tablespoon sugar, and stir to combine.
  3. Put the apple slices in a greased 9 inch baking pan. Add some blueberries.
  4. In another bowl put brown sugar, flour, eggs, vegetable oil, and vanilla.
  5. Combine with a spatula or a wire whisk, and pour over the apples.
  6. Bake for 55 minutes or until golden.
  7. Serve warm or at room temperature with whipped cream, and blueberries.

Corn Cake – Deliciously Sweet

$
0
0

Corn Cake

As far as we know, the savory version of pastel de choclo has been a favorite in Peru since the XIX century, and ours is not the same as the famous one made by Chilean cooks. Just like in the US, there are hundreds of recipes of corn cake in Latin America, maybe because corn is such a staple in our diet and we are always figuring out different ways to enjoy it. In our kitchens we have every variety or corn cakes and corn pies with all kinds of fillings: beef, chicken, olives, cheese, etc.

Corn Cake

We love to have a slice of this cake as a sweet treat with coffee or tea. Here you have the recipe for the loveliest corn cake ever! The texture is wonderfully light and moist, with a tender crumb thanks to the cream cheese and butter. It has an intense corn flavor and the tiny amount of flour (can you believe it only has 2 tablespoons?) is enough to bind everything so the result is amazingly good and satisfying.

Corn Cake

Any type of white corn is good in this cake, and I have to confess that when I’m feeling lazy and don´t want to go to the supermarket, I just go to the freezer and grab a bag of frozen Peruvian corn that I buy in any Latin American grocery store; thaw the amount needed for the recipe and proceed as indicated. It really is delicious this way too, though fresh corn is ideal; the fresher the better. Yellow corn will produce a sweeter version of the cake, which is not bad at all, but I recommend you stick to white corn for authenticity´s sake.

Corn Cake

In some households they like to add raisins, cinnamon, or any other flavoring to the dough. I prefer a simpler style because I like the corn flavor to be the star of the cake. Remember, if you use older corn, the cake will be drier and somewhat tough. And never substitute corn with cornmeal or corn flour. Corn Cake

Once the cake is ready, you can leave it covered in the counter and it will keep fresh and moist up to a couple of days. Serve it with salted caramel or vanilla ice cream, fresh fruit on the side (this is up to you), or custard over or under the cake. If you are feeling indulgent, serve it as breakfast with guava jelly instead of the custard, and a slice of cheese. (This is not Peruvian, but I like it.)

Corn Cake

Here you have my own interpretation of Chef Flavio Solórzano´s master recipe. Follow the instructions carefully and you´ll be charmed with the magic simplicity of this cake.

Corn Cake
Author: 
Recipe type: Dessert
Prep time: 
Cook time: 
Total time: 
Serves: 6
 
Ingredients
  • 8 oz. fresh white corn (about 2 cups)
  • 8 oz. cream cheese (about 1 package)
  • 1 stick unsalted butter (about ½ cup)
  • ½ cup sugar
  • 2 egg whites
  • 3 egg yolks
  • 2 teaspoons baking powder
  • 2 tablespoons all-purpose flour
Instructions
  1. Have all the ingredients at room temperature. Line the bottom of a 9 inch round pan with parchment paper. Preheat the oven to 350ºF.
  2. Process the corn in the blender or food processor until very fine.
  3. Beat butter and sugar until creamy. Add egg yolks one by one, then the cream cheese, beating at high speed for 5 minutes.
  4. Add processed corn to the butter mixture, with the baking powder and flour.
  5. Meanwhile, beat the egg whites until soft peaks form and fold them very gently into the corn-butter mixture.
  6. Scrape the batter in the pan and bake for 45 minutes or until the cake is lightly golden and firm.
  7. Remove the cake from the oven and cool in a rack.

Add color to your meals with Peruvian purple rice

$
0
0

Purple Rice

This recipe has been in my notebook for many years. It was given to me -with this spectacular photo included- by Peruvian chef Jean Paul Desmaison, when he had a dreamy restaurant called La Cofradía, in Lima. Purple rice is not only beautiful but also delicious and very original. It was the perfect side dish for our braised lamb shanks, posted two years ago as our recommended entree for an out of the ordinary Thanksgiving dinner.

Purple Rice

The rice is purple because it is cooked in purple corn water (yes, the one used to make Chicha Morada and Mazamorra Morada, two of our favorite recipes of all time). Don´t be fooled by it´s color, because it´s actually very easy to make. All you need is to find dry purple corn in your closest Latin American grocery store (or online), add pineapple peels, quince, apples, cinnamon, cloves and allspice. Use the amount of liquid needed for the rice, add lime juice and sugar to the remaining corn water, to have a meal and a refreshing beverage all in one go.

Purple Rice

Serve this fabulous rice as a side for lamb shanks, asado, roast chicken, pork, shrimp, or fish, and surprise your family and friends with a new and delicious dish.

Purple Rice
Author: 
Recipe type: Side dish
Cuisine: Peruvian
Prep time: 
Cook time: 
Total time: 
Serves: 6
 
Ingredients
  • 1 lb Peruvian purple corn
  • ½ pineapple (use the peels only)
  • 1 quince, quartered
  • 2 apples, thickly sliced
  • 2 cinnamon sticks
  • 6 allspice berries
  • 6 cloves
  • 2 tablespoons vegetable oil
  • 2 garlic cloves
  • ½ leek, finely sliced
  • ½ cup red bell pepper, finely sliced
  • 2 cups white rice
  • Salt and pepper
Instructions
  1. In a heavy saucepan over medium heat, simmer the corn with pineapple peels, quince, apple, cinnamon, allspice, and cloves, for about 45 minutes.
  2. Turn off the heat, strain the water and discard the solids. The water should have a deep purple color.
  3. To make the rice, heat the vegetable oil in a saucepan. Add the garlic and sauté until lightly golden. Add the leek and bell pepper, and stir for 3 minutes.
  4. Add the rice, season with salt and pepper, and add 3 cups of hot purple corn water.
  5. Bring to a boil, put the lid on, turn the heat to very low, and cook undisturbed for about 25 minutes.
  6. Stir once with a kitchen fork. Put the lid back on and turn off the heat.


Strawberry frappé to cool down in the summer

$
0
0

Strawberry Frappé

This is one of my family´s favorite drinks for the summer, so good that we included the recipe in our book The Everything Peruvian CookbookBig, plump, and juicy strawberries are frozen at their peak of ripeness and sweetness, then they are ready to be transformed into one of the most refreshing frappés in just a few minutes.  This can be done with other flavors too. If you store frozen fruit in the freezer, you will have frappés in the blink of an eye  any time you feel like having one.

Strawberry Frappé

Instead of strawberries you may use cherimoya, soursop, melon, watermelon, papaya, mango, raspberries, grapes, plums, pineapple, lucuma, or camu camu, to give you just a few examples. Use them alone or combined to make a delicious fruit juice blend. If there are no frozen fruits at home, add ice cubes and process. Using milk instead of water is another change we love. Strawberries and milk make a delicious frappé. Frozen bananas and milk? Yes, please. Papaya and milk? Yummy!

Strawberry Frappé
Author: 
Recipe type: Beverages
Prep time: 
Total time: 
Serves: 1
 
Ingredients
  • 1 ½ cups frozen strawberries
  • Juice of ½ lime
  • 1 tablespoon sugar, or to taste
  • 1 cup water
Instructions
  1. Process strawberries, lime juice, sugar, and 1 cup water in a blender. Serve immediately with straws.
Viewing all 144 articles
Browse latest View live